6-12 888-2408-002
WARNING: Disconnect primary power prior to servicing.
Troubleshooting
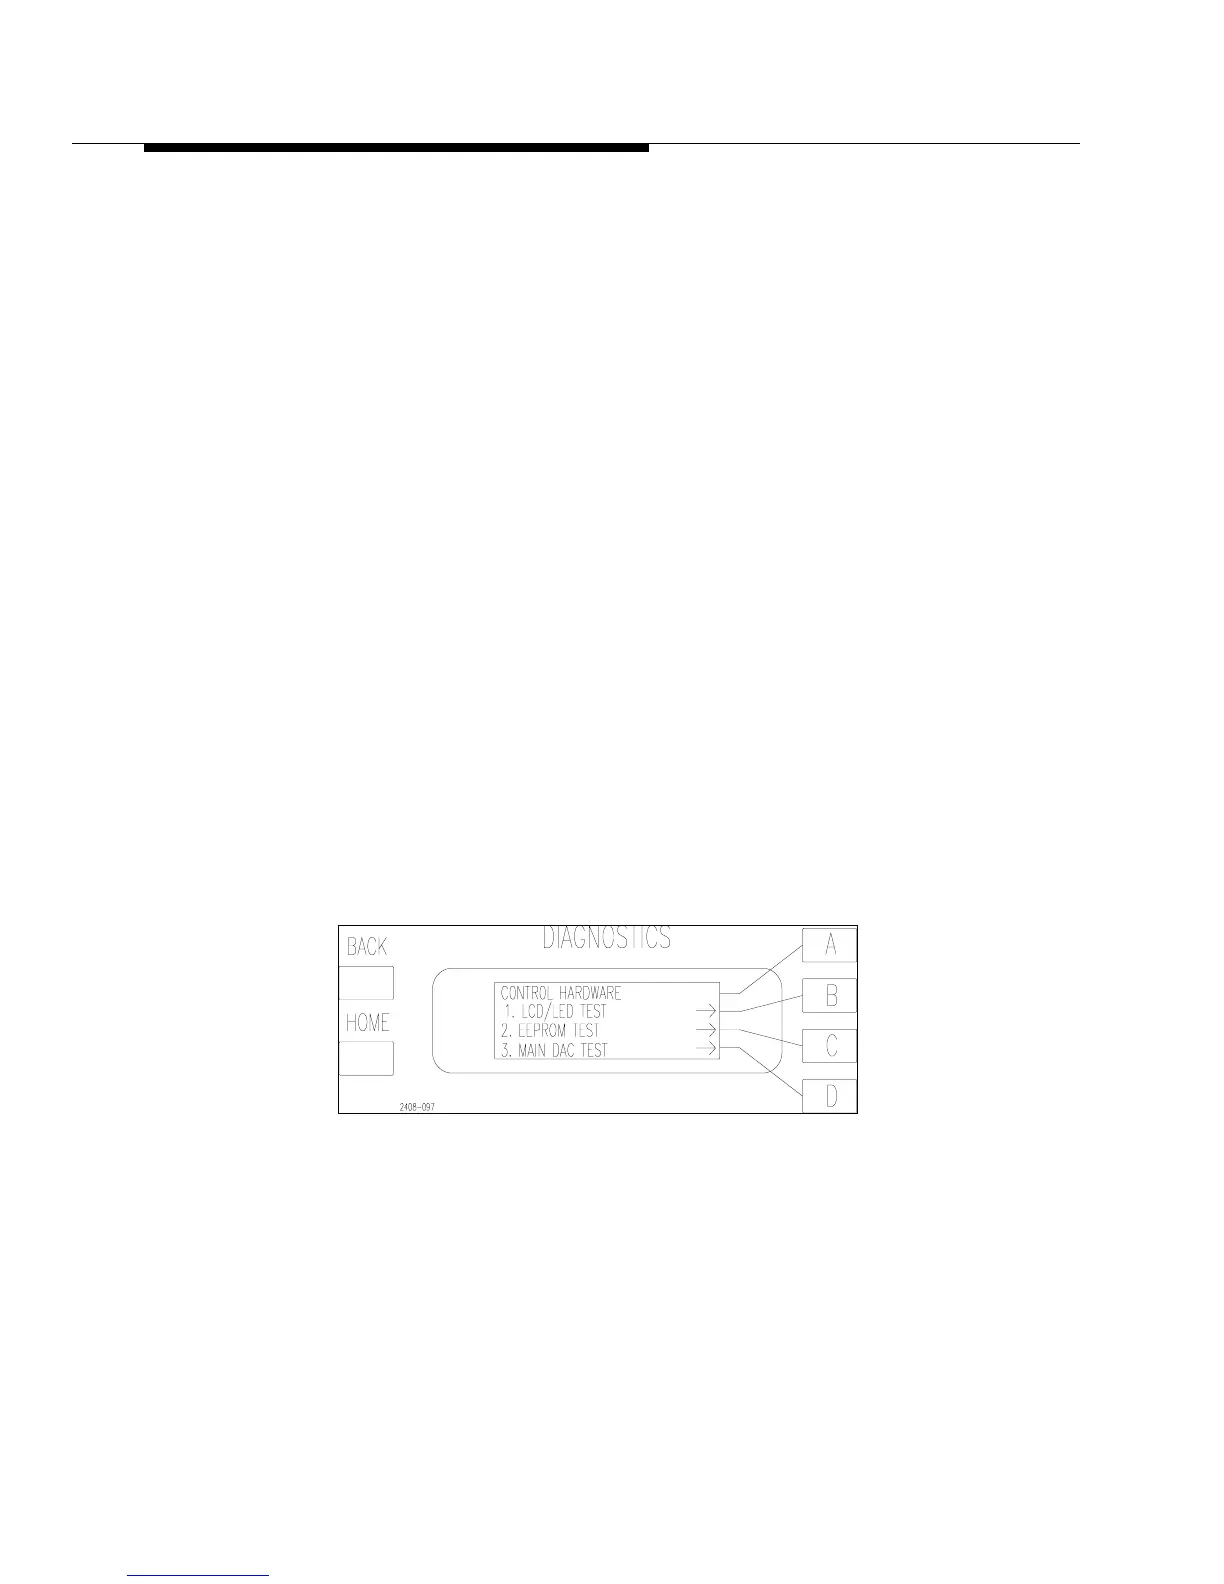
6.7.2 Hardware Test
The other option in Figure 6-4 is to test the hardware. Pressing [D] should bring up
the screen in Figure 6-6. This screen gives 3 more choices:
a. LCD/LED Test - This is a test of all of the LCD segments and LEDs on the
front panel to make sure the overlay indicators are operational. Pressing [B]
will active the test. Press [B] again to shut off the test.
b. EEPROM TEST - This will test EEPROM U39 on the Master Controller (the
only socketed IC on the board). This is where all of the user data and the Fac-
tory Default Settings are stored. This test should only be done if there is a
problem recalling the Factory Default Settings in the Diagnostics Display or
if the Master Controller needs to be replaced. If it fails the test, U39 will have
to be replaced and a complete “System Configuration and Calibration” will
have to be done per the procedure in Section V.
c. Main DAC Test - This test should only be done as a last resort in a case where
the system control appears erratic. To run the test requires an oscilloscope. It
is a test of the main Digital-To-Analog-Converter on the Master Controller
Board. To run the test shut the transmitter off and press [MORE, TEST, D,D].
The display will read “Main DAC test is running.” With the scope probe,
monitor TB1-36 on the Remote Control Terminal strip which is labelled
“SPARE OUT” or on the Master Controller Board at U9-14 or either side of
R47. There should be a 28Hz sinewave at about 4Vp-p. If the sinewave is
present the DAC is working. If not, the Master will have to be replaced per
the procedures in Section V. Pressing BACK shuts off the test.
Figure 6-6 Hardware Testing
 Loading...