Page 17 of 43
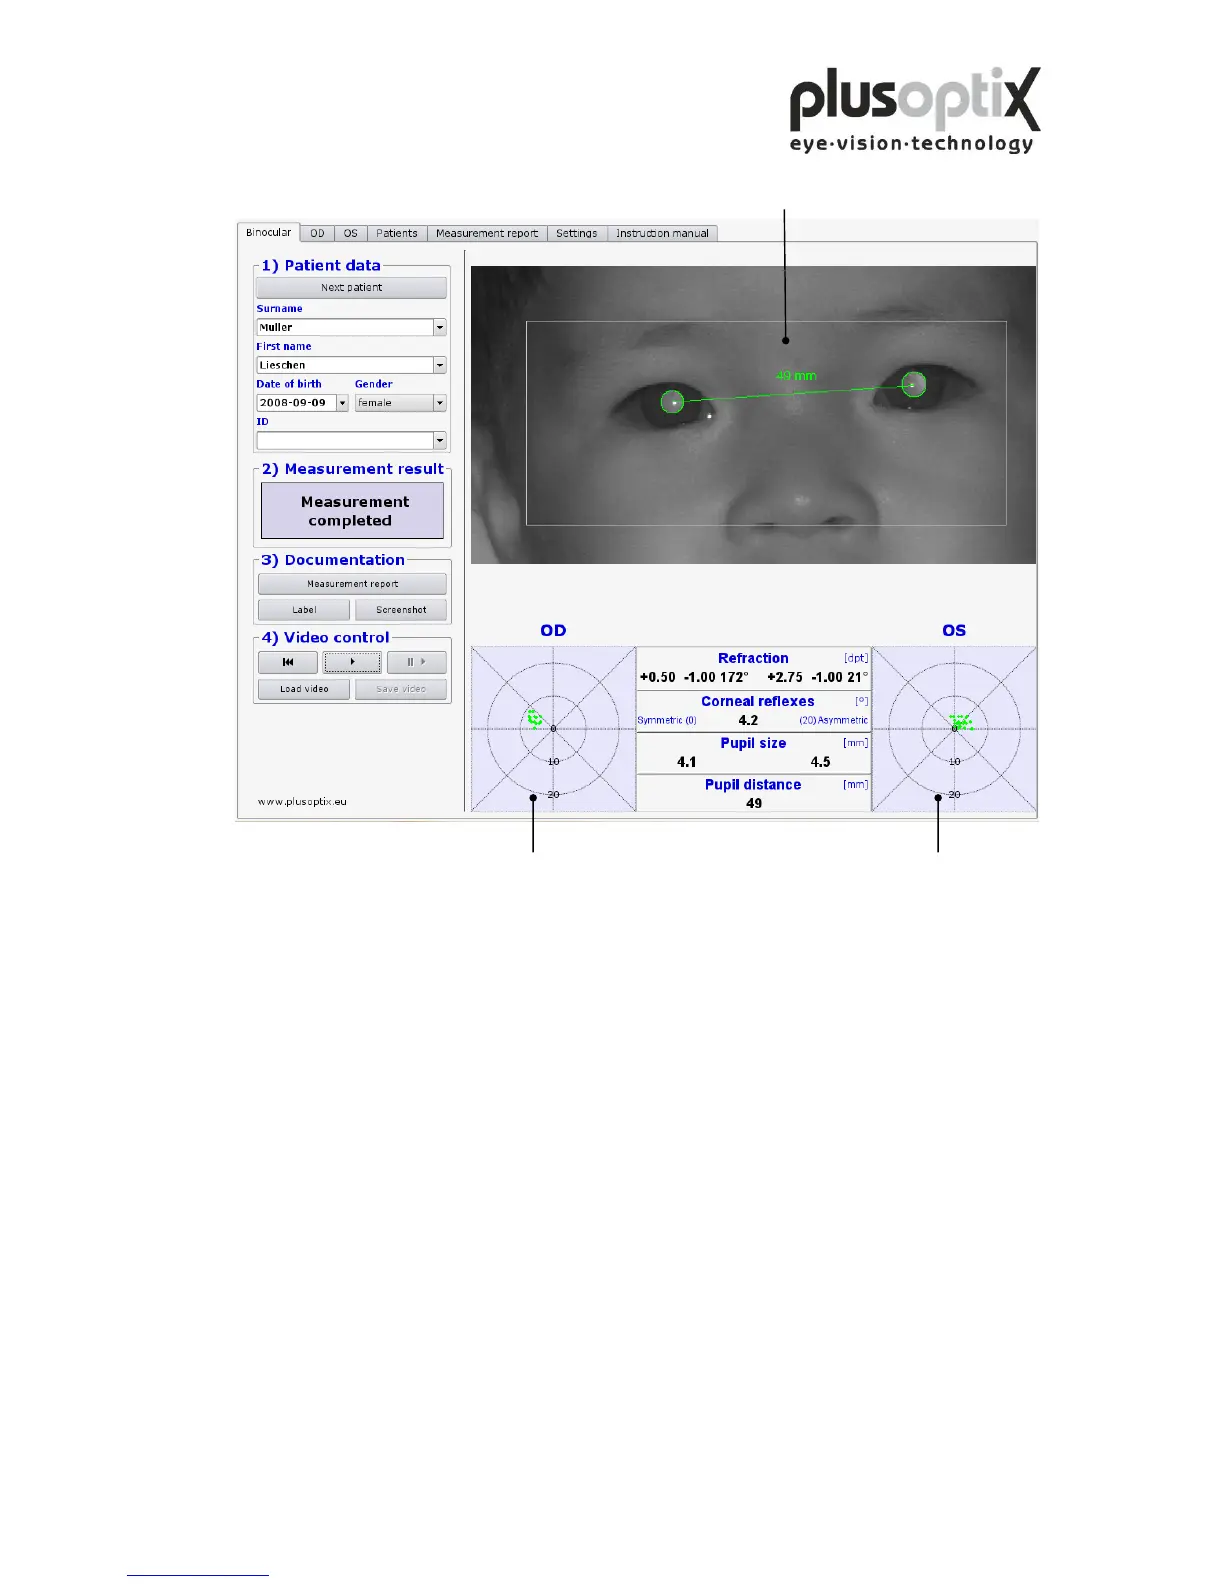
Step 3: Align the child’s eyes in the white box on the monitor.
Now move the camera slowly forwards until you can see green circles around both
pupils and you hear another warble sound. You are now 1 m from the child; the
measurement will start automatically. Do not change the distance after this point.
Within one second, a ping tone will signal the end of measurement. The measurement
values will be displayed between the gaze charts, and the measurement result
"measurement completed" appears at the left side of the screen.
Note: If the measurement result "Measurement aborted” appears, the following could be
the cause:
1. A white square around the pupil is a sign that the measurement distance of 1m ± 5cm
was not adhered to. Use a tape measure to check the distance to the child and then
start measurement again.
2. A red edge around the pupil is a sign that the pupil is too small. Reduce the light in
the room to allow the pupils to dilate and repeat the measurement.
3. If the plusoptiX A09 does not find the pupils within 20 seconds, the measurement
procedure is automatically terminated. The most common reasons for this are: