4.33
ELECTRONIC FUEL INJECTION
4
P
RELIMINARY
V
ERS
I
ON
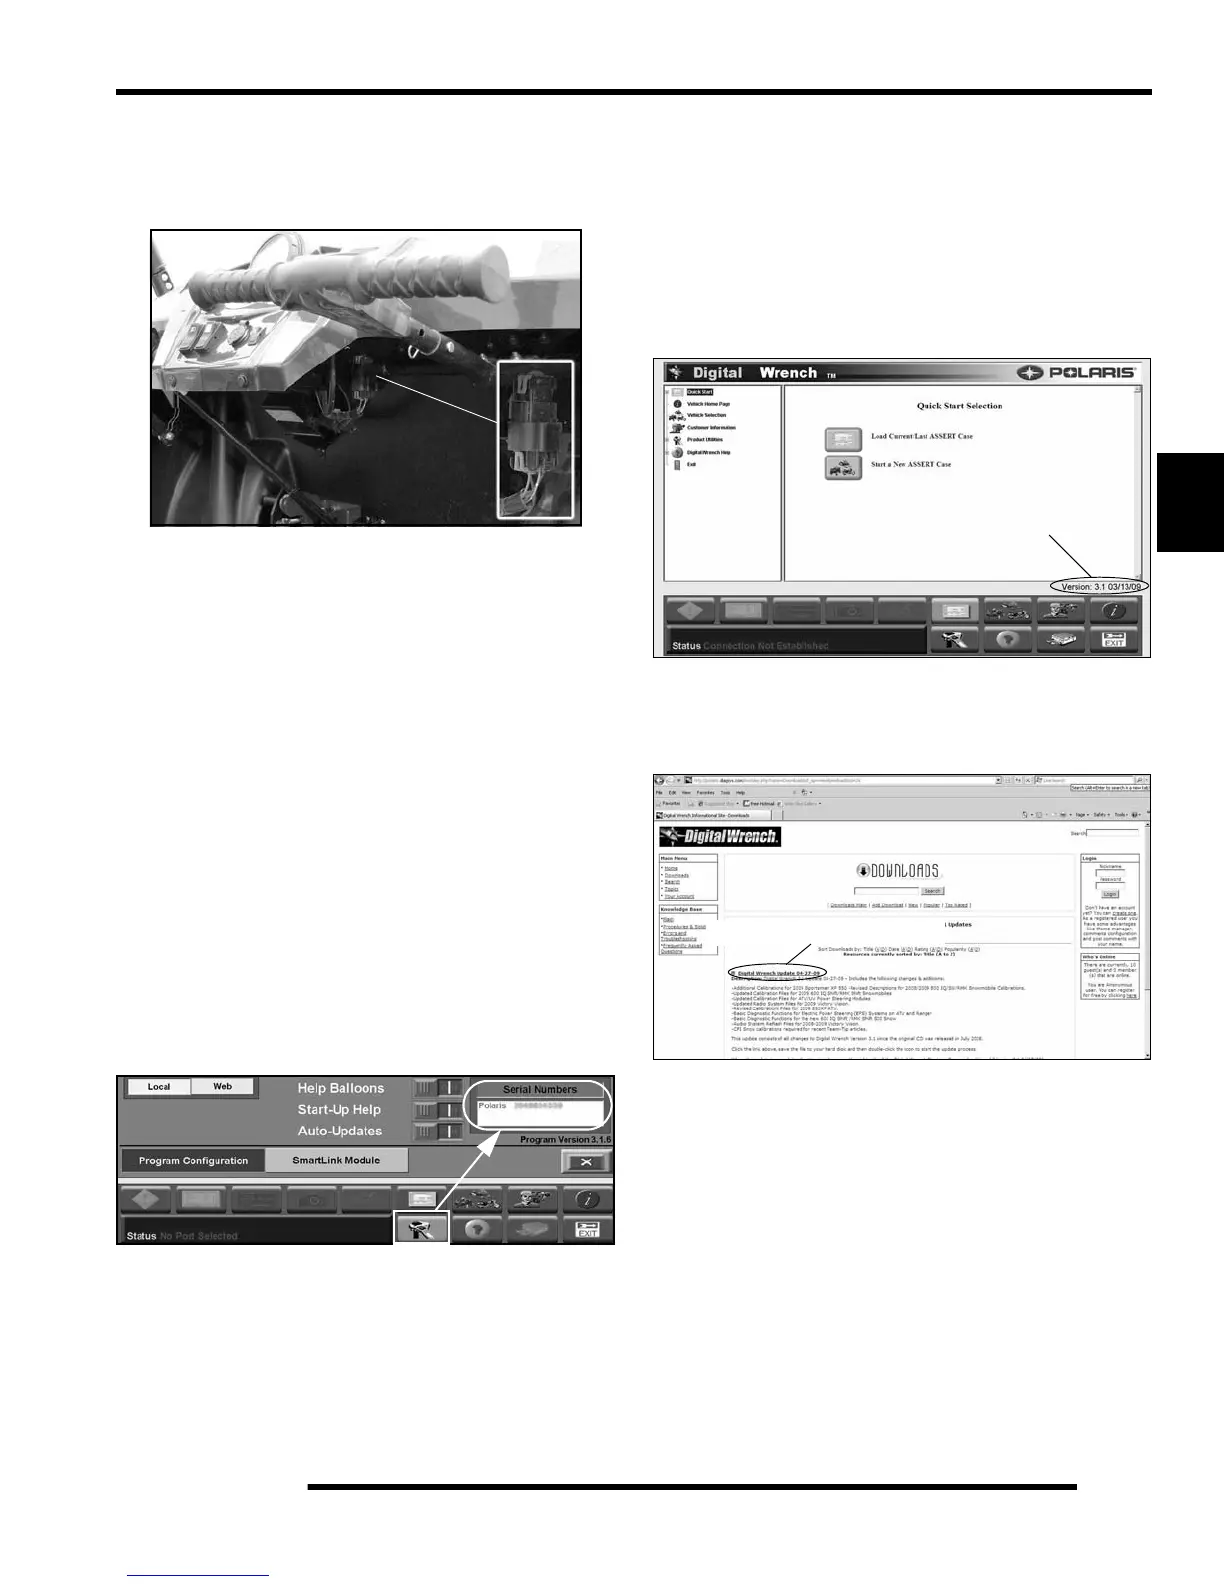
Digital Wrench™ - Diagnostic Connector
The diagnostic connector is located under the dash and is
accessible from the passenger side.
Follow these steps to connect the diagnostic interface cable to
the vehicle to allow Digital Wrench™ use:
1. Assemble the SmartLink Module and attach the PC
Interface Cable to your laptop (see page 4.3).
2. Remove the protective cap from the Digital Wrench™
connector.
3. Connect the Vehicle Interface Cable to the Digital
Wrench™ diagnostic connector.
4. Turn the ignition key to the ‘ON’ position, select the
appropriate vehicle and wait for the status to display
‘Connected’ in the lower left corner of the screen.
5. Once connected, proceed with using Digital Wrench™.
Digital Wrench™ Serial Number Location
Open the configuration screen by clicking on the wrench icon.
The serial number is located on the right side of the screen.
Digital Wrench™ Version and Update ID
Knowing what Digital Wrench™ version and update is installed
will help determine which updates are required.
NOTE: Versions and updates are subject to change.
1. Open the Digital Wrench™ software. Locate the version
ID shown on the lower right side of the Digital Wrench™
start-up screen.
2. In this case, the version number is 3.1 with a 03/13/09
update. Proceed to http://polaris.dia gsys.com to see if a
newer update is available.
3. In this case, a newer update (04-27-09) is available and
should be downloaded before using Digital Wrench™ (see
“Digital Wrench™ Updates”).
IMPORTANT: Always operate with the latest update.
Digital Wrench™ Updates
Updates are released for Digital Wrench™ via the Internet at:
http://polaris.diagsys.com. The Digital Wrench™ website can
also be accessed through the dealer website at:
www.polarisdealers.com.
NOTE: Only authorized Polaris dealers and
distributors can access the dealer website.
1. Log on to www.polarisdealers.com.
2. Locate the “Service and Warranty” drop-down menu.
Version: 3.1 03/13/09
Digital Wrench Update 04-27-09

 Loading...