6.27
CLUTCHING
6
P
RELIMINARY
V
ERS
I
ON
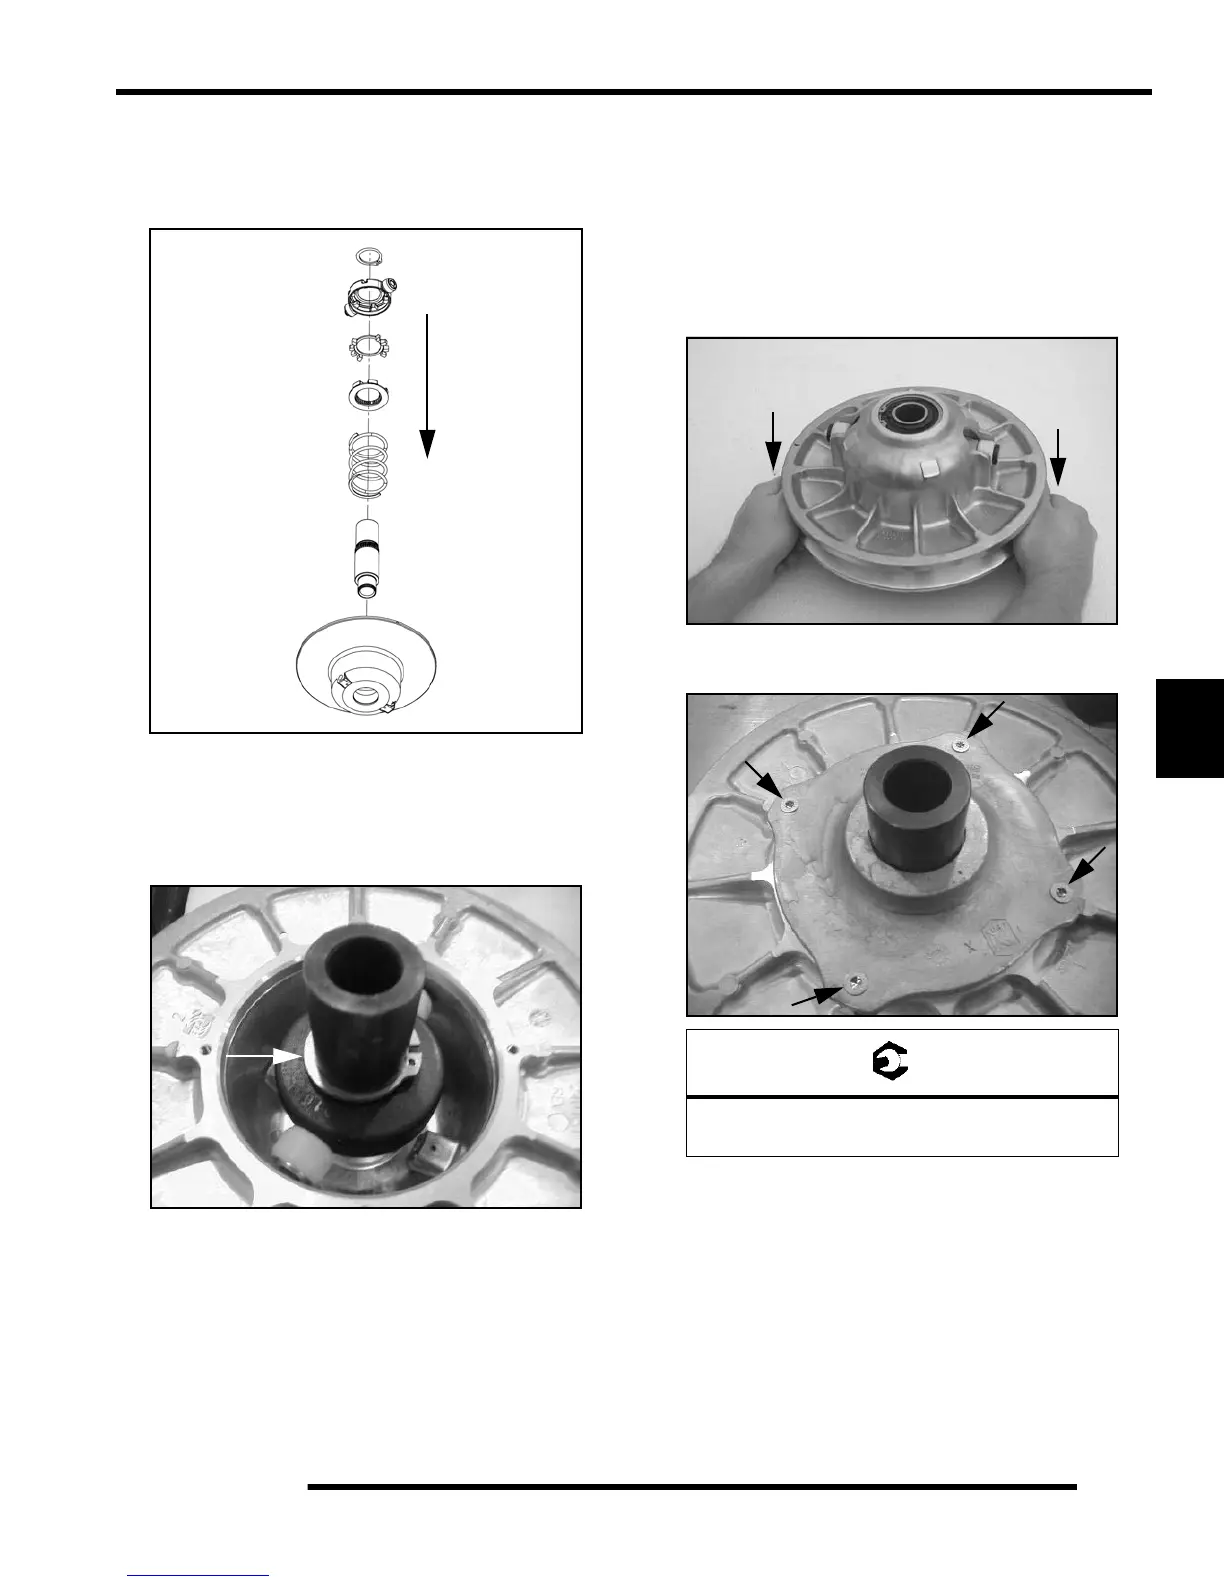
12. Place the clutch into Clutch Compression Tool PN
8700220. Using Compression Extensions PN PS-45909,
press down on the top of the spider assembly, pushing the
spider onto the shaft.
13. Slowly compress the spider into place. If the spider appears
to bind while compressing, stop and make sure the skip
tooth on the shaft and the spider are aligned. Once the
spider passes the retaining ring notch on the shaft, install
the retaining ring.
14. Install the cam (helix) assembly over the shaft. Line up the
“X” on the cam, “X” on spider, and “X” on the stationary
sheave or use the marks previously made before
disassembly. NOTE: If the cam assembly (helix) is
difficult to install, be sure the sheaves are aligned. To align
the sheaves place the clutch assembly on a flat surface with
the cam assembly (helix) side down. Press down on the
moveable sheave belt face with both hands and the helix
will release.
15. Use a T25 Torx driver to install the four screws and torque
to specification.
Press down
on spider
= T
T25 Torx:
42-52 in. lbs. (4.75 - 5.88 Nm)
Press Down to Loosen Helix
 Loading...