42
Q. This adjusts the Q value for the selected frequency band.
The Q is the ratio of the center frequency to the bandwidth.
When the center frequency is constant, the bandwidth is inversely
proportional to the Q, so as you raise the Q, you narrow the
bandwidth. Hence, the smaller the number, the wider the curve.
HPF (High-Pass Filter). This slider sets the High-Pass Filter
frequency, with a range of 24 Hz to 1 kHz. You can switch
the filter off by setting it all the way to the left.
The High-Pass Filter’s slope is -12 dB/octave.
LPF (Low-Pass Filter) – Mono/Center Channel. This slider sets the Low-
Pass Filter frequency for the Mono/Center channel, with a range of 100
Hz to 20 kHz. You can switch the filter off by setting it to the far left.
The Low-Pass Filter’s slope is -12 dB/octave.
Interactive Graph. This graph provides a visual representation of
the current settings. You can change the settings by moving the
blue dots to adjust the frequency and gain at the same time.
The first time you touch a dot, the associated band will automatically
turn on. Tapping or clicking a dot will turn the band on and off.
EQ/Dyn A/B Button. This button is used for switching between, or comparing
two different Fat Channel settings. When you first switch from A to B, the
B version will have the same settings as A. Once the settings are changed
you will have two different Fat Channel settings to switch between.
Note: On the iPad, the A/B button can be found in the Channel
Presets view. See Preset List/Editor Button for more details.
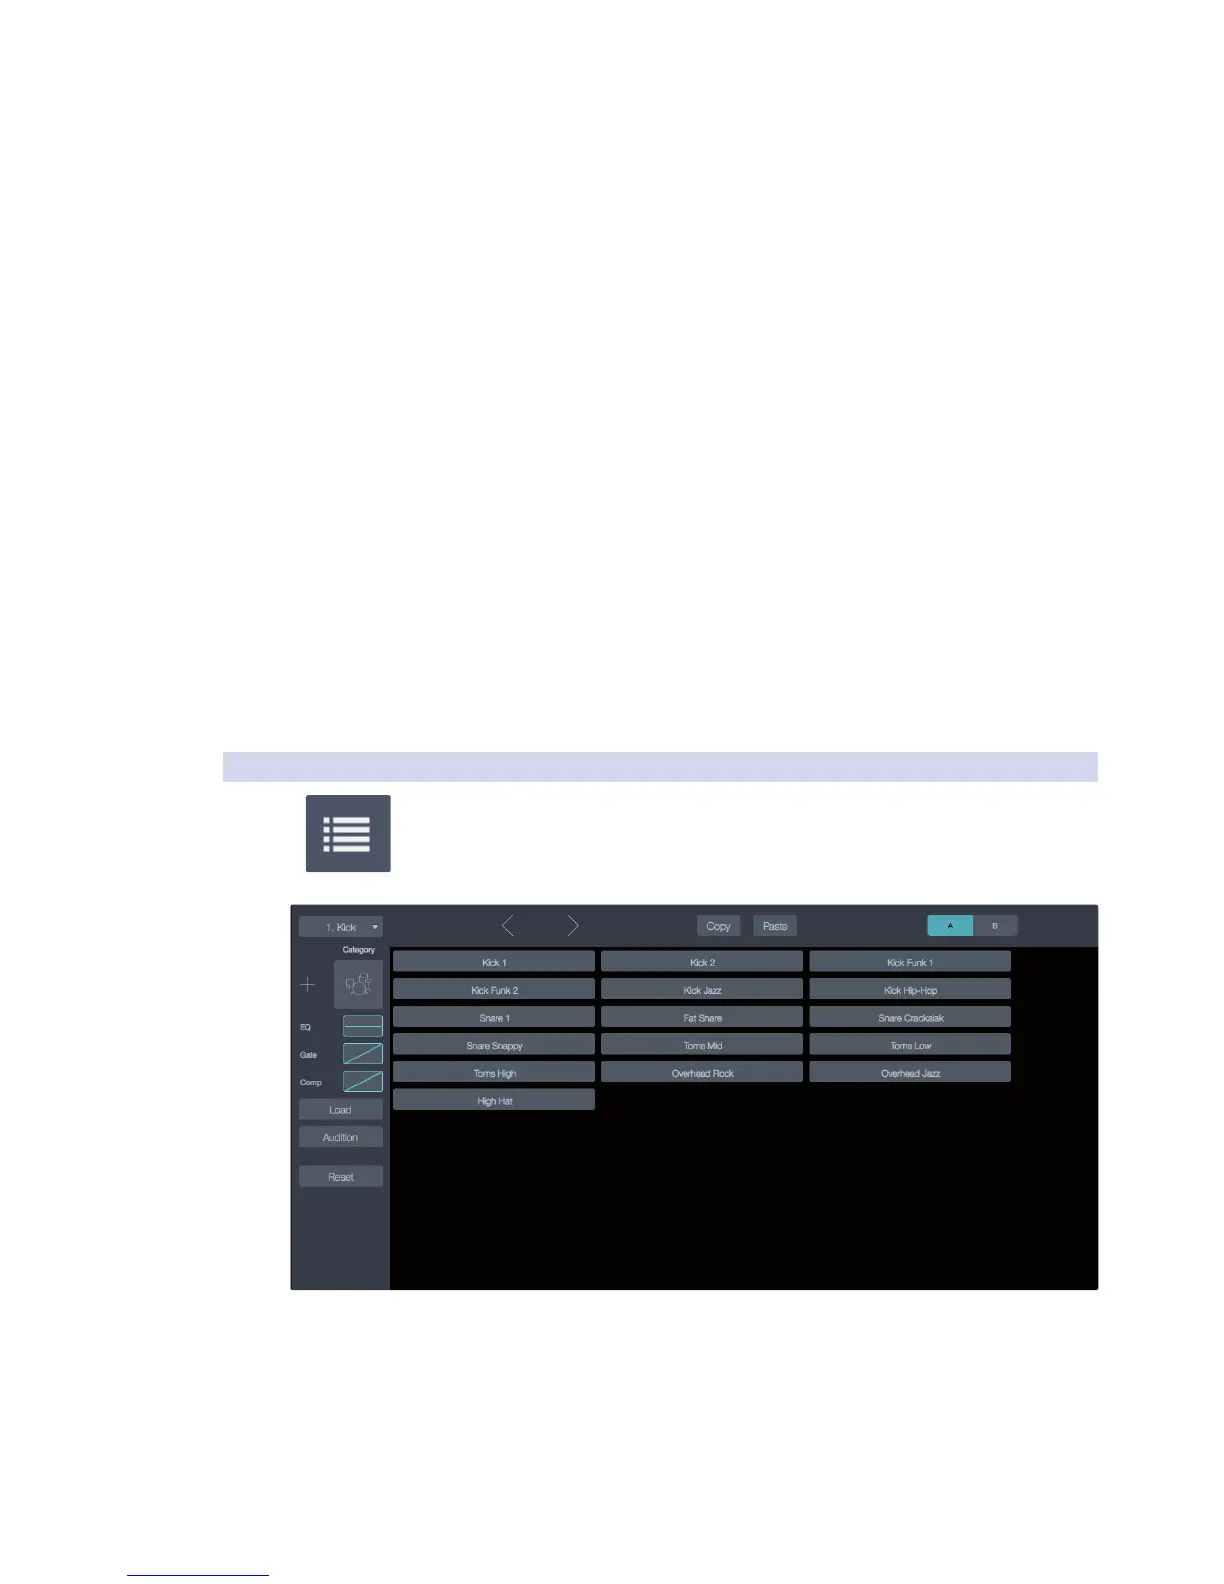
5.7.7 Preset List/Editor Button
This button lets you access the Fat Channel presets, as well as the features for loading,
saving, auditioning, and copying them.
For more information about how these tasks are performed,
refer to Working With Presets in section 5.8.
Selected Channel. The currently selected channel will be
displayed on the left of the Preset view. This makes it easy to
make quick adjustments as you’re changing presets.
Channel Selection. Displays the currently selected mixer channel. Click
or touch this area for a list of channels that you can select and “jump” to.
Previous/Next Channel Buttons. These select the previous or next channel.
Copy. Copies the current settings.