Joining overlapped tracks
NOTICE
► Check the teeth on sprocket wheel for wear and damage.
►
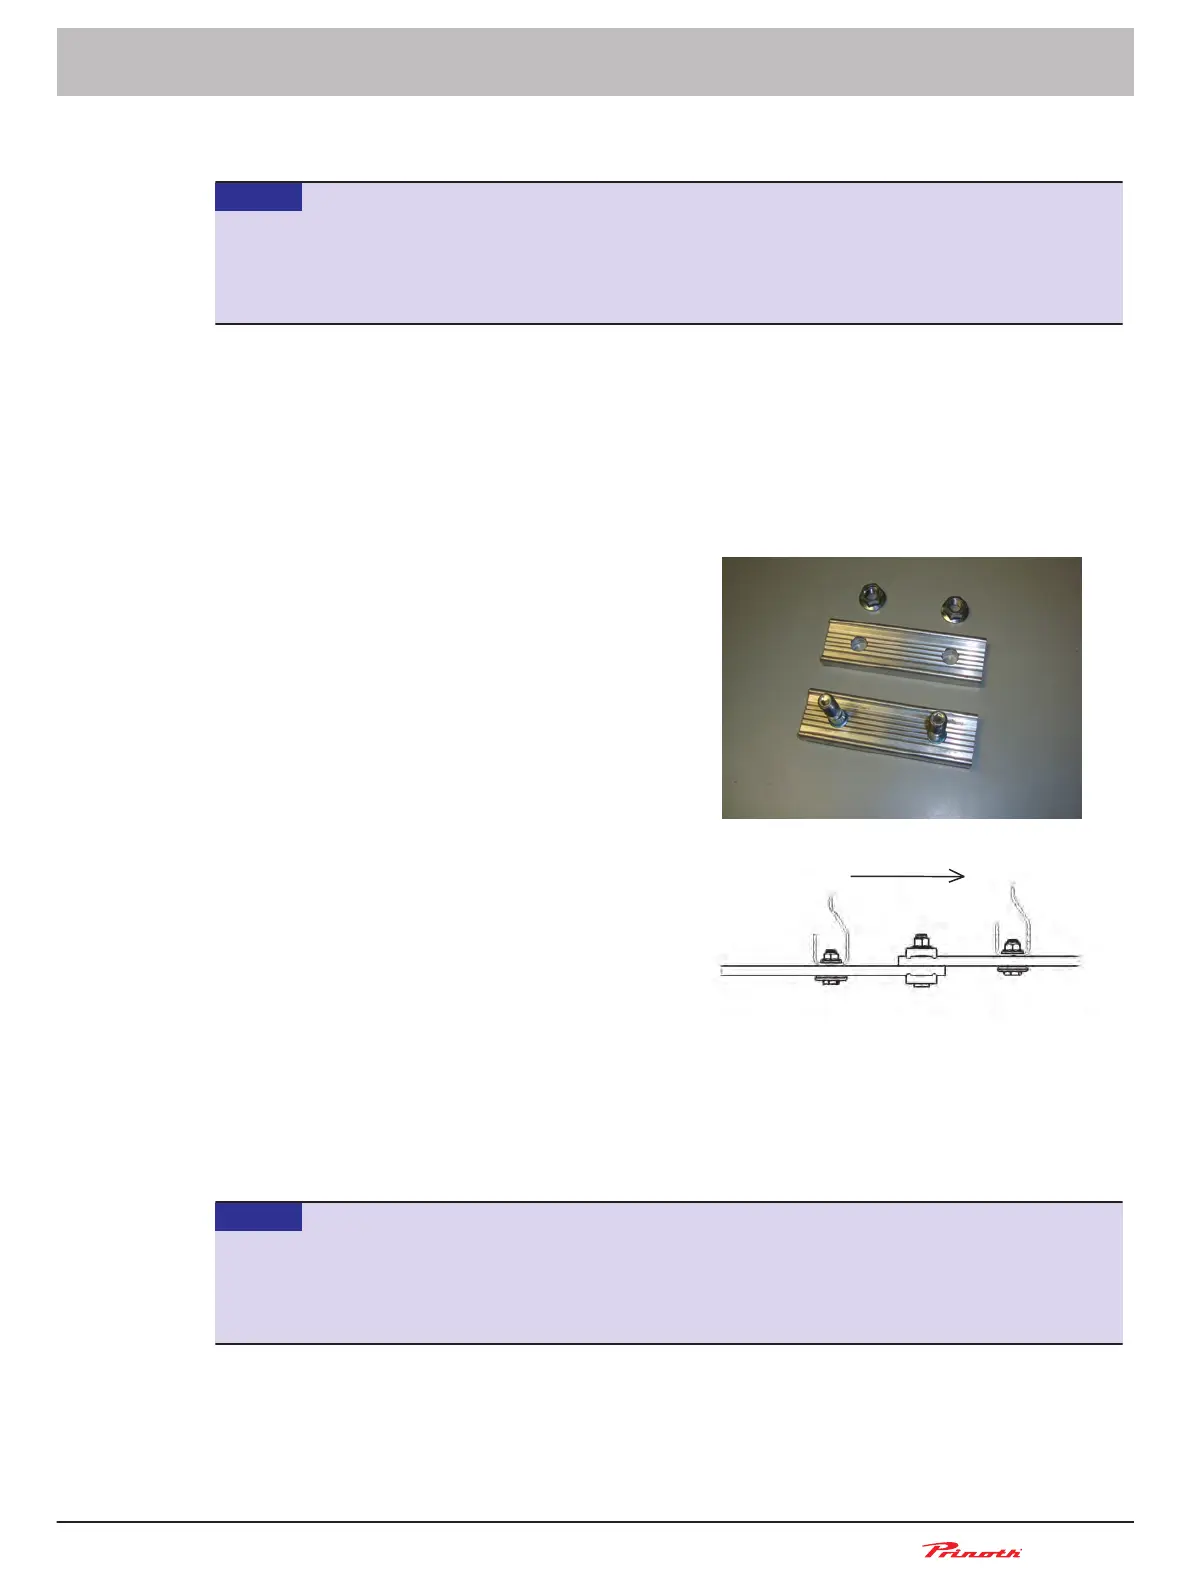
Mount the track bolts only in the direction indicated.
► Use the stop nuts only once.
The track ends are to be connected as follows:
1. Roll the track onto the sprocket wheel.
2. Rotate the sprocket wheel at low speed until the track end is on front of the tension wheel.
3. Roll the front end of the track around the tension wheel and pull it back as far as possible.
4. Place the track tensioner tool at the centre of the undecarriage and pull the track ends together
until the belts can be joined on the overlap section as shown.
5. First insert clamping locks and nuts on the
overlap of the inner belt and work on the
overlaps toward the outer belts. Observe
the direction of the bolts. Apply a torque of
102 ± 7 Nm (75 ± 5 ft-lb) on belt overlap-
ping nuts.
□
Properly align belt holes on overlap-
ped section of the belts.
□ Install the clamping locks over the
belt holes and keep in place using an
appropriate tool (C-clamp or locking
tool).
□ Install the nuts. Tighten evenly. On
clamping locks with three nuts, tight-
en centre nut first.
NOTE: if the belt overlap and clamp-
ing is not properly done, the belt
could tear apart or sustain premature
failure.
6. Remove the track tensioner tool.
7. If ice calks are installed, ensure they can rotate freely.
The second track is assembled in the same way.
Joining hinged tracks
NOTICE
► Check the teeth on sprocket wheel for wear and damage.
► Mount the track bolts only in the direction indicated.
► Use the stop nuts only once.
The track ends are to be connected as follows:
1. Roll the track onto the sprocket wheel.
2. Rotate the sprocket wheel at low speed until the track end is on front of the tension wheel.
Snow groomer BISON
Operating and Maintenance Manual
BISON 908930245 - 30367
9 - Attachments
131 (255)
■
■