© 2015 Proceq SA 13
5.1.2 Settings in the Main Menu
Prior to the measurements, check if the correct settings are selected (see 4.).
• Regional Setting
Choose between Metric, ASTM inch, ASTM mm or Japanese Bar Diameter
Keep the default diameter of 16 mm / #5
• Bar Diameter
Keep the default diameter of 16 mm / #5
• Measuring Range
Choose the “Auto” mode (see also short cuts in chapter 5.1.1)
• Audio Setting
Set it according to your preference
• Minimum Cover Alert
Must be turned off by setting (-)
• Neighboring Bar Correction
Must be turned off by setting (-)
• Memory function
(for Profoscope+ only)
Must be turned off by setting (-)
5.2 Locate a Rebar
Switch on the Profoscope and perform a reset as explained in “Getting Started”. The Profoscope
can immediately be used to locate a rebar.
NOTE! The Profoscope is able to locate a rebar and also the mid-point between two
rebars. It is important to be able to distinguish between the two situations.
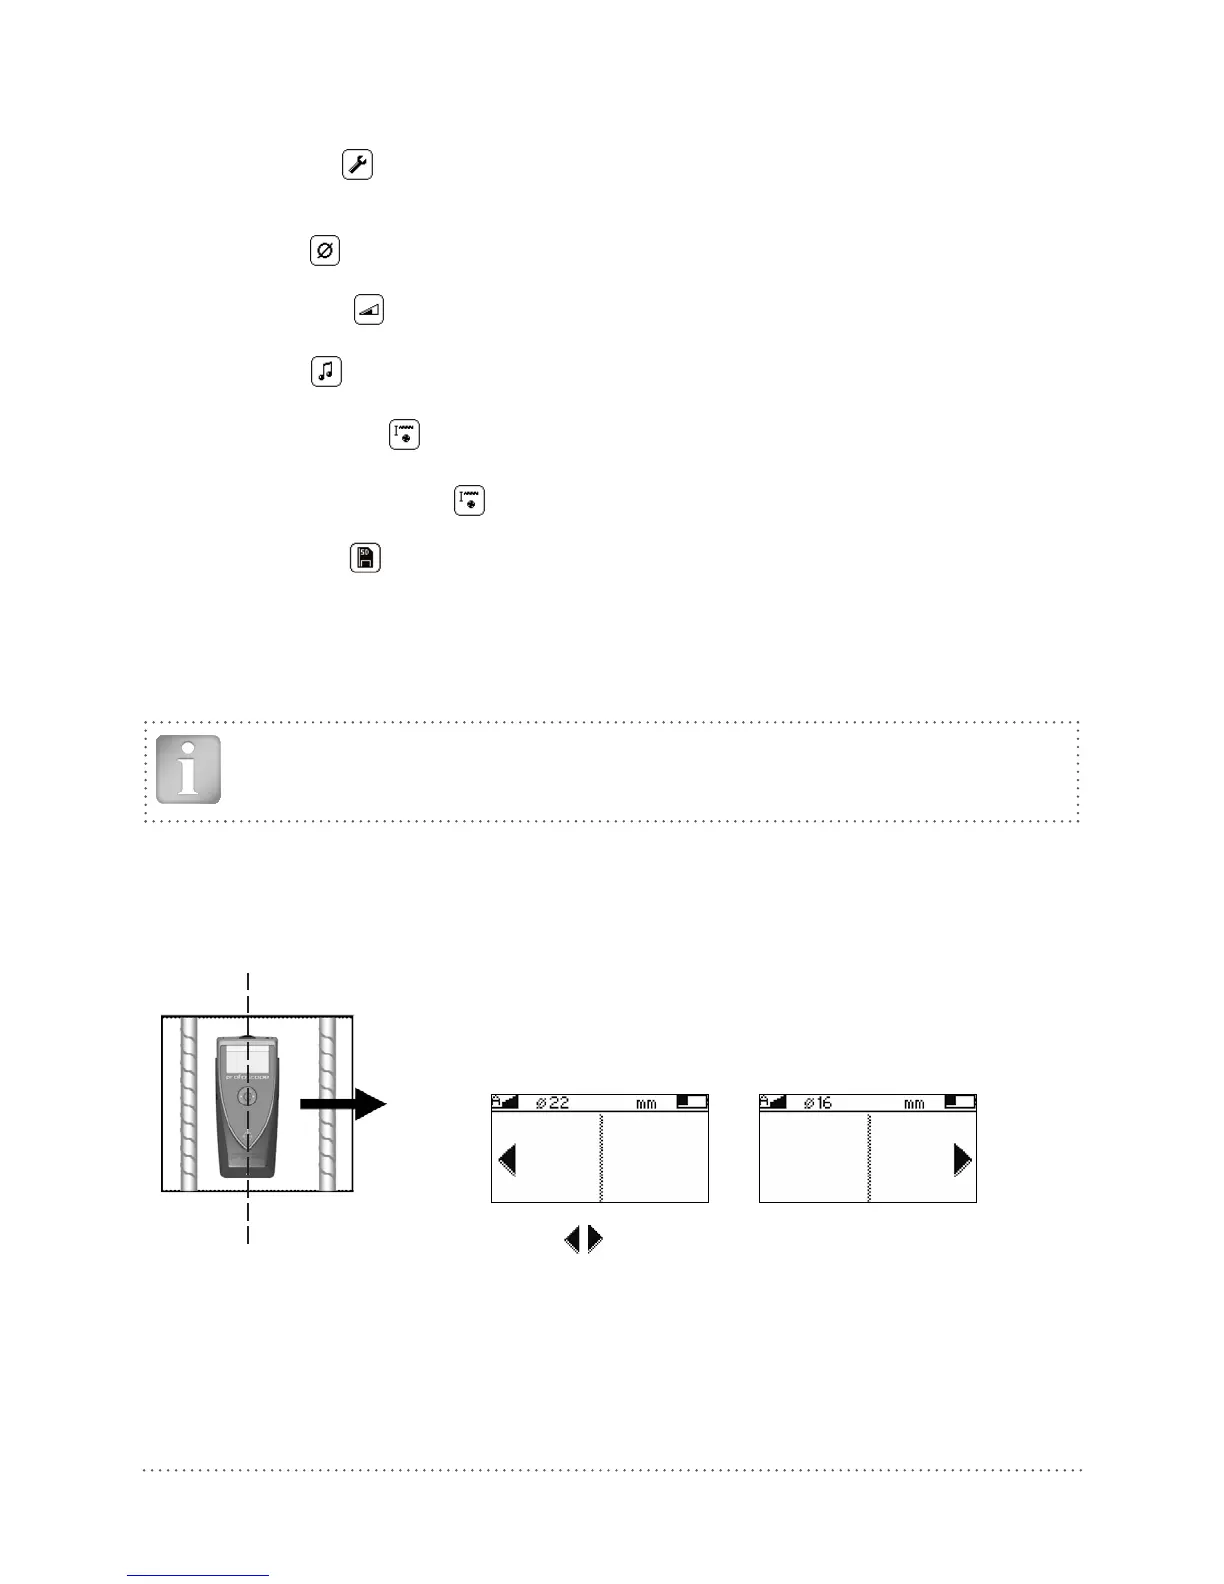
5.2.1 Finding a Rebar
Place the Profoscope on the test surface and move it slowly in a chosen direction. The Profoscope
reacts differently depending on its orientation relative to the rebars. There are three scenarios.
Scenario A: Sweeping Perpendicular to the Rebars
Center Line (9)
The Center Line (9) is in parallel to the rebars
This is the correct scenario to detect the rebars.
Try it out on the start up test kit.
Arrows on screen indicate of the rebar.
Fig 12: Sweeping perpendicular and display of rebar proximity