You can remove the battery from the charger by lifting the lever (?).
If the indicator of the charger lights red continuously upon battery installation, probably
the battery's charge level is lower than acceptable (the battery has been long in deep
discharge). Keep the battery in the charger for a long time (up to several hours), remove
and re-insert it.
If the indicator starts blinking green, the battery is good;
If the indicator keeps lighting red, the battery defective. Do not use the battery!
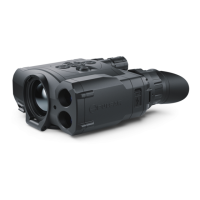
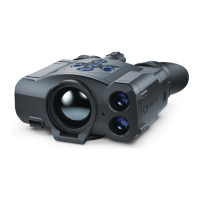
The LED indicator (D) will display the battery charge status:
LED Indicator Battery Charge Status
Battery is empty
Image not found or type unknown
Battery is full
Step 3. ?onnect the charger to the mains supply
1.
Connect the Micro-USB plug of the USB cable to the port(E) of the charger.
2.
Connect the Micro-USB plug to the power adapter.
3.
Insert the plug of the power adapter to the 100-240 V socket.