49
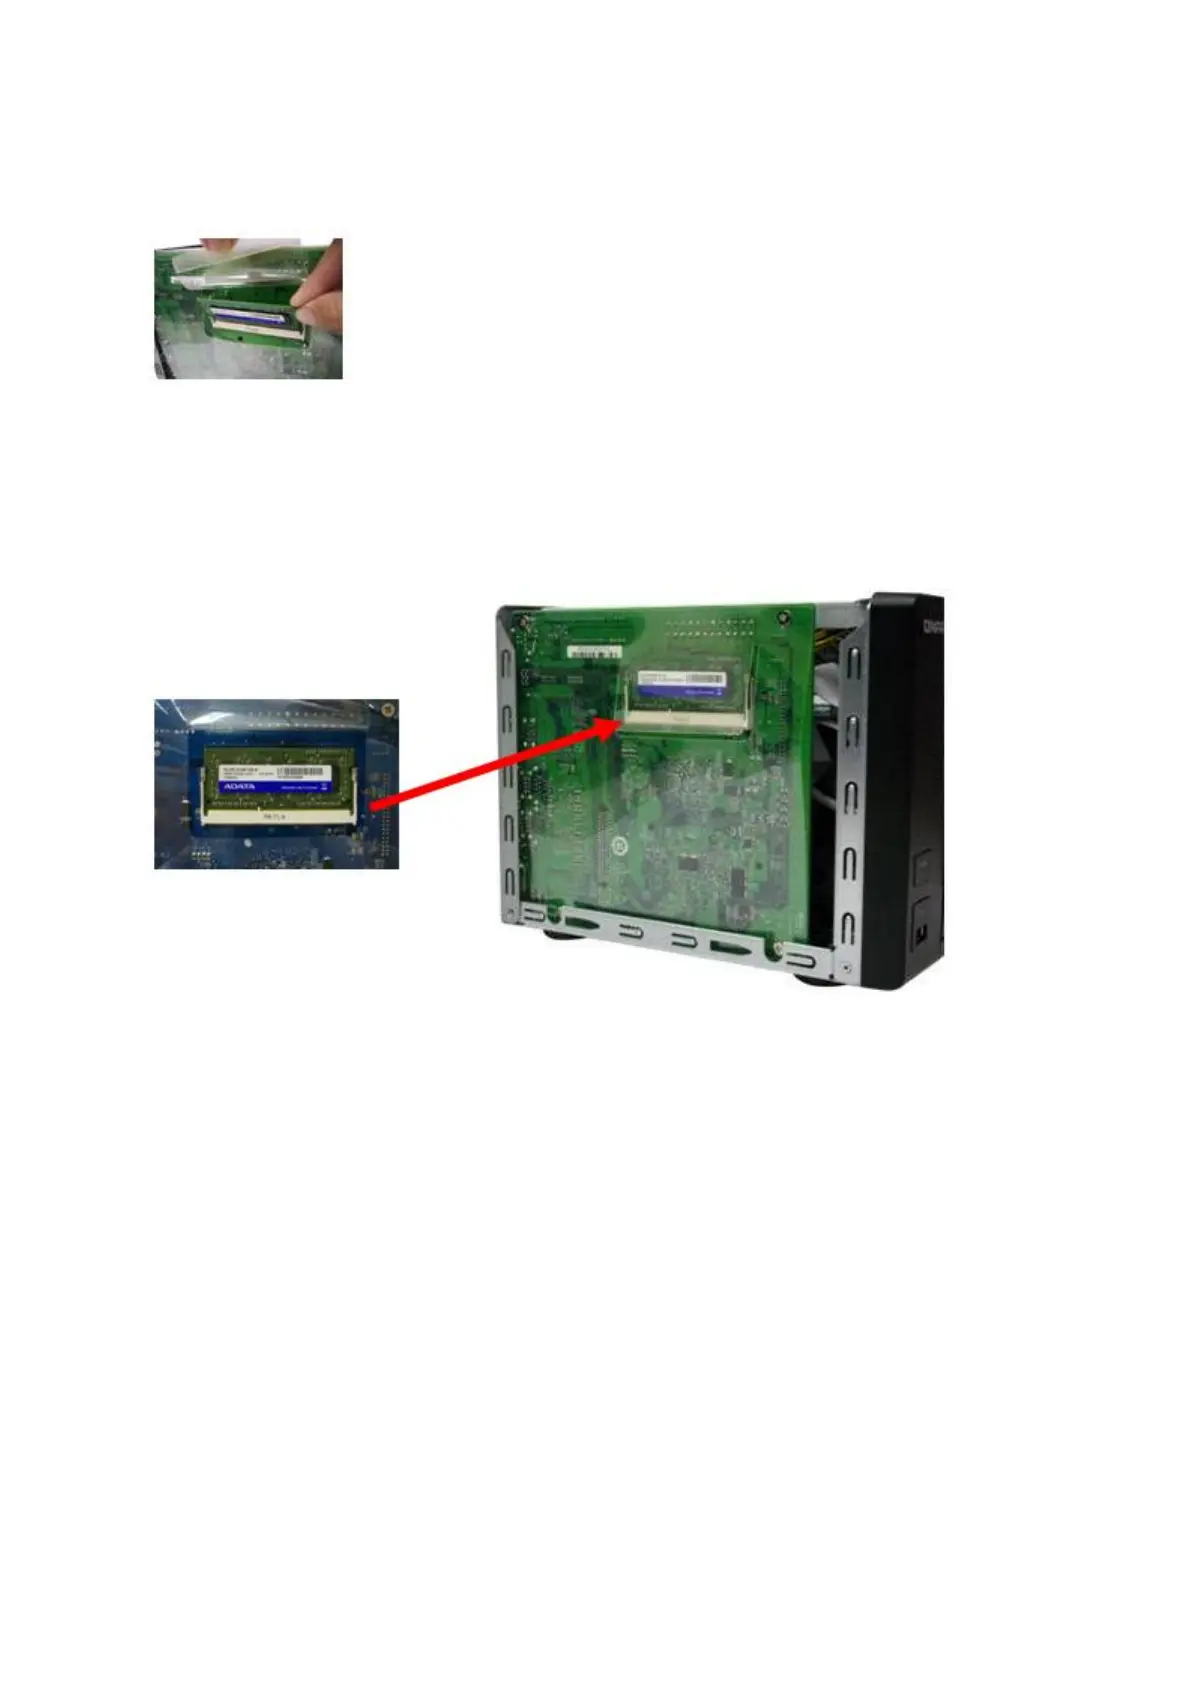
with t he notch in t he m em ory slot . Slide t he m em ory m odule to t he slot at a 45- degree
angle ( approxim at ely) .
5. Gent ly press t he m em ory m odule int o t he slot unt il it is seat ed fully.
6. Rotat e the m em ory m odule t owards t he m ot herboard unt il t he securing clips clicks into
place.
7. Close t he case cover and fasten t he screws. Connect t he power adapt or and cables
back to the NAS.
8. To check that t he m em ory m odule is recognized by the NAS, power up t he NAS and
login t he web interface as an adm inist rat or. Go to “ System Status” > “System
I nform at ion” and check t he t ot al m em ory in “ Hardware I nform at ion”.
5 .4 TS- 1 6 3 5
1. Loosen the screws on t he back of the NAS that are connect ing t he case cover to t he
case.