48
5 .3 TS- 4 5 1 S, TS- 5 3 1 P, TS- 5 3 1 X , TS- 6 5 1 , TS- 8 3 1 X, TS- 8 5 1 , TS- x5 3 / x 5 3 S Pr o,
TS- 5 6 3 , TVS- 8 8 2 S, TVS- 8 8 2 ST, TVS- x6 3 , TS- x 5 3 Aserie s ( 2 / 4 / 6 / 8 - bay)
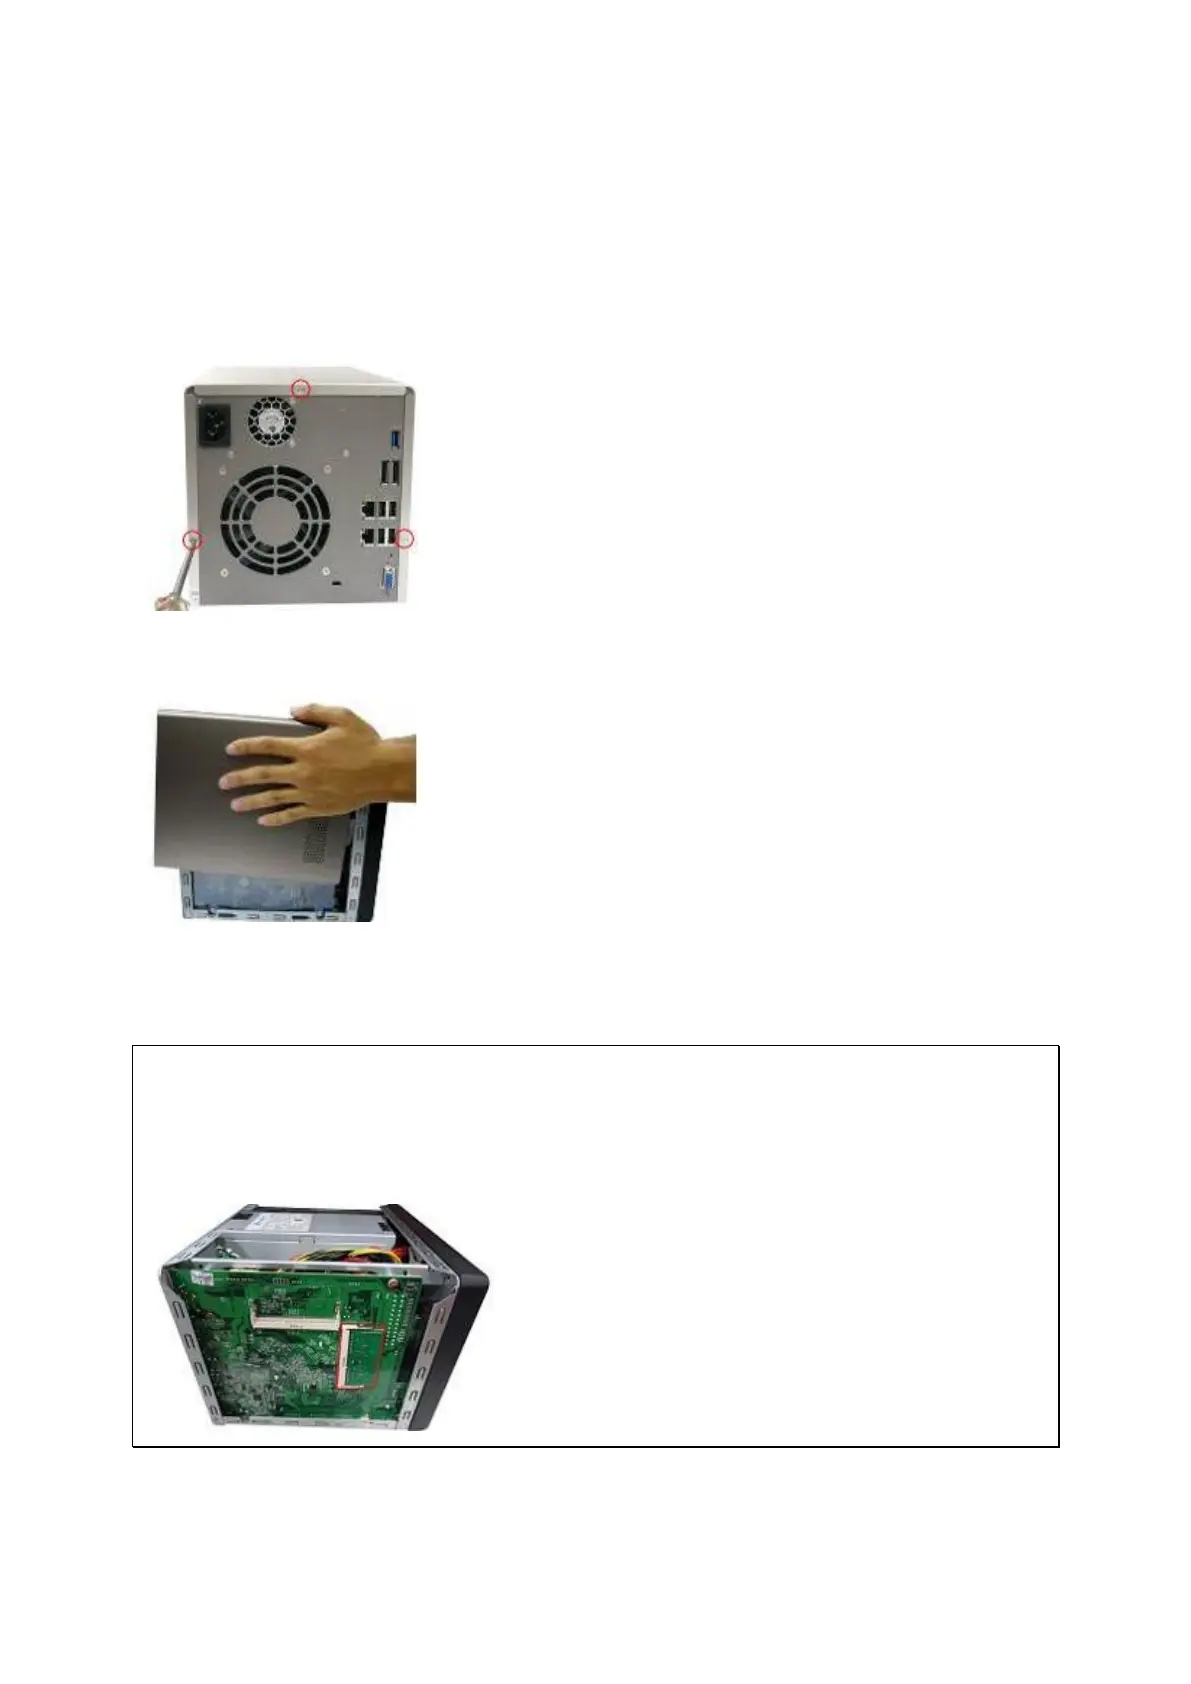
1. Loosen t he t hree screws on t he rear of the NAS.
2. Rem ove t he case cover of t he NAS gently.
3. Locat e t he m em ory slot. Make sure t he slot is em pt y.
N ot e: For TS- x 5 3 / x5 3 S Pr o, TS- 4 5 1 S, TS- 5 3 1 P, TS- 6 5 1 , TS- 8 5 1 a nd TS- x 5 3 A
m ode ls, alw a ys e nsure t ha t a m em or y m odule is inst a lled in the Prim a r y slot
( r ed) . I f not , t hen t he syst e m w ill fail to sta rt . The m axim um supported m em ory is
8GB com bined.
4. Grasp t he edge of the m em ory m odule. Align t he notch on the gold edge of t he m odule