47
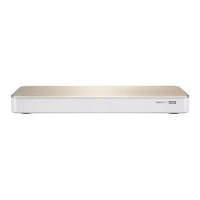
N ot e: Alw ay s ensure t hat a m em ory m odule is in st a lle d in t h e Pr im ary ( r e d) slot .
I f not, t hen t h e syst e m w ill fail t o st a r t . The m axim um supported m em ory is 8GB
com bined.
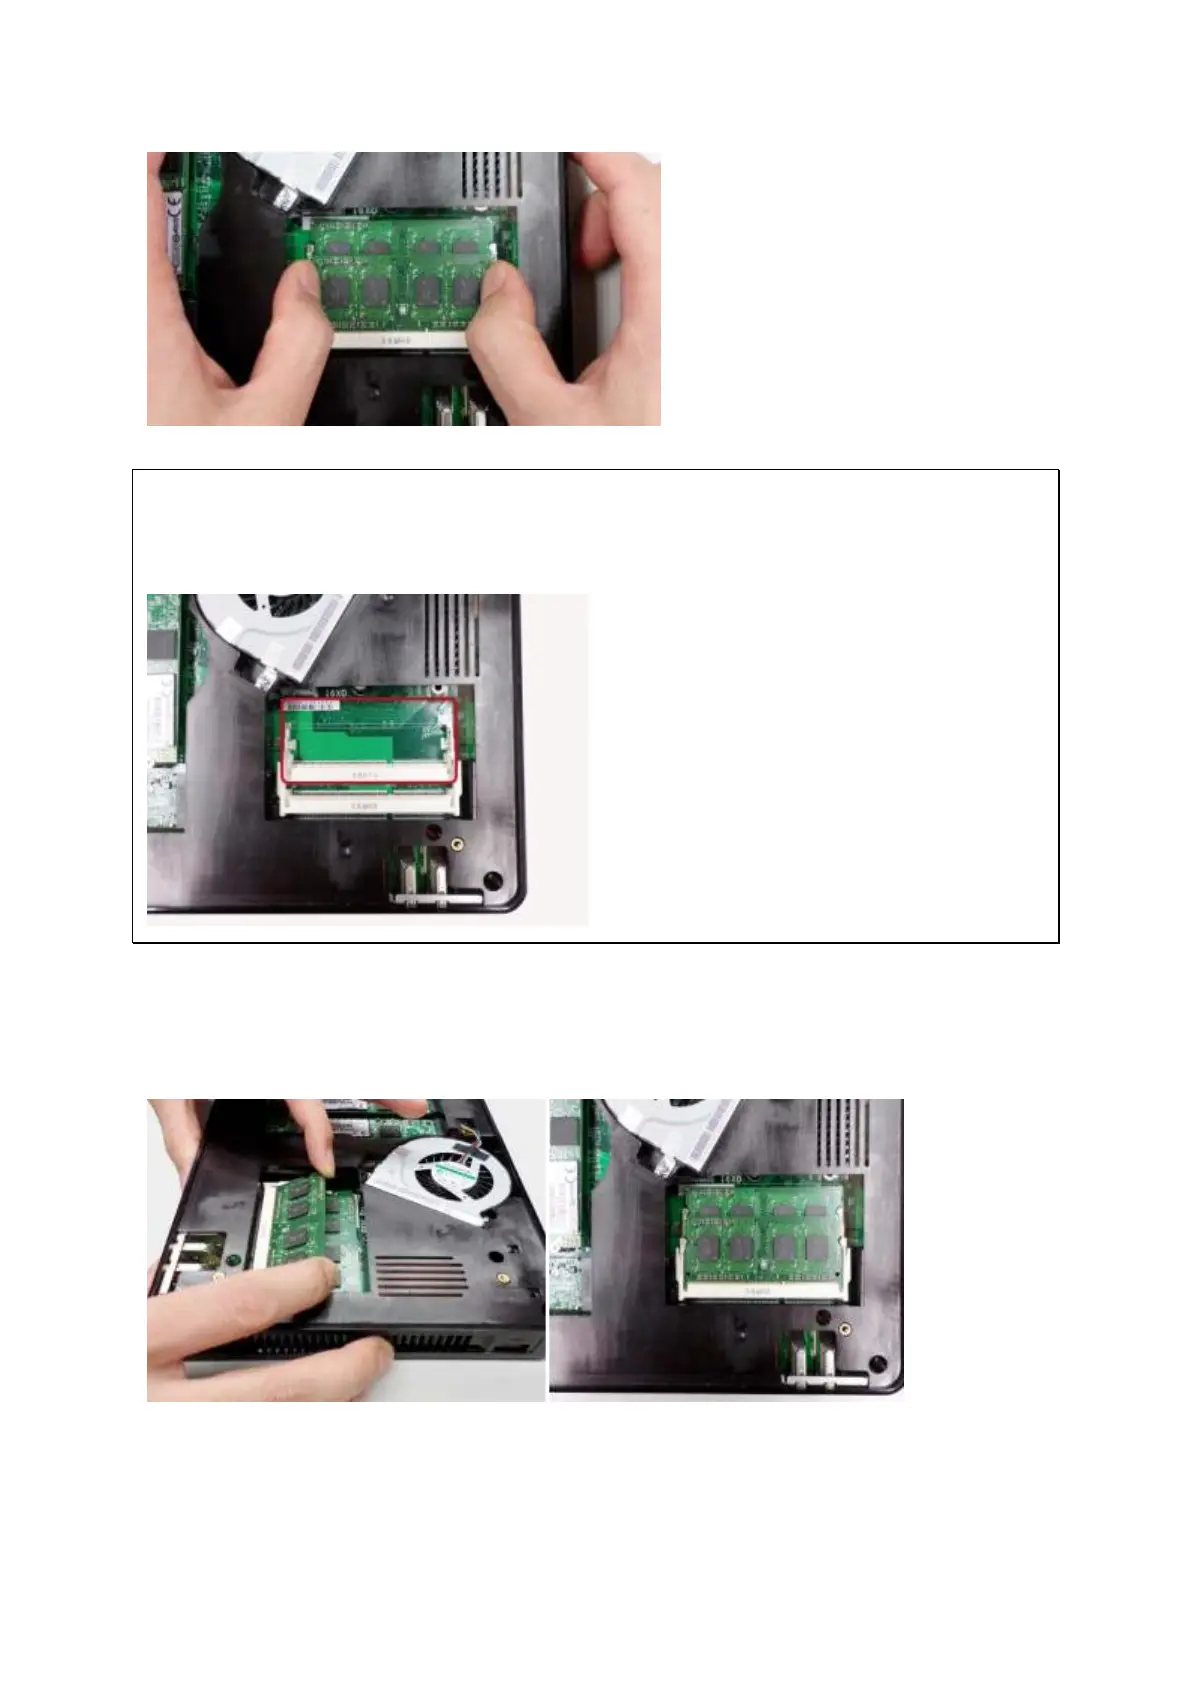
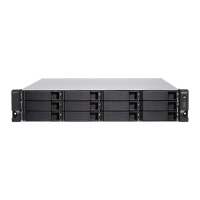
3. Slide t he m em ory m odule t o the slot at a 45- degree angle ( approxim at ely) and press
t he m em ory m odule down until it clips into place. Ensure t he m em ory m odule sit s
properly w it h t he clips in place.
4. Close t he NAS cover, fasten the four hand screws, and replace t he rubber feet.
Reconnect t he power and net work cables t o t he NAS.