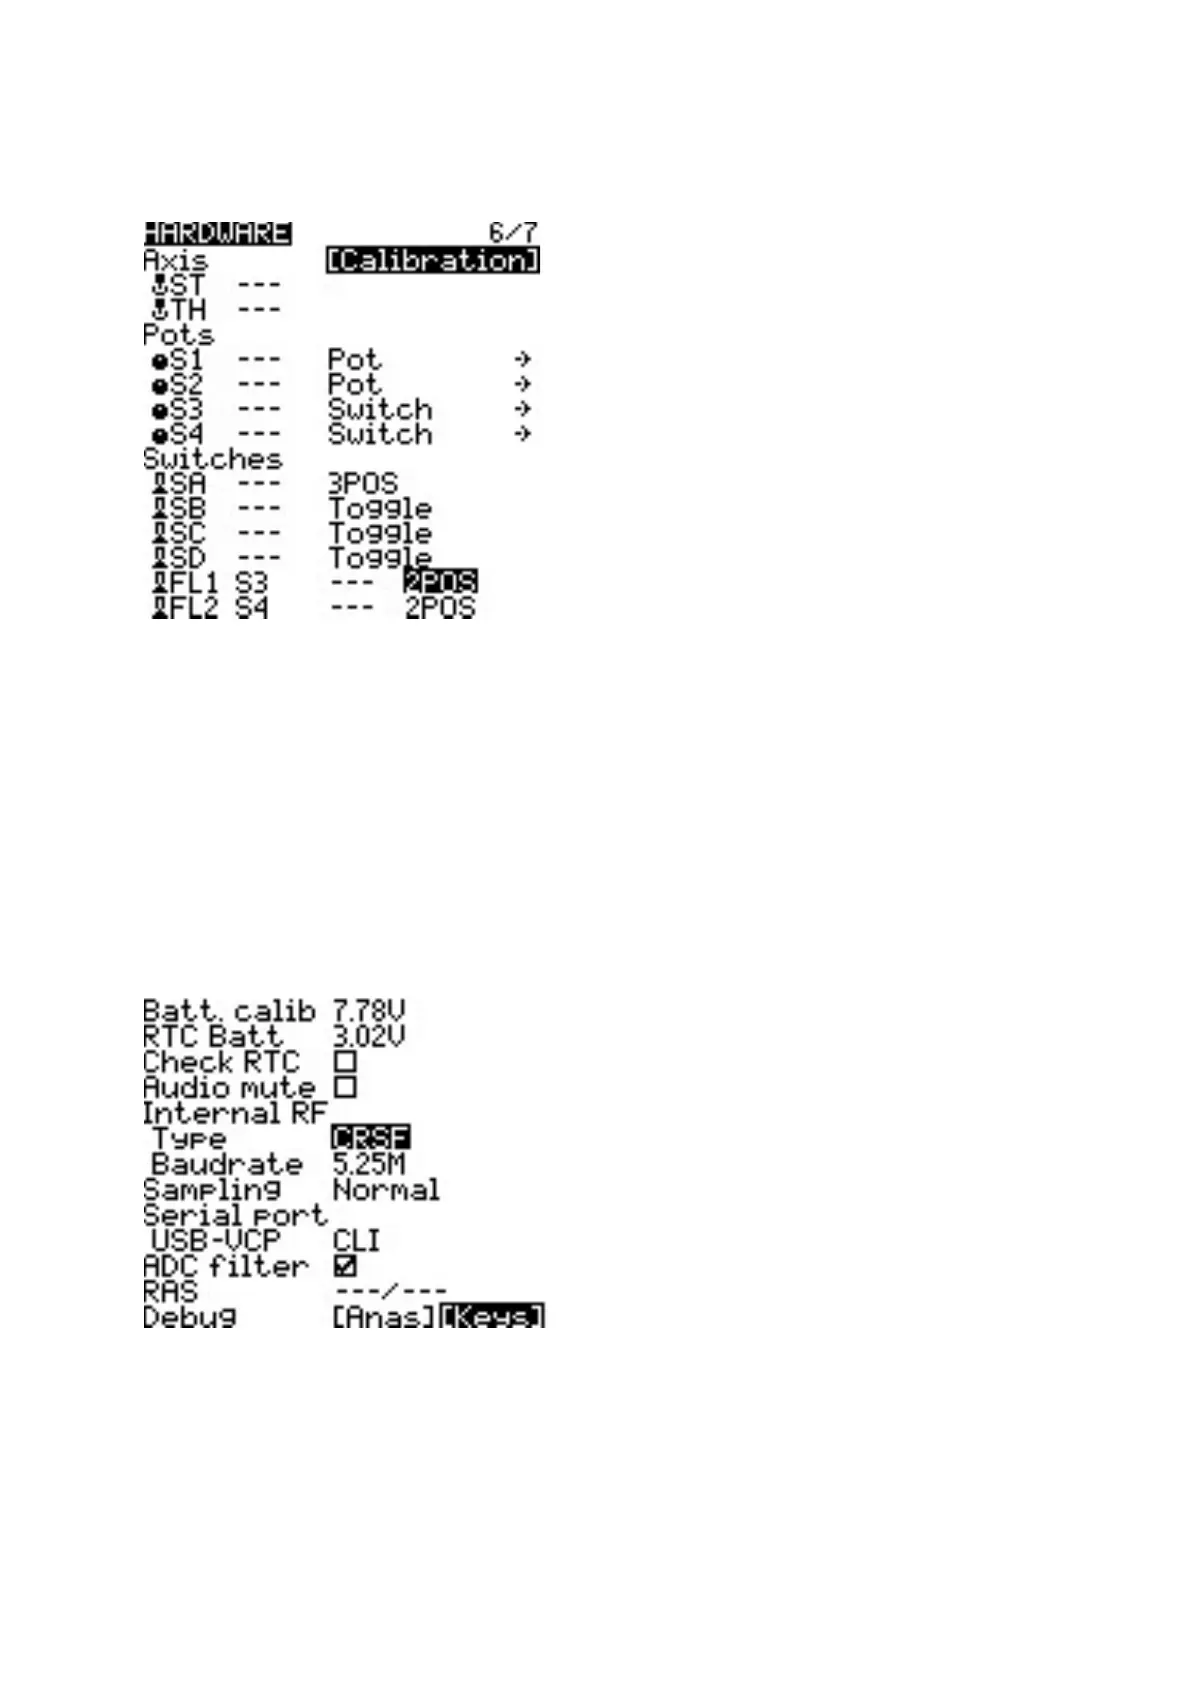
10.5. Hardware
The Hardware screen is where you congure hardware specic-sengs for your radio. It shows all physical
hardware objects (scks, pots, switches) and allows for their modicaons. It is also where you can calibrate
your scks and pots. It also contains addional conguraon opons.
Hardware Screen
Calibraon
To calibrate your physical radio controls (scks, pots, sliders, & 6-posion switch), highlight the [Calibraon]
opon and press the [Enter] buon. The radio will prompt you through the calibraon steps.
For your gimbal calibraon, use a le-to-right & up-to-down movement for the gimbals, not a circular
movement! Addionally, use the normal amount of pressure at the endpoints. Excessive endpoint pressure
will cause the gimbal to be mis-calibrated. Also, do not forget to calibrate your 6-posion switch!
Inputs, Scks, Pots, and Switches Buons List
Selecng one of the Scks, Pots, or Switches lines from the list will allow you to add a 3 character label to the
control as well as change the type of control as needed.
Addional hardware conguraon opons
Hardware Screen
Ba. Calib (Baery Calibraon) - Set this value to match the transmier baery voltage. This ensures that
the displayed baery voltage is accurate.
RTC Ba - The current voltage of the RTC baery. The RTC (real me clock) baery keeps the radio's date and
me accurate even when no main radio baery is present.
Check RTC - When enabled, checks the RTC baery at startup and warns you if the baery voltage is low.
Audio Mute - When enabled, puts the transmier in mute mode unl a sound needs to be played. This
prevents interference noise from high-powered TX modules from coming out of the transmier speakers.