ESP-SMT Smart Modular Control System
67
Installing The Weather Sensor
Locating the SMT Weather Sensor
Select a convenient outdoor location in close proximity
(wire-run distance is 200 feet maximum) to the ESP-SMT
controller. Place in an unobstructed area away from
reective heat so that the unit can provide accurate on-
site temperature and rainfall measurements.
Mount the unit at least 6 feet above the ground surface
to accurately measure ambient temperature. Suggested
installation locations include, but are not limited to the
eave of a residence roof, a wood fence post, siding of a
residence, etc.).
The sensor mounting bracket is designed to mount on
any vertical surface. Easy adjustment of the mounting
arms assist to make sure the installed sensor is level. UV
rated #16AWG or #18AWG wire is recommended for the
communication wires if more than 25 feet is required.
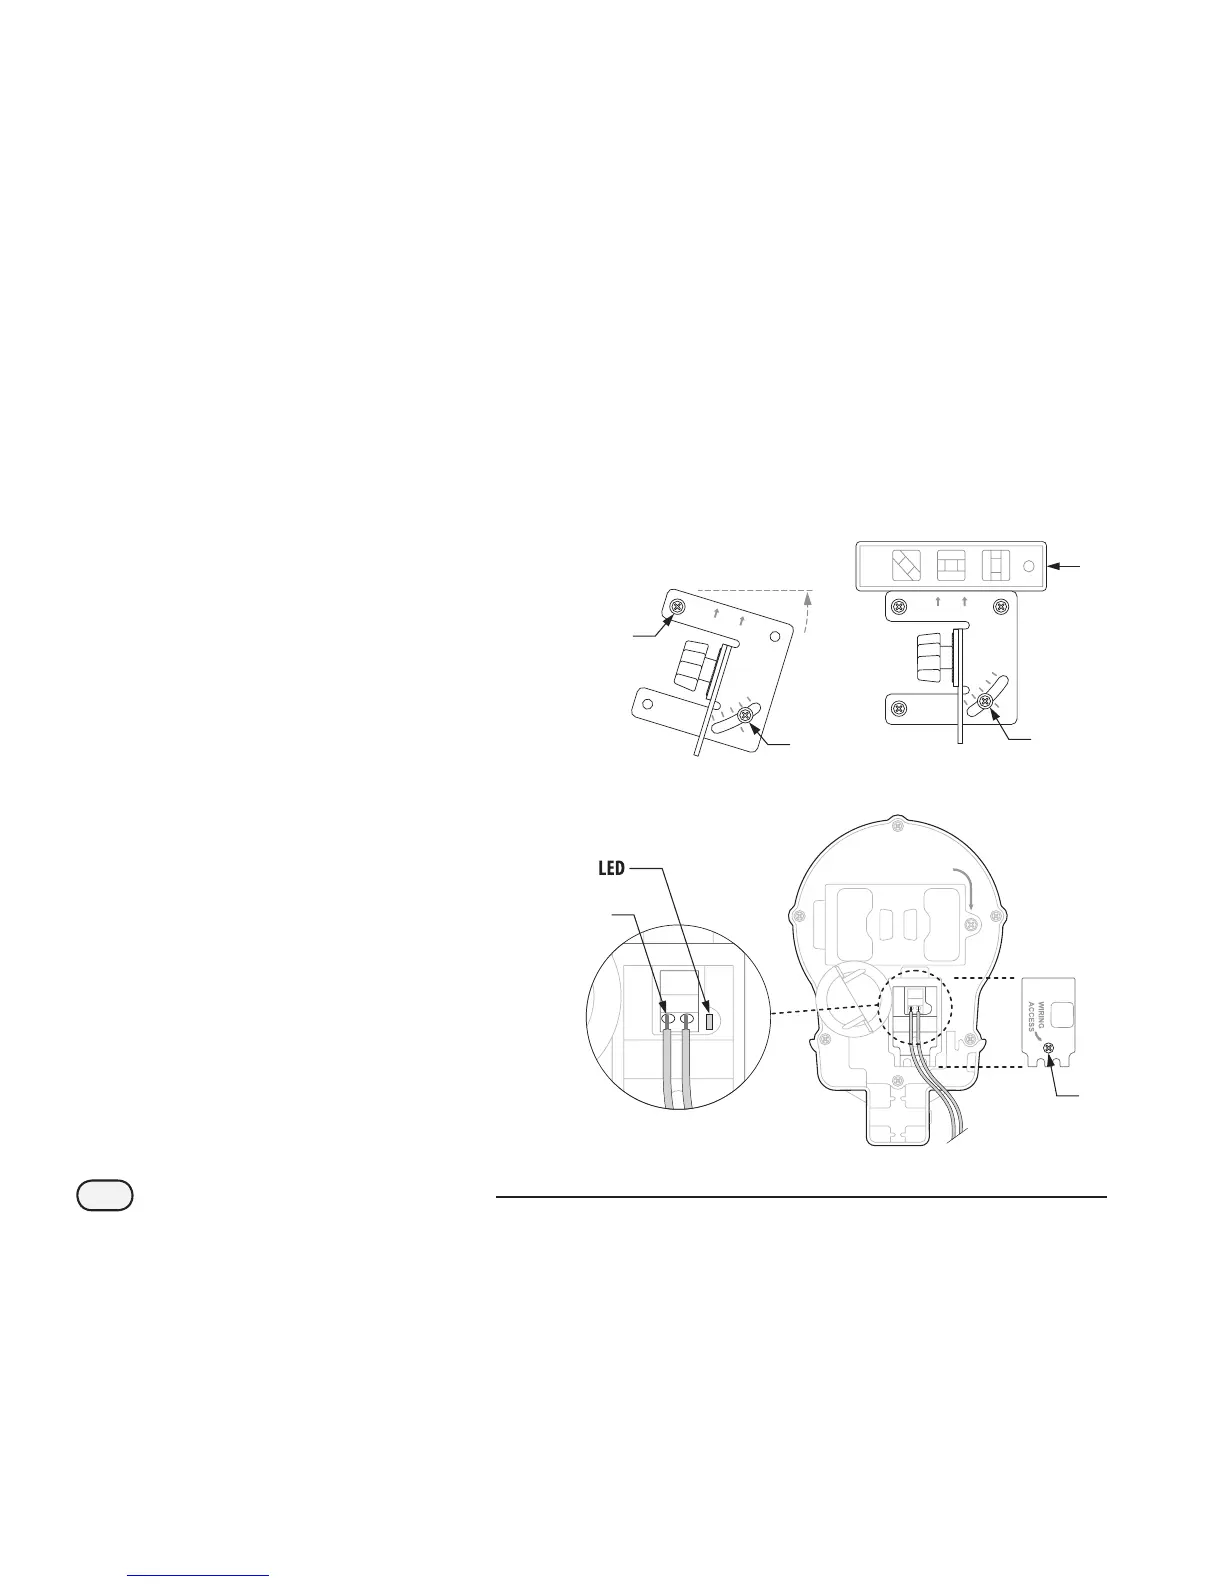
Sensor Installation Procedure
A
Run the communication wire to the location in which
the sensor will be mounted.
B
Place the mounting bracket assembly base against a
vertical mounting surface and drive one of the screws
into the upper left hole of the base (do not tighten
completely).
C
Drive a second screw into the middle area of the
adjustment slot located on the lower right corner of
the mounting base.
D
Level the mounting base. Hold in place.
E
Tighten the screws in the slot rst and then assure that
all 4 screws are tightened to the mounting surface to
secure the mounting base.
TOP
LEVEL
HERE
TOP
LEVEL HERE
ACCESS HERE TO
CLEAN RAIN SENSOR