Chapter 4. Saying "Hello World" in C
After blinking an LED on and off, the next thing that most developers will want to do is create and use a serial port, and
say "Hello World."
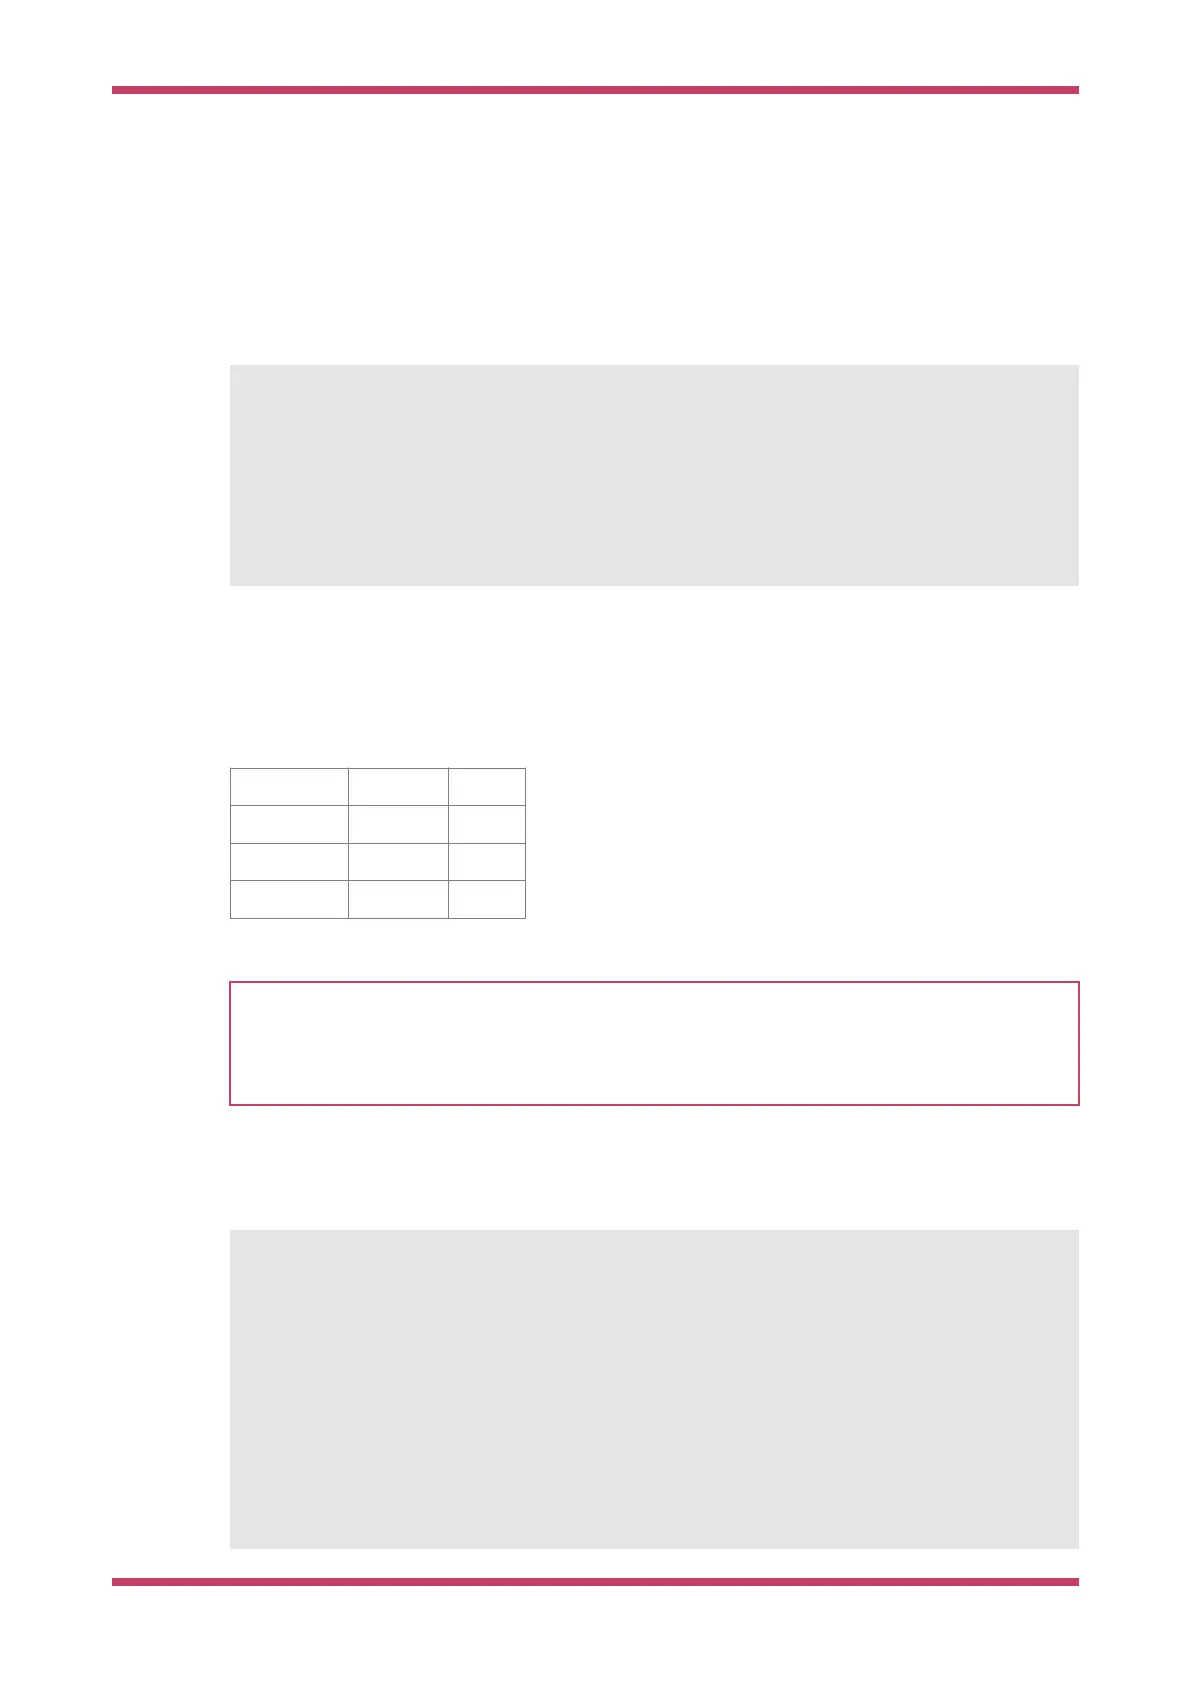
Pico Examples: https://github.com/raspberrypi/pico-examples/tree/master/hello_world/serial/hello_serial.c Lines 10 - 17
10 int main() {
11 stdio_init_all();
12 while (true) {
13 printf("Hello, world!\n");
14 sleep_ms(1000);
15 }
16 return 0;
17 }
4.1. Serial input and output on Raspberry Pi Pico
Serial input (stdin) and output (stdout) can be directed to either serial UART or to USB CDC (USB serial). However by
default stdio and printf will target the default Raspberry Pi Pico UART0.
Default UART0 Physical Pin GPIO Pin
GND 3 N/A
UART0_TX 1 GP0
UART0_RX 2 GP1
IMPORTANT
The default Raspberry Pi Pico UART TX pin (out from Raspberry Pi Pico) is pin GP0, and the UART RX pin (in to
Raspberry Pi Pico) is pin GP1. The default UART pins are configured on a per-board basis using board configuration
files. The Raspberry Pi Pico configuration can be found in https://github.com/raspberrypi/pico-sdk/tree/master/src/
boards/include/boards/pico.h. The SDK defaults to a board name of Raspberry Pi Pico if no other board is specified.
The SDK makes use of CMake to control its build system, see Chapter 8, making use of the pico_stdlib interface library
to aggregate necessary source files to provide capabilities.
Pico Examples: https://github.com/raspberrypi/pico-examples/tree/master/hello_world/serial/CMakeLists.txt Lines 1 - 12
Ê1 add_executable(hello_serial
Ê2 hello_serial.c
Ê3 )
Ê4
Ê5 # Pull in our pico_stdlib which aggregates commonly used features
Ê6 target_link_libraries(hello_serial pico_stdlib)
Ê7
Ê8 # create map/bin/hex/uf2 file etc.
Ê9 pico_add_extra_outputs(hello_serial)
10
11 # add url via pico_set_program_url
12 example_auto_set_url(hello_serial)
Getting started with Raspberry Pi Pico
4.1. Serial input and output on Raspberry Pi Pico 12