You should then wire the Raspberry Pi and the Raspberry Pi Pico together with the following mapping:
Raspberry Pi Raspberry Pi Pico
GND (Pin 14) GND (Pin 3)
GPIO15 (UART_RX0, Pin 10) GP0 (UART0_TX, Pin 1)
GPIO14 (UART_TX0, Pin 8) GP1 (UART0_RX, Pin 2)
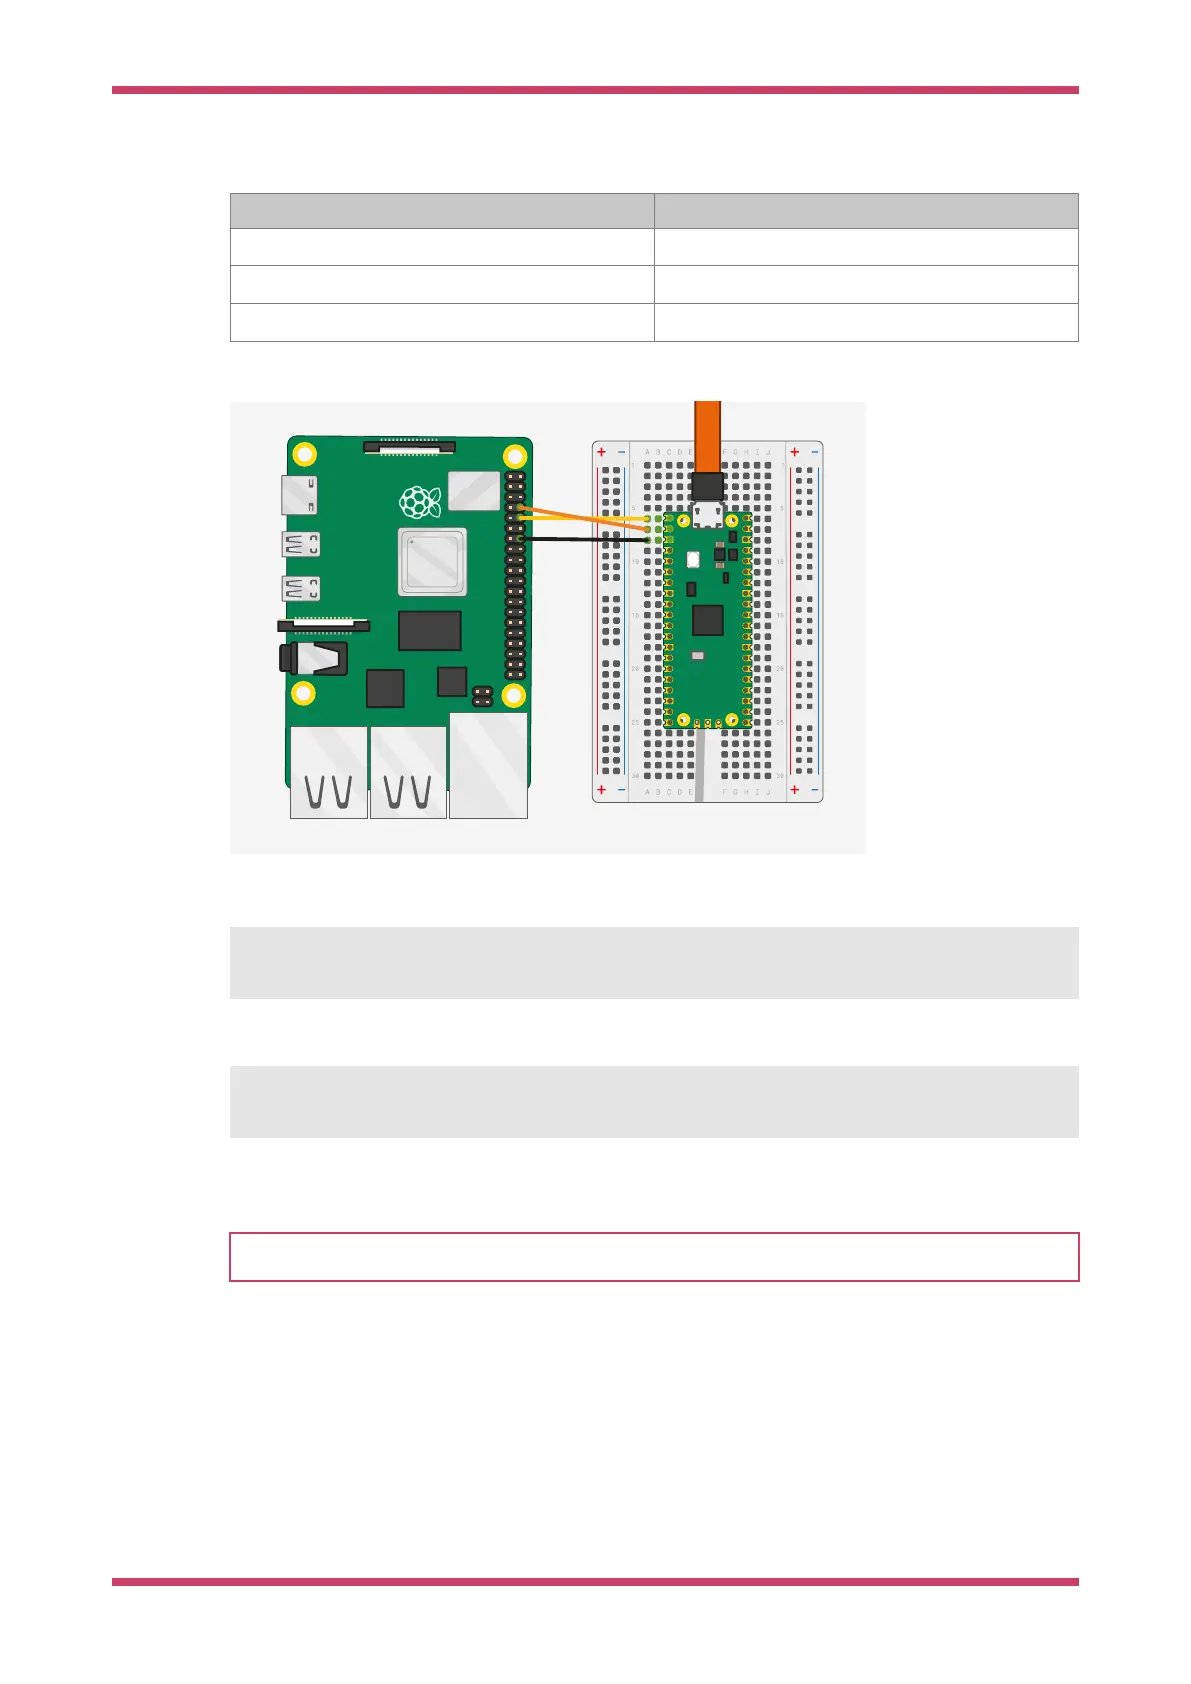
See Figure 4.
Figure 4. A Raspberry
Pi 4 and the Raspberry
Pi Pico with UART0
connected together.
Once the two boards are wired together if you have not already done so you should install minicom:
$ sudo apt install minicom
and open the serial port:
$ minicom -b 115200 -o -D /dev/serial0
You should see Hello, world! printed to the console.
TIP
To exit minicom, use CTRL-A followed by X.
4.6. Powering the board
You can unplug the Raspberry Pi Pico from USB, and power the board by additionally connecting the Raspberry Pi’s 5V
pin to the Raspberry Pi Pico VSYS pin via a diode, see Figure 5, where in the ideal case the diode would be a Schottky
diode.
Getting started with Raspberry Pi Pico
4.6. Powering the board 16