NOTE
UF2 (USB Flashing Format) is a file format, developed by Microsoft, that is used for flashing the RP2040 board over
USB. More details can be found on the Microsoft UF2 Specification Repo
NOTE
To build a binary to run in SRAM, rather than Flash memory you can either setup your cmake build with
-DPICO_NO_FLASH=1 or you can add pico_set_binary_type(TARGET_NAME no_flash) to control it on a per binary basis in your
CMakeLists.txt file. You can download the RAM binary to RP2040 via UF2. For example, if there is no flash chip on
your board, you can download a binary that runs on the on-chip RAM using UF2 as it simply specifies the addresses
of where data goes. Note you can only download in to RAM or FLASH, not both.
8.1. Debugging your project
Debugging your own project from the command line follows the same processes as we used for the "Hello World"
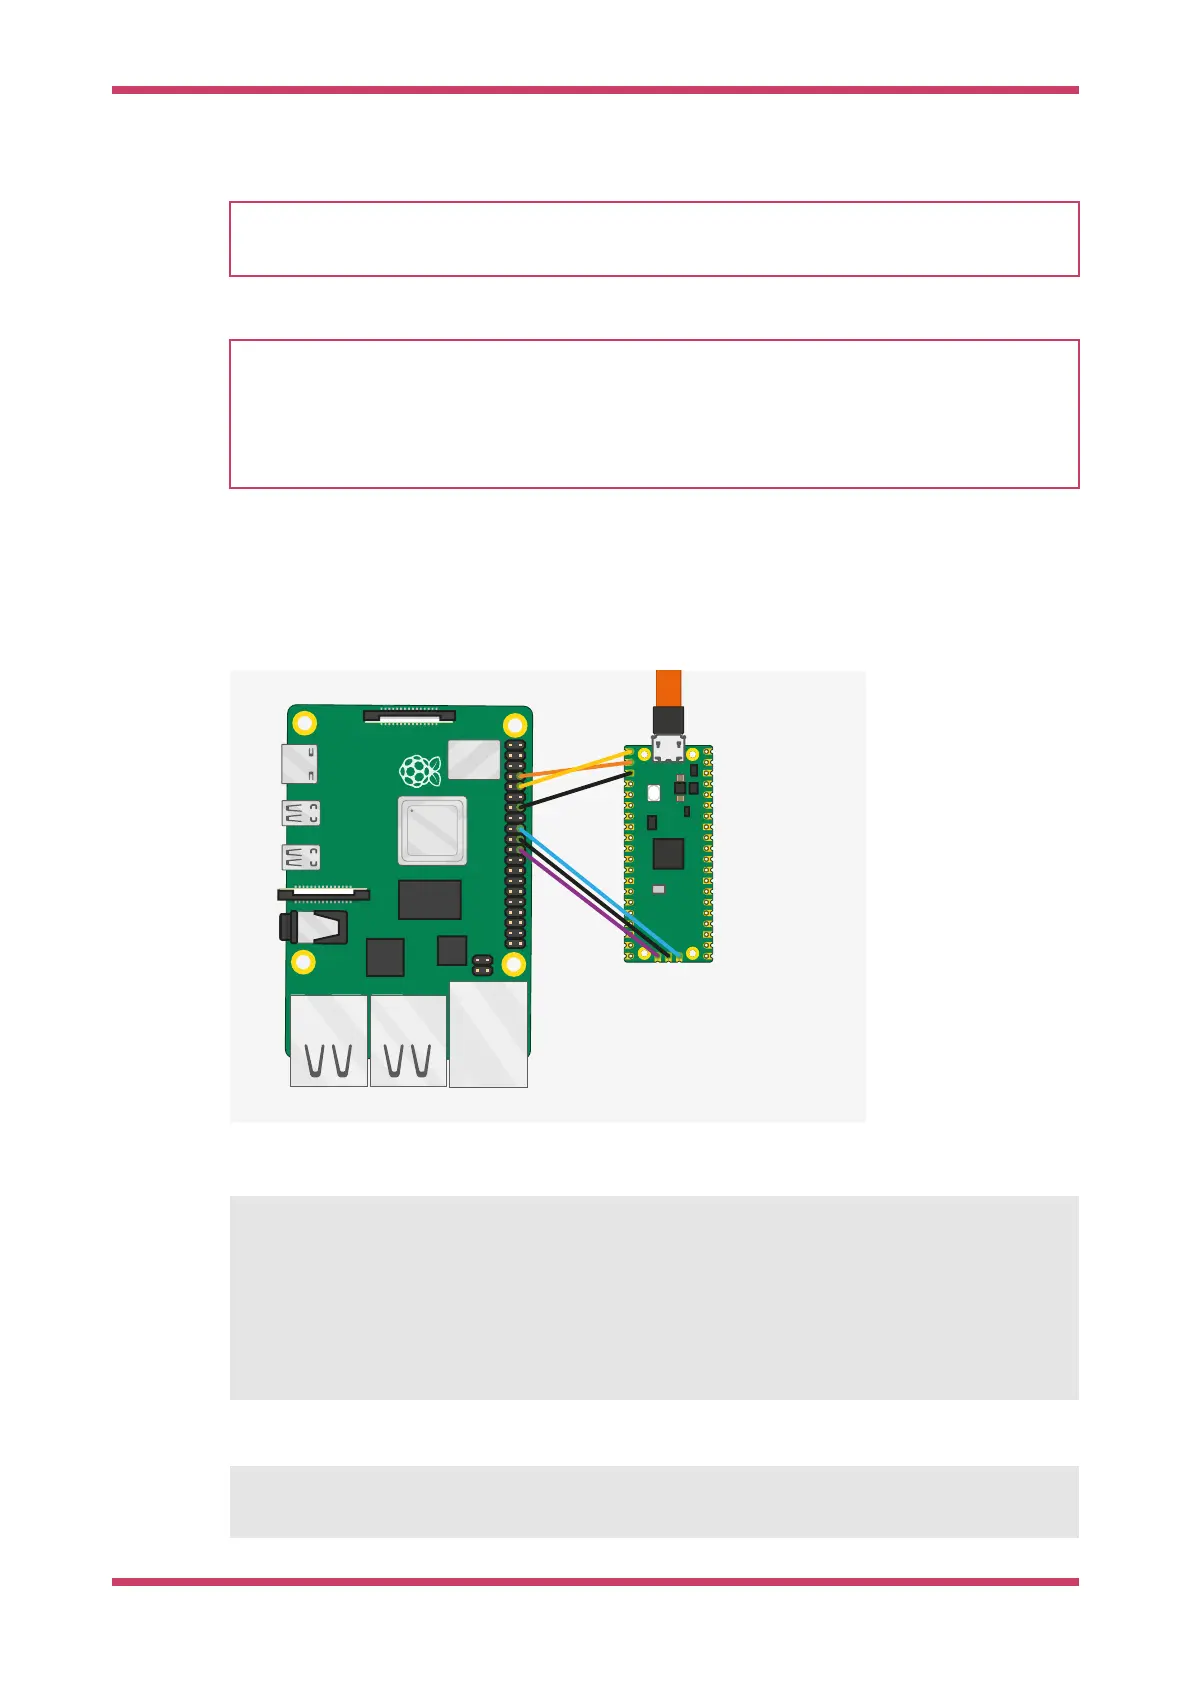
example back in Section 6.3. Connect your Raspberry Pi and the Raspberry Pi Pico as in Figure 11.
Figure 11. A Raspberry
Pi 4 and the Raspberry
Pi Pico with UART and
SWD debug port
connected together.
Both are jumpered
directly back to the
Raspberry Pi 4 without
using a breadboard.
Then go ahead and build a debug version of your project using CMAKE_BUILD_TYPE=Debug as below,
$ cd ~/pico/test
$ rmdir build
$ mkdir build
$ cd build
$ export PICO_SDK_PATH=../../pico-sdk
$ cmake -DCMAKE_BUILD_TYPE=Debug ..
$ make
Then open up a terminal window and attach OpenOCD using the raspberrypi-swd interface.
$ openocd -f interface/raspberrypi-swd.cfg -f target/rp2040.cfg
Getting started with Raspberry Pi Pico
8.1. Debugging your project 32