7.2. Loading a Project
Go ahead and open the pico-examples folder by going to the Explorer toolbar (Ctrl + Shift + E), selecting "Open Folder,"
and nagivating to, /home/pi/pico/pico-examples in the file popup. Then click "OK" to load the Folder into VSCode.
As long as the CMake Tools extension is installed, after a second or so you should see a popup in the lower right-hand
corner of the vscode window.
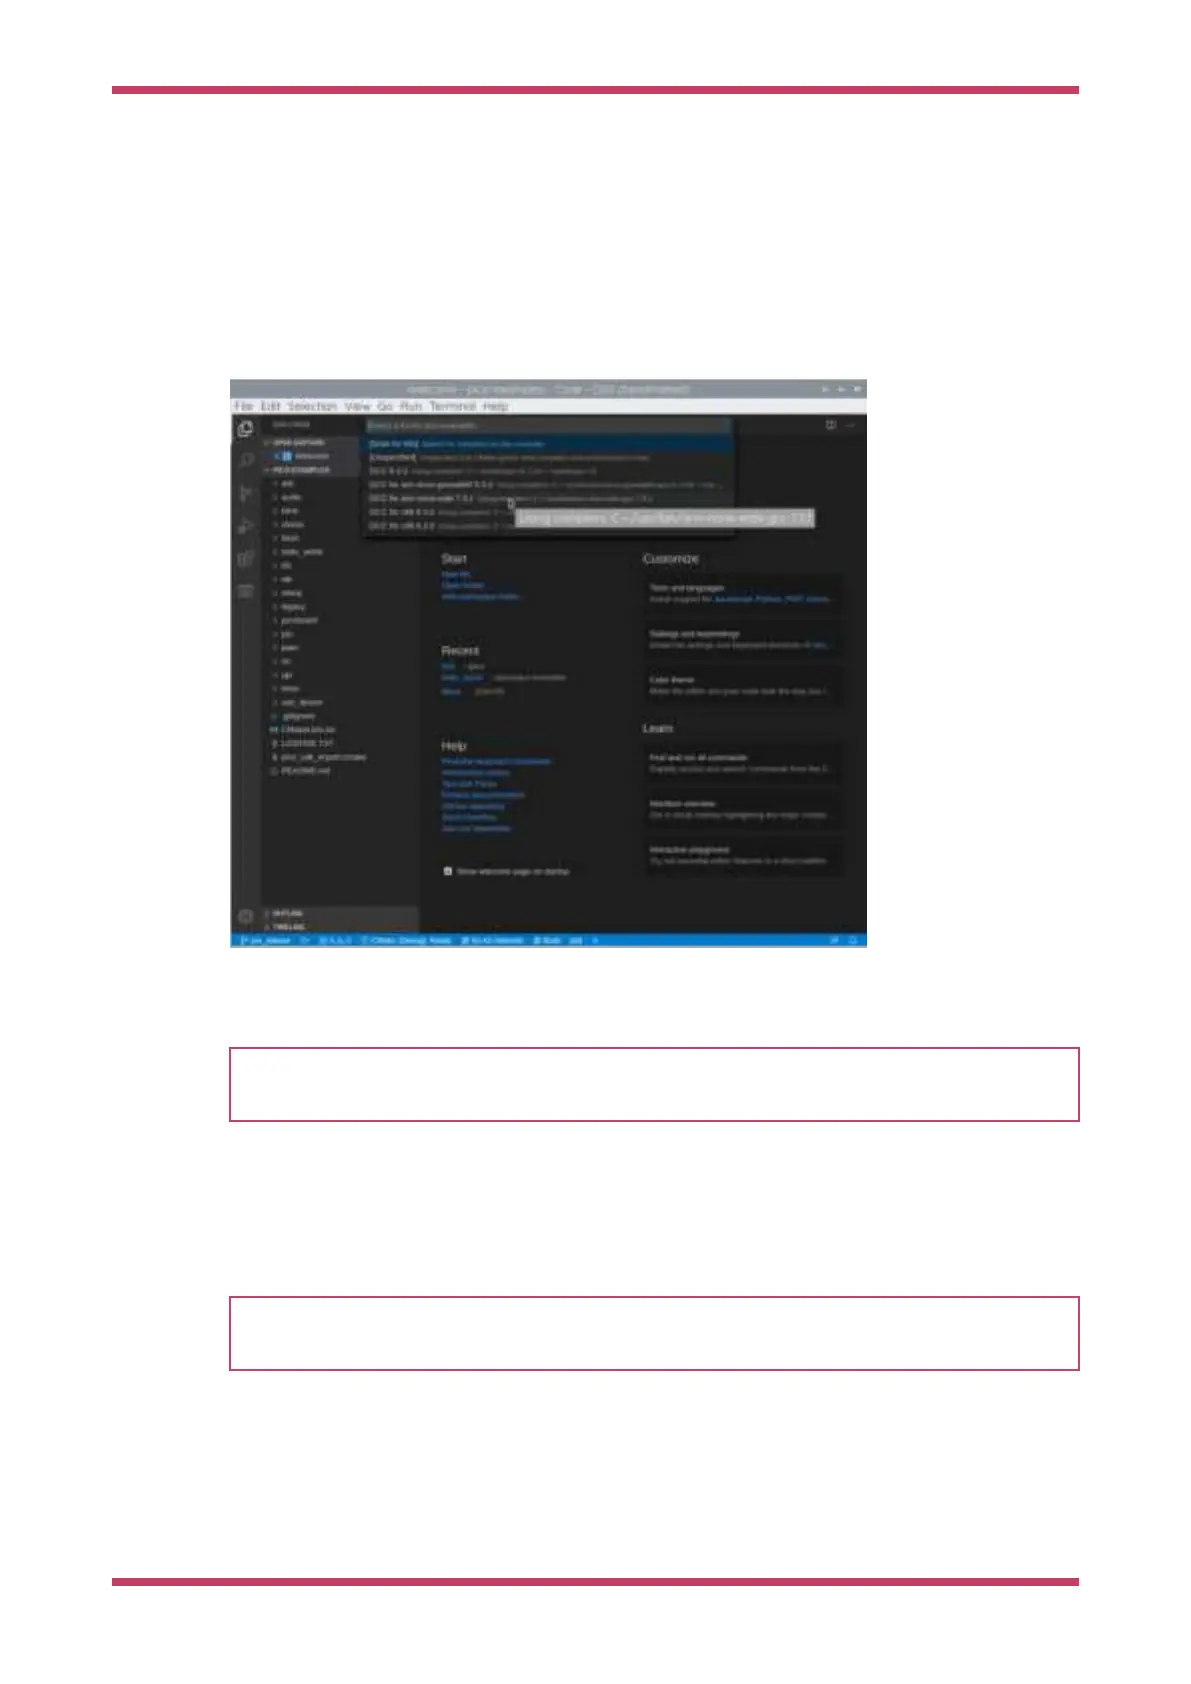
Hit "Yes" to configure the project. You will then be prompted to choose a compiler, see Figure 8,
Figure 8. Prompt to
choose the correct
compiler for the
project.
and you should select GCC for arm-none-eabi from the drop down menu.
TIP
If you miss the popups, which will close again after a few seconds, you can configure the compiler by clicking on "No
Kit Selected" in the blue bottom bar of the VSCode window.
You can then either click on the "Build" button in the blue bottom bar to build all of the examples in pico-examples folder,
or click on where it says "[all]" in the blue bottom bar. This will present you with a drop down where you can select a
project. For now type in "hello_usb" and select the "Hello USB" executable. This means that VSCode will only build the
"Hello USB" example, saving compile time.
TIP
You can toggle between building "Debug" and "Release" executables by clicking on where it says "CMake: [Debug]:
Ready" in the blue bottom bar. The default is to build a "Debug" enabled executable ready for SWD debugging.
Go ahead and click on the "Build" button (with a cog wheel) in the blue bottom bar of the window. This will create the
build directory and run CMake as we did by hand in Section 3.1, before starting the build itself, see Figure 9.
Getting started with Raspberry Pi Pico
7.2. Loading a Project 26