IMPORTANT
If Pico B is a USB Host then you must connect VBUS to VBUS, not VSYS to VSYS, so that Pico B can provide 5V on its
USB connector. If Pico B is using USB in device mode, or not using its USB at all, this is not necessary.
Install Picoprobe driver (only needed on Windows)
The Picoprobe device has two usb interfaces:
1. A class-compliant CDC UART (serial port), which means it works on Windows out of the box
2. A vendor-specific interface for SWD probe data. This means we need to install a driver to make it work.
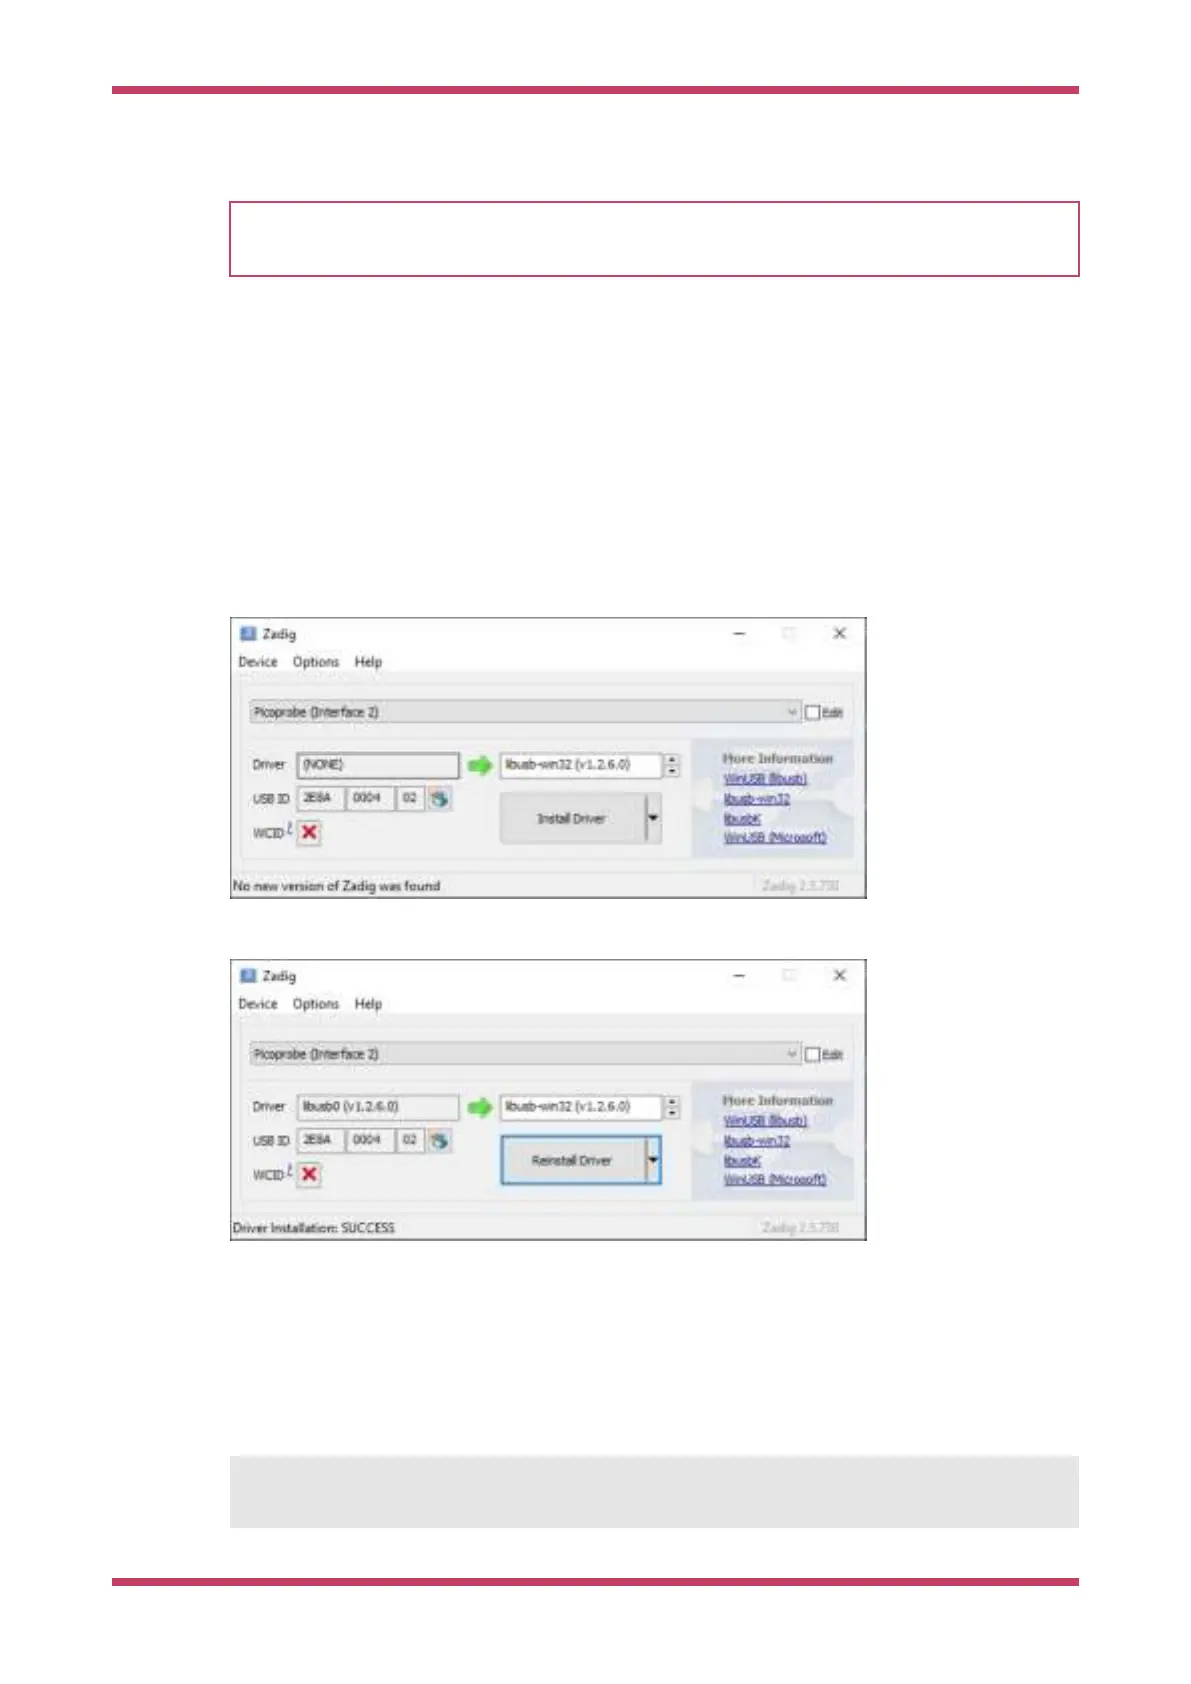
We will use Zadig (http://zadig.akeo.ie) for this.
Download and run Zadig.
Select Picoprobe (Interface 2) from the dropdown box. Select libusb-win32 as the driver.
Then select install driver.
Using Picoprobe’s UART
Linux
sudo minicom -D /dev/ttyACM0 -b 115200
Getting started with Raspberry Pi Pico
Install Picoprobe driver (only needed on Windows) 62