RT-7200 Auto Hematology Analyzer User’s Manual
7 System Setting
System setting is used to set up system parameters, in main screen, click “Setting”, and go
to System Setting menu as follows:
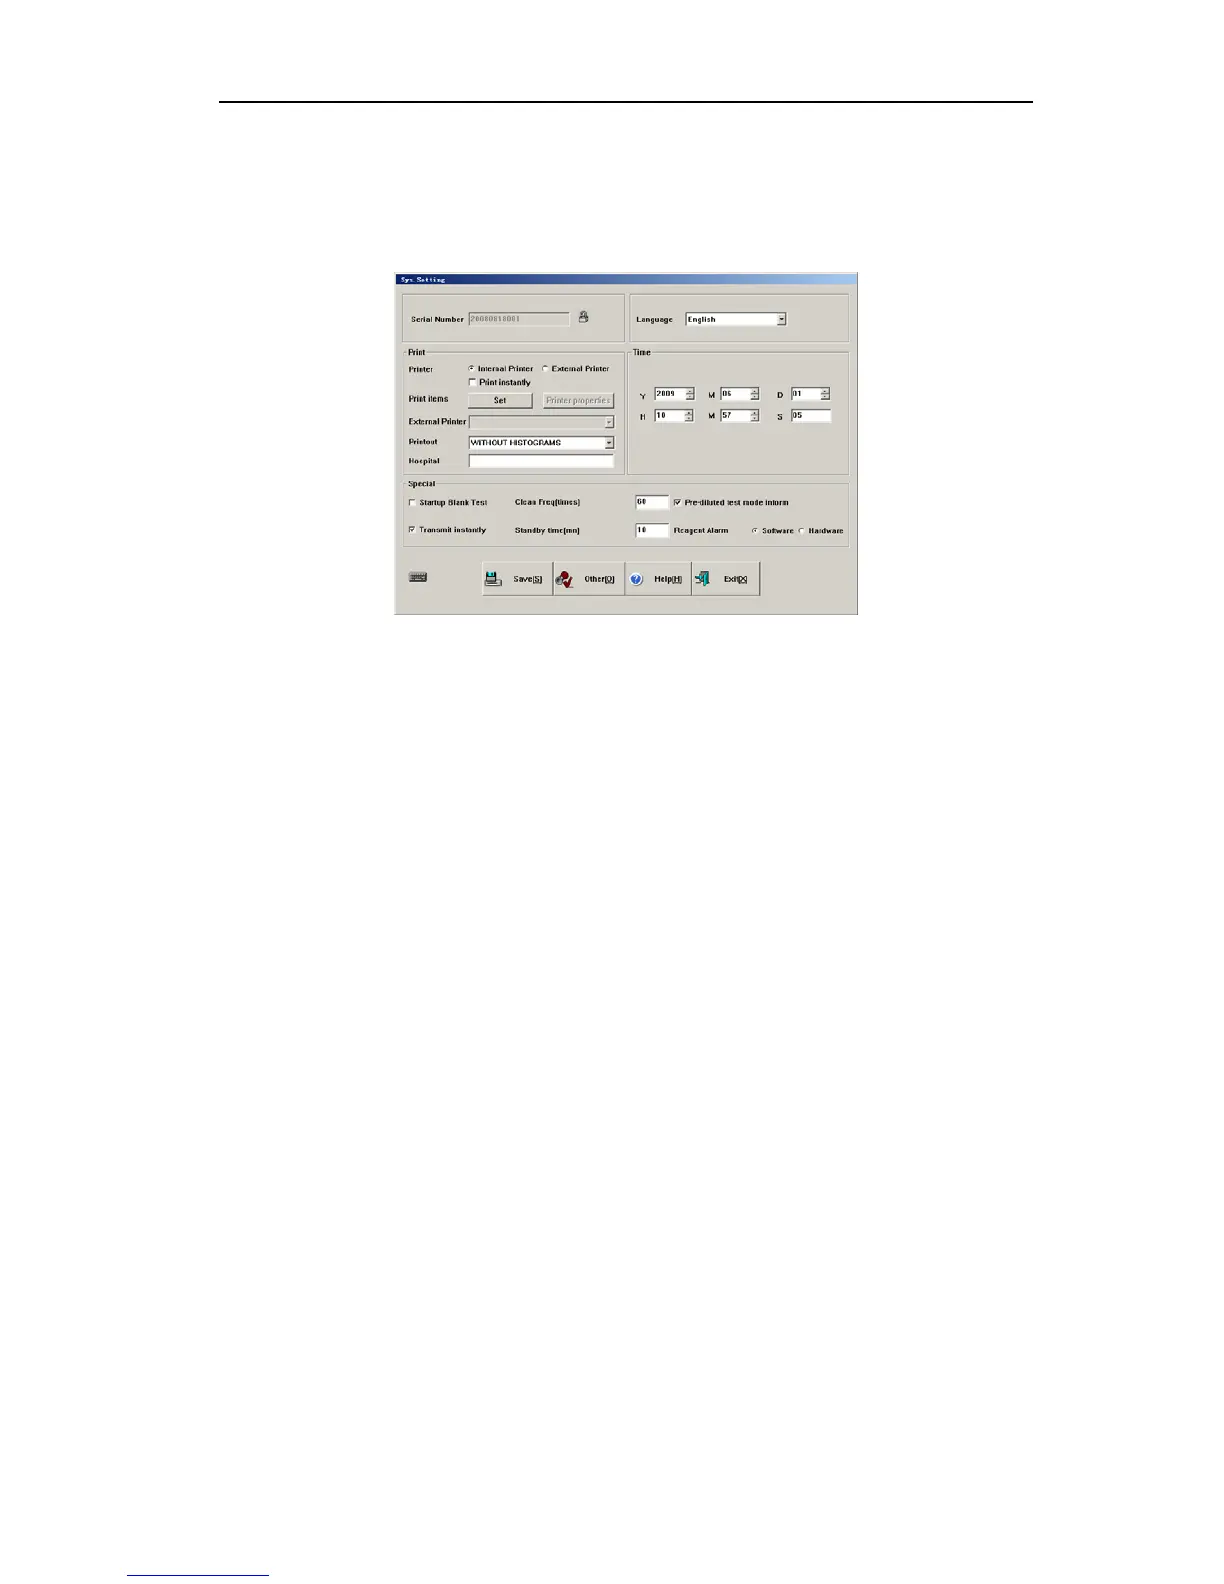
Fig.7-1 System setting
7.1 General setting
¾ Serial number: machine serial number, used to identify one instrument.
¾ Time: input or use adjust bar on the right to modify setting item, set up new time only
after saving.
¾ Print setting:
1. Printer: select internal Print, the instrument’s internal thermal printer will output
result. Meanwhile, you can select Print instantly or not, if selecting Print instantly,
the test result will be automatically printed once the sample test ends. Select
External Print, the system will print by external printer selected.
2. Print item: click “Set” button to open the print item setting menu, you can select the
parameters need printing. The system provides 3 templates for user.
3. Printout: internal printer has 2 formats, with histogram, without histogram.
Parameter names refer to name of 20 hematology parameters. With histogram
means printout includes histogram, without histogram means printout does not
include histogram.
4. Unit name: will be printed in report title.
¾ Special:
1. Startup blank test: select startup blank test, then start up program for blank test,
otherwise skip blank test.
2. Clean Freq (times): in this box, input test sample quantity, when instrument tested
sample number is above this value, the instrument will run cleaning procedure one
time. If it is set zero, it will not execute automatic cleaning.
3. Pre-diluted test mode inform: select the box, before pre-diluted peripheral blood
test, inform message will popup.
4. Transmit instantly: After sample test, the result will transfer to the computer by
RS-232 serial port instantly.
36