EasyManua.ls Logo

Rayto RT-7600S - User Manual

Rayto RT-7600S
53 pages
Print Icon
To Next Page IconTo Next Page
Loading...
RT-7600S
Auto Hematology Analyzer
Users Manual
Copyright: Rayto Life and Analytical Sciences Co., Ltd.
Address: C&D/4F, 7
th
Xinghua Industrial Bldg, Nanhai Rd, Nanshan,
Shenzhen 518067, P.R. China
Rev: 1.3e

Table of Contents

Questions and Answers

  • M
    Monica ReedAug 13, 2025
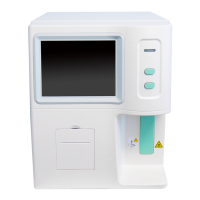
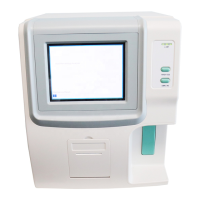
    How to troubleshoot printer issues with Rayto RT-7600S Measuring Instruments?
    • K
      Kevin LongAug 13, 2025
      If the Rayto Measuring Instruments printer isn't printing, first check if it has paper. Then, verify it's properly connected. Finally, check the printer settings within the system settings.
  • T
    Teresa NovakAug 17, 2025
    What to do if QC is not in the target range in Rayto RT-7600S Measuring Instruments?
    • M
      Melinda LarsonAug 17, 2025
      To address a QC issue not being in the target range for Rayto Measuring Instruments, first verify the reagent's validity period. Next, confirm that the settings are correct, adjusting parameters if necessary. Ensure the QC process is free from contamination, and consider retesting using an alternative method.
  • R
    Robert BooneAug 21, 2025
    How to fix temperature abnormal on Rayto RT-7600S?
    • A
      Amber PhillipsAug 21, 2025
      If your Rayto Measuring Instruments show a temperature abnormality, navigate to the software's main menu and click “System Info” then “System Status”. Check the environment temperature. If it falls outside the 15°C~35°C range, adjust the instrument's ambient temperature to fall within this range.
  • M
    Michael WigginsAug 25, 2025
    Why Rayto RT-7600S Measuring Instruments cannot be started up?
    • M
      michelle91Aug 25, 2025
      If the Rayto Measuring Instruments cannot be started, ensure that the instrument is powered on and check that the power plug is securely connected. Also, verify the voltage.
  • R
    Russell SilvaAug 28, 2025
    What to do if parameter test incorrect on Rayto Measuring Instruments?
    • M
      Margaret WellsAug 28, 2025
      To resolve the issue of parameter test incorrect on Rayto Measuring Instruments, calibrate the instrument. Also, check that the sampling needle location is correct. Inspect the fluid syringe for bubbles and ensure the piston slides smoothly, verifying that reagent tubing connections are normal. Finally, check if the solenoid valves are functioning normally.
  • C
    Christine PadillaSep 1, 2025
    Why does Rayto RT-7600S cut power automatically?
    • G
      Gail BeckSep 1, 2025
      If the Rayto Measuring Instruments cut power automatically, check the instrument's power connection and ensure the power cable is not loose. If needed, power off the instrument's internal circuit breaker and then restart it.
  • J
    Jennifer ShawSep 5, 2025
    How to troubleshoot high blank counting value repeatedly on Rayto RT-7600S Measuring Instruments?
    • S
      Samantha FryeSep 5, 2025
      If the blank counting value is repeatedly high on your Rayto Measuring Instruments, check if the reagent is used up, deteriorated, or contaminated. Calibrate the instrument and ensure the temperature and pressure are normal.
  • J
    Jennifer WangSep 9, 2025
    What to do if waste bottle full on Rayto RT-7600S Measuring Instruments?
    • K
      Kathryn CarterSep 9, 2025
      To resolve a 'Waste bottle full' error on Rayto Measuring Instruments, discard the waste.

Summary

How to Use This Manual

Main Graphical Representations

Warnings and Security Attentions

Usage of Reagents

Precautions for handling reagents to prevent skin contact, eye exposure, and ingestion.

Power Supply Safety

Guidelines for safe and stable electrical connections, grounding, and power supply usage.

Instrument Introduction

Product Overview

Details the Auto Hematology Analyzer, its name, and model number.

Technical Specifications

Lists test items, technical parameters, and composition.

Instrument Views

Explains the front and rear panels with diagrams of components and ports.

Installation

Initial Setup Procedures

Steps for unpacking, choosing the environment, and power requirements.

Peripheral Connections

Instructions for connecting reagents, keyboard, mouse, and printer.

Sample Test Procedures

Startup and Preparation

Steps for preparing the instrument and starting a test session.

Blood Sample Handling

Procedures for collecting, mixing, and analyzing blood samples.

Data Entry and Result Interpretation

Editing sample data and understanding parameter/histogram messages.

Test Execution and Output

Performing sample counting, adjusting histograms, and printing results.

Quality Control Methods

L-J QC Methods

Settings, runs, lists, and charts for Levey-Jennings quality control.

X-B QC Methods

Settings, lists, and charts for X-B quality control.

X-R QC Methods

Settings, runs, lists, and charts for X-R quality control.

Calibration Procedures

Preparation and Manual Calibration

Pre-calibration checks and steps for manual calibration.

Auto-calibration Process

Procedure for the instrument to automatically calibrate using samples.

History Data Management

Accessing History Data

Overview of the history data list and selection methods.

History Data Operations

Functions for transferring, searching, deleting, and printing history records.

Detailed History View

Viewing detailed information for a specific sample's history data.

System Setting

General System Configuration

Basic settings for serial number, time, printing, and special modes.

Other System Settings

User, limits, units, communication, and department/doctor information settings.

System Information

System Status and Logs

Checking current system status and reviewing the instrument's operational log.

Statistical Data

Viewing statistics on instrument running time and samples tested.

Shutdown Procedure

Service and Maintenance

Routine Maintenance Procedures

Covers daily maintenance, startup/shutdown, rinsing, and surface cleaning.

Maintenance Program Procedures

Details advanced maintenance tasks including flushing, draining, and blockage removal.

Instrument Cleaning and Testing

Procedures for priming, general cleaning, cleanser soaking, and mechanical checks.

Specialized Service Functions

Includes valve testing, debugging, engineering settings, and machine reset.

Instrument Storage and Reagent Handling

Procedures for stopping instrument use and replacing reagents.

Troubleshooting Guide

Appendix XI Toxic Substance Information

Appendix II List of Product Tubes

Rayto RT-7600S Specifications

General IconGeneral
ModelRT-7600S
Wavelength Range340-800nm
Light SourceHalogen lamp
Absorbance Range0-3.0Abs
ISE ModuleOptional
DetectorPhotodiode
DisplayLCD touch screen
CalibrationAutomatic or manual
InterfaceRS-232
Power Supply220V ±10%, 50/60Hz
Operating Temperature15-30°C

Related product manuals