24 MAN-GD-2300-002
Seeding Adjustments
Seed Rate Change
The drive system is designed for a wide variety of different seed rates. A 13 tooth sprocket for slow rate, 23
tooth for medium rates, and 33 tooth for high rate. To change speeds, select the 13, 23, or 33 tooth sprocket
and place on the hex jackshaft at the lower left side of the drill. Refer to the proper seed chart for sprocket
required.
Meter Rate Adjustments
• Using the seed rate charts, determine the seeding rate for the seed you will be planting and make the
following adjustments.
1. Decide which seed rate sprocket you will need.
2. Change the sprocket if necessary, to the required size.
3. Locate the seed meter adjustment lever.
4. Move it to the indicator number obtained from the charts.
5. Move the adjustment lever to the required setting, from a lower to
higher.
• There are many factors which will affect seeding rates: seed treatment, weight of seed, surface condition
of seed or drive wheel slippage. Minor adjustments may be needed to compensate for these factors.
• The seed rate charts are based on average size seed. This may differ from the seed you are using. Use
the seed rate charts as a guide. For lighter than average seed, the setting should be increased. For
heavier than average seed, the setting should be decreased.
• To determine seed rates for seeds not listed on the charts, compare weight and size to those listed and
use a similar setting.
• Field conditions will affect seeding rates. When seeding check the amount of seed you are using by
noting acres or square feet seeded, amount of seed added to seeder, and level of seed in the seed box. If
you suspect that you are seeding more or less seed than desired, and you have accurately calibrated the
seeder to your seed, you may need to adjust the seeding rate slightly to compensate for field conditions.
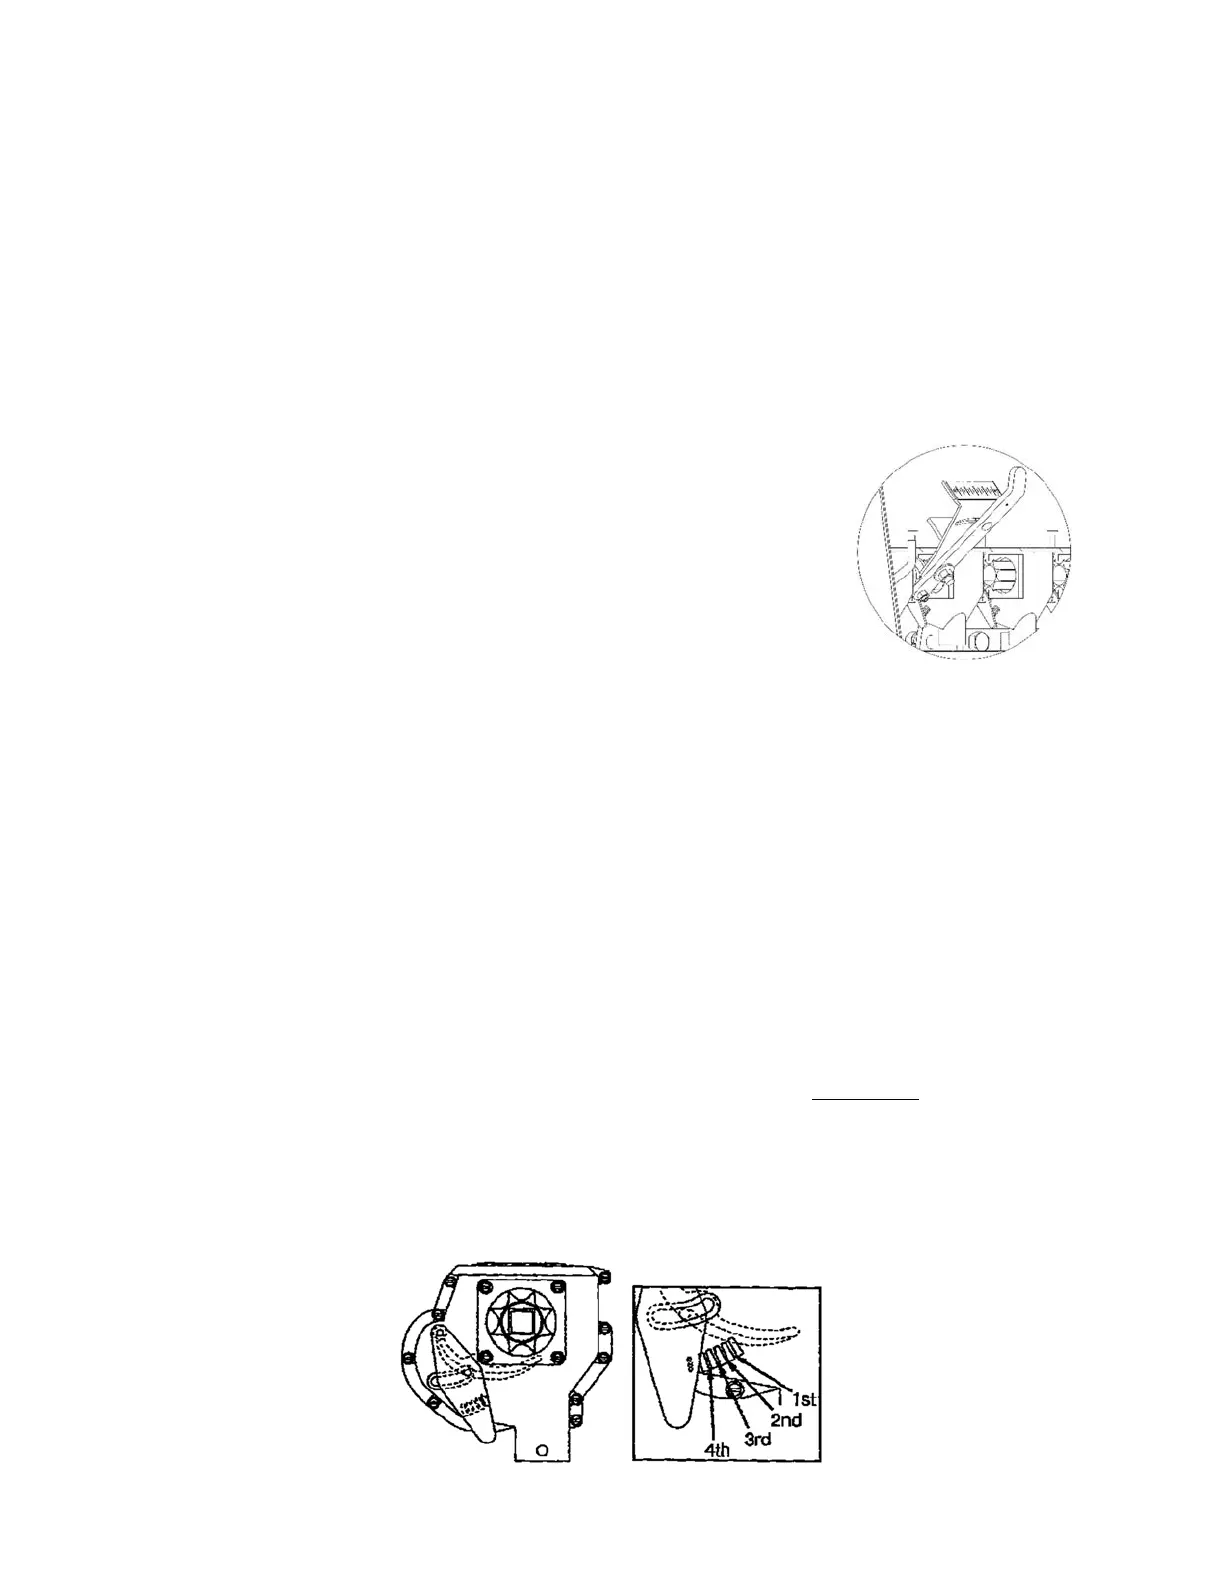
• This seeder is equipped with a four-position meter gate on each seed meter. The 1
st
gate position is for
small seeds, second and third and fourth positions are for larger seeds. Make Sure all gates are in the
same position before seeding. The wide-open position will allow complete clean out of the seed cup. DO
NOT open the gate to the wide-open position with seed in the box unless complete clean out is
desired. Set the gate so that seed must be metered by the fluted roll, seed should not be able to flow past
the gate without the meter roll turning. The gate may crack large seeds if it is set too close to the flutes.
 Loading...