19A-80
COOLING
Engine cooling fan assembly: Removal - Refitting
F4R
19A
a
REMOVAL
I - REMOVAL PREPARATION OPERATION
a Position the vehicle on a two-post lift (see Vehicle:
Towing and lifting) (02A, Lifting equipment).
a Disconnect the battery (see Battery : Removal -
Refitting) (80A, Battery).
a Remove:
-the engine cover,
-the engine undertray bolts,
-the engine undertray,
-the front wheels (see Wheel: Removal - Refitting)
(35A, Wheels and tyres),
-the front section of the front wheel arch liners (see
Front wheel arch liner: Removal - Refitting)
(55A, Exterior protection),
-the front bumper (see Front bumper: Removal -
Refitting) (55A, Exterior protection),
-the upper air deflector,
-the side air deflectors,
-the accessories belt (see 11A, Top and front of
engine, Accessories belt: Removal - Refitting,
page 11A-7) ,
-the headlights (see Front headlight: Removal -
Refitting) (80B, Headlights),
-the front bumper supports (see Front bumper
support: Removal - Refitting) (42A, Front upper
structure),
-the audible warning (see Horn: Removal - Refit-
ting) (82B, Horn),
-the front impact cross member (see Front impact
cross member: Removal - Refitting) (41A, Front
lower structure),
-the bonnet catch (see Bonnet latch: Removal -
Refitting) (52A, Non-side opening element mecha-
nisms).
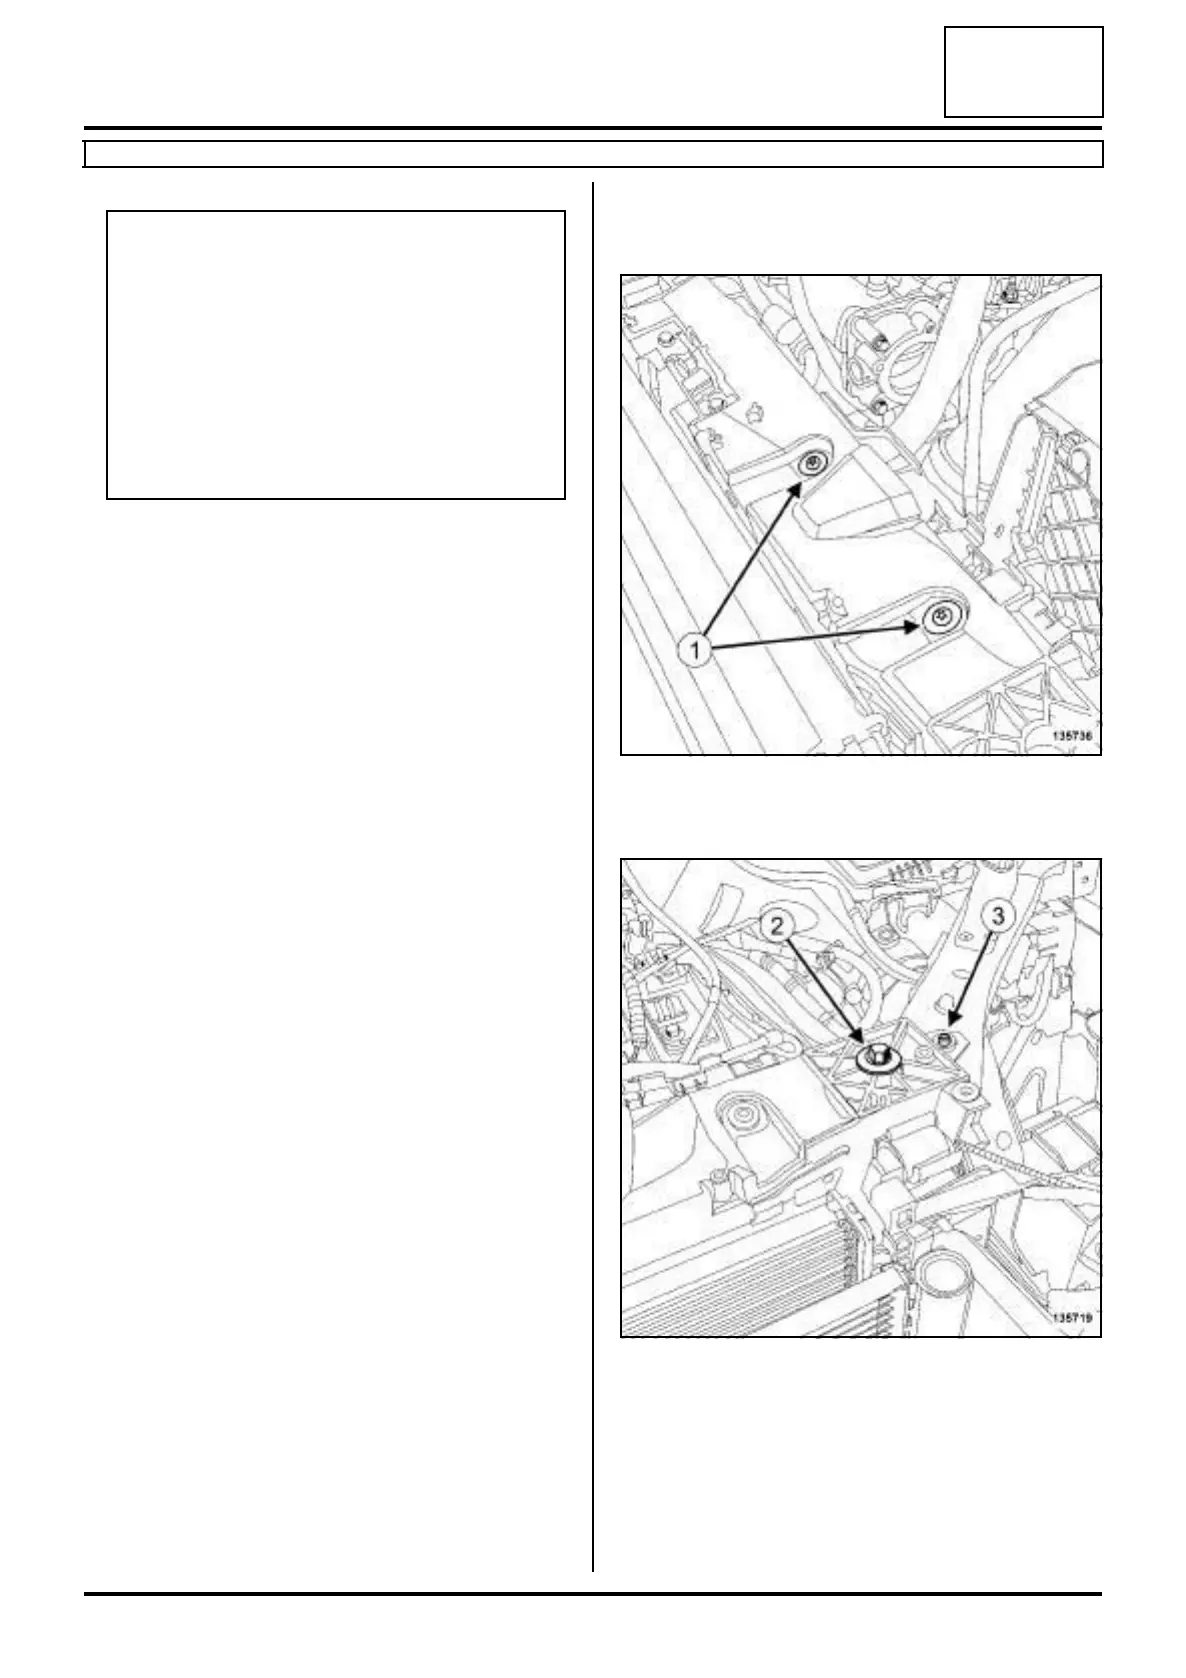
a Remove the bolts (1) of the wiring channel from the
engine cooling fan assembly.
a Remove:
- the upper bolts (2) from the front end panel,
- the front end panel clips (3) .
IMPORTANT
When working in the engine compartment, take
care as the radiator fan(s) may start up unexpec-
tedly (risk of being cut).
To avoid any risk of serious burns when the
engine is hot:
-do not open the expansion bottle cap,
-do not drain the cooling system,
-do not open the bleed screw(s).
135736
135719