2
Getting Started
46
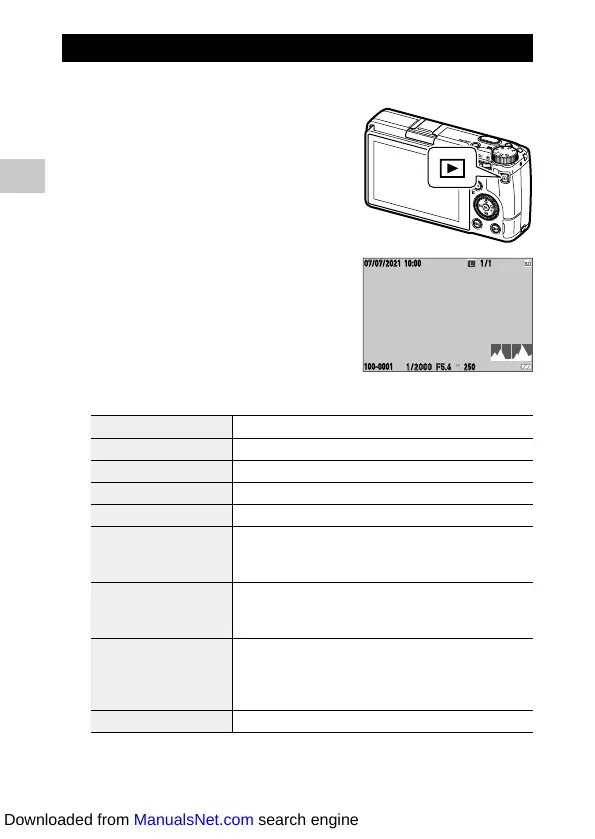
Viewing the Captured Images
Review the captured image on the monitor.
1 Press g.
The camera switches to the playback mode
and the last image you took is displayed.
(Single image display)
2 View an image.
The following operations are available.
cd/Flick Displays the previous or next image.
i Deletes the image. (p.96)
p to the right/Pinch out Magnifies the image.
p to the left/Pinch in In magnified view: Reduces the image.
abcd/Slide In magnified view: Moves the magnified area.
Press n/Double-tap Magnifies the image with the magnification ([x4], [x8], [x16],
[100%]) set in [Quick Zoom] of the D3 menu. (p.127)
In magnified view: Returns to the single image display.
n to the left or right/r Displays the previous or next image.
In magnified view: Displays the previous or next image without
changing the magnification.
j Switches between [Standard Info. Display], [Detailed Info. Display],
and [No Information Display].
In magnified view: Switches between [Standard Info. Display] and
[No Information Display].
k Displays the playback functions setting screen. (p.91)
1 1
/
100-0001
1/2000 F5.6
250
10:00
07/07/2021
Downloaded from ManualsNet.com search engine

 Loading...