84 • Chapter 6: Maintenance GX-3R Operator’s Manual
Replacing the Hydrophobic Dust Filter
Some GX-3Rs have a hydrophobic dust filter that is not attached to the filter gasket. When
replacing the hydrophobic dust filter on one of these GX-3Rs, remove the filter and the gasket
and replace it with a filter gasket/hydrophobic dust filter assembly.
1 . Verify that the GX-3R is off.
2 . Turn the GX-3R upside down.
3 . Use a small Phillips screwdriver to unscrew the two screws holding the bottom cover to
the rest of the GX-3R’s case. Only unscrew them until the heads are flush with the edge
of the bottom cover.
4 . Using a small flat blade screwdriver, gently pry each side of the bottom cover away from
the rest of the GX-3R’s case.
5 . Remove the bottom cover from the rest of the GX-3R’s case. The filter gasket/sensor
retainer assembly may come out.
6 . Remove the filter gasket/hydrophobic dust filter assembly.
7 . Install the new filter gasket/hydrophobic dust filter assembly with the gasket tabs facing
down.
8 . Reattach the bottom cover to the GX-3R. Push it onto the GX-3R until it snaps into
place.
9 . Reinstall the two screws that were loosened in Step 3.
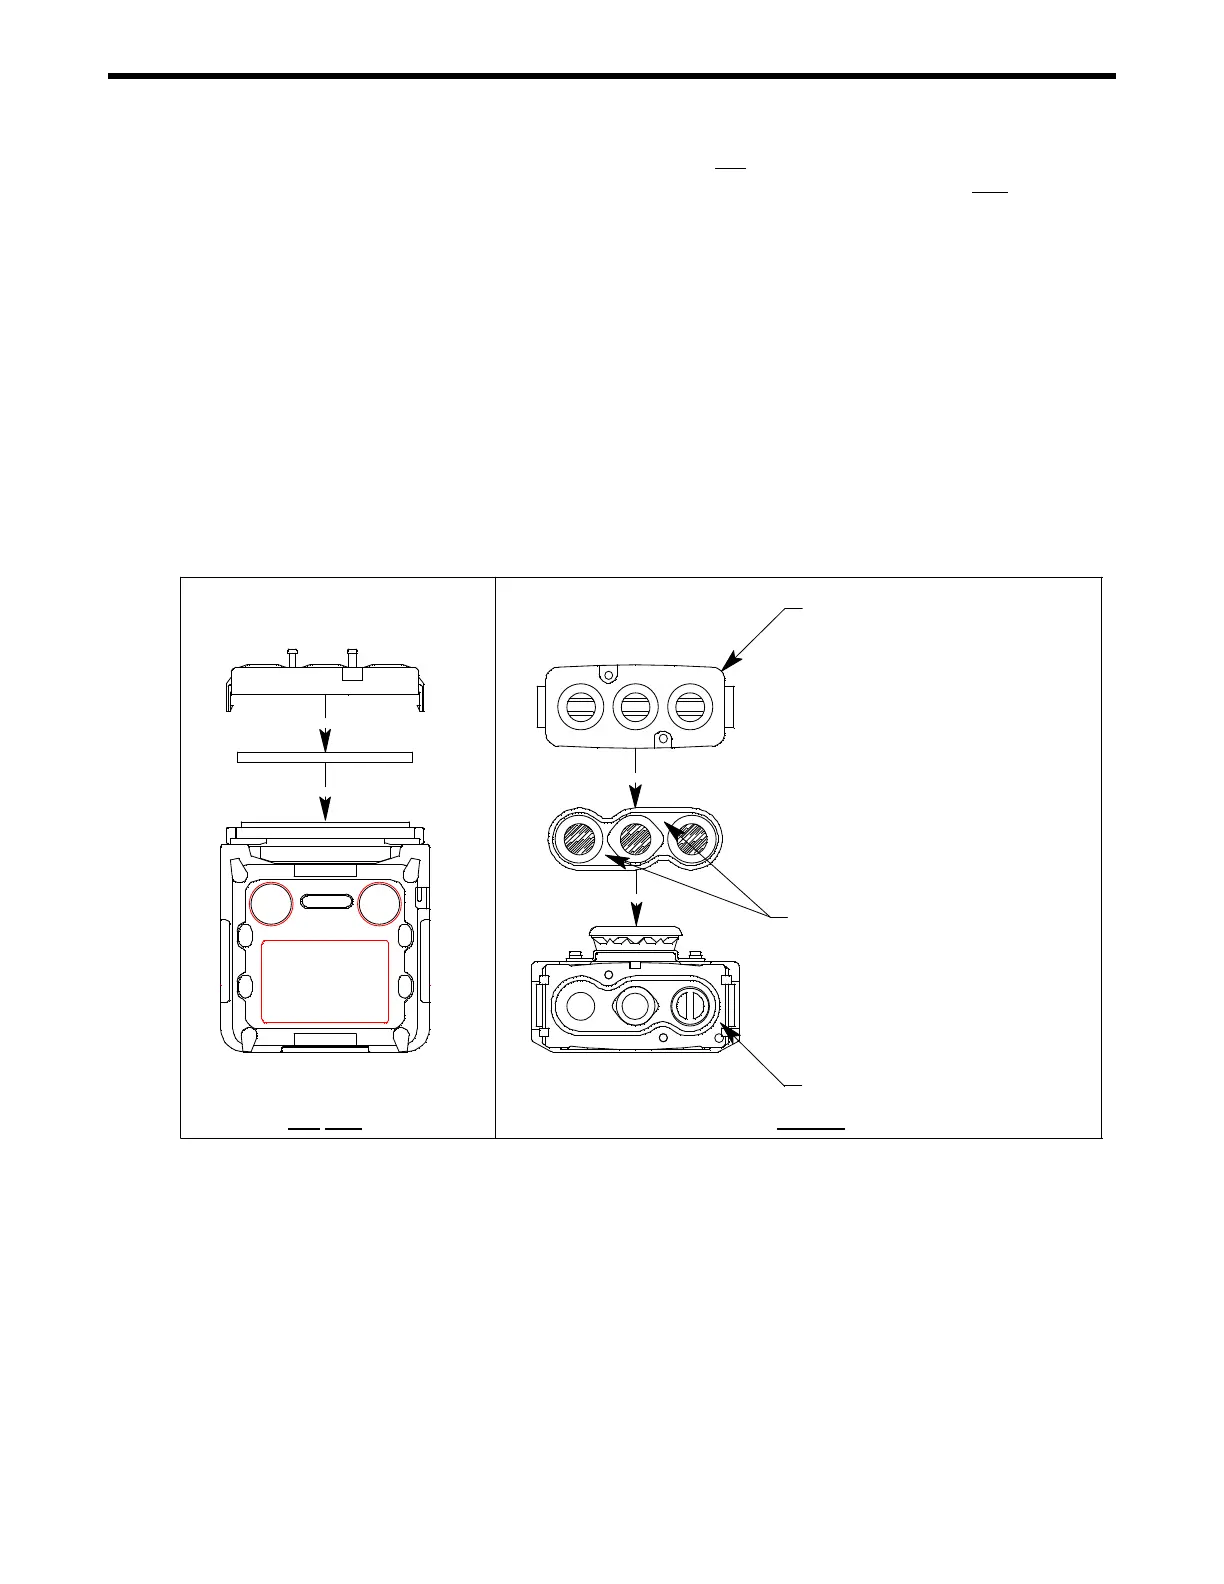
Figure 13: Replacing the Hydrophobic Dust Filter
Filter Gasket/Hydrophobic Dust
Filter Assembly,
gasket tabs on opposite side of this view
Sensor Retainer
Bottom Cover
CO/H
2
S LEL O
2
POWER
MODE
GX-3R
AIR
Side View Top View

 Loading...