www.cel-robox.com
4.0 Using Robox
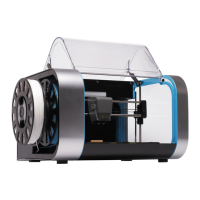
Once unscrewed, pull down the head as shown in the diagram below - you will
hear a ‘snap’ as the head disconnects.
1
2
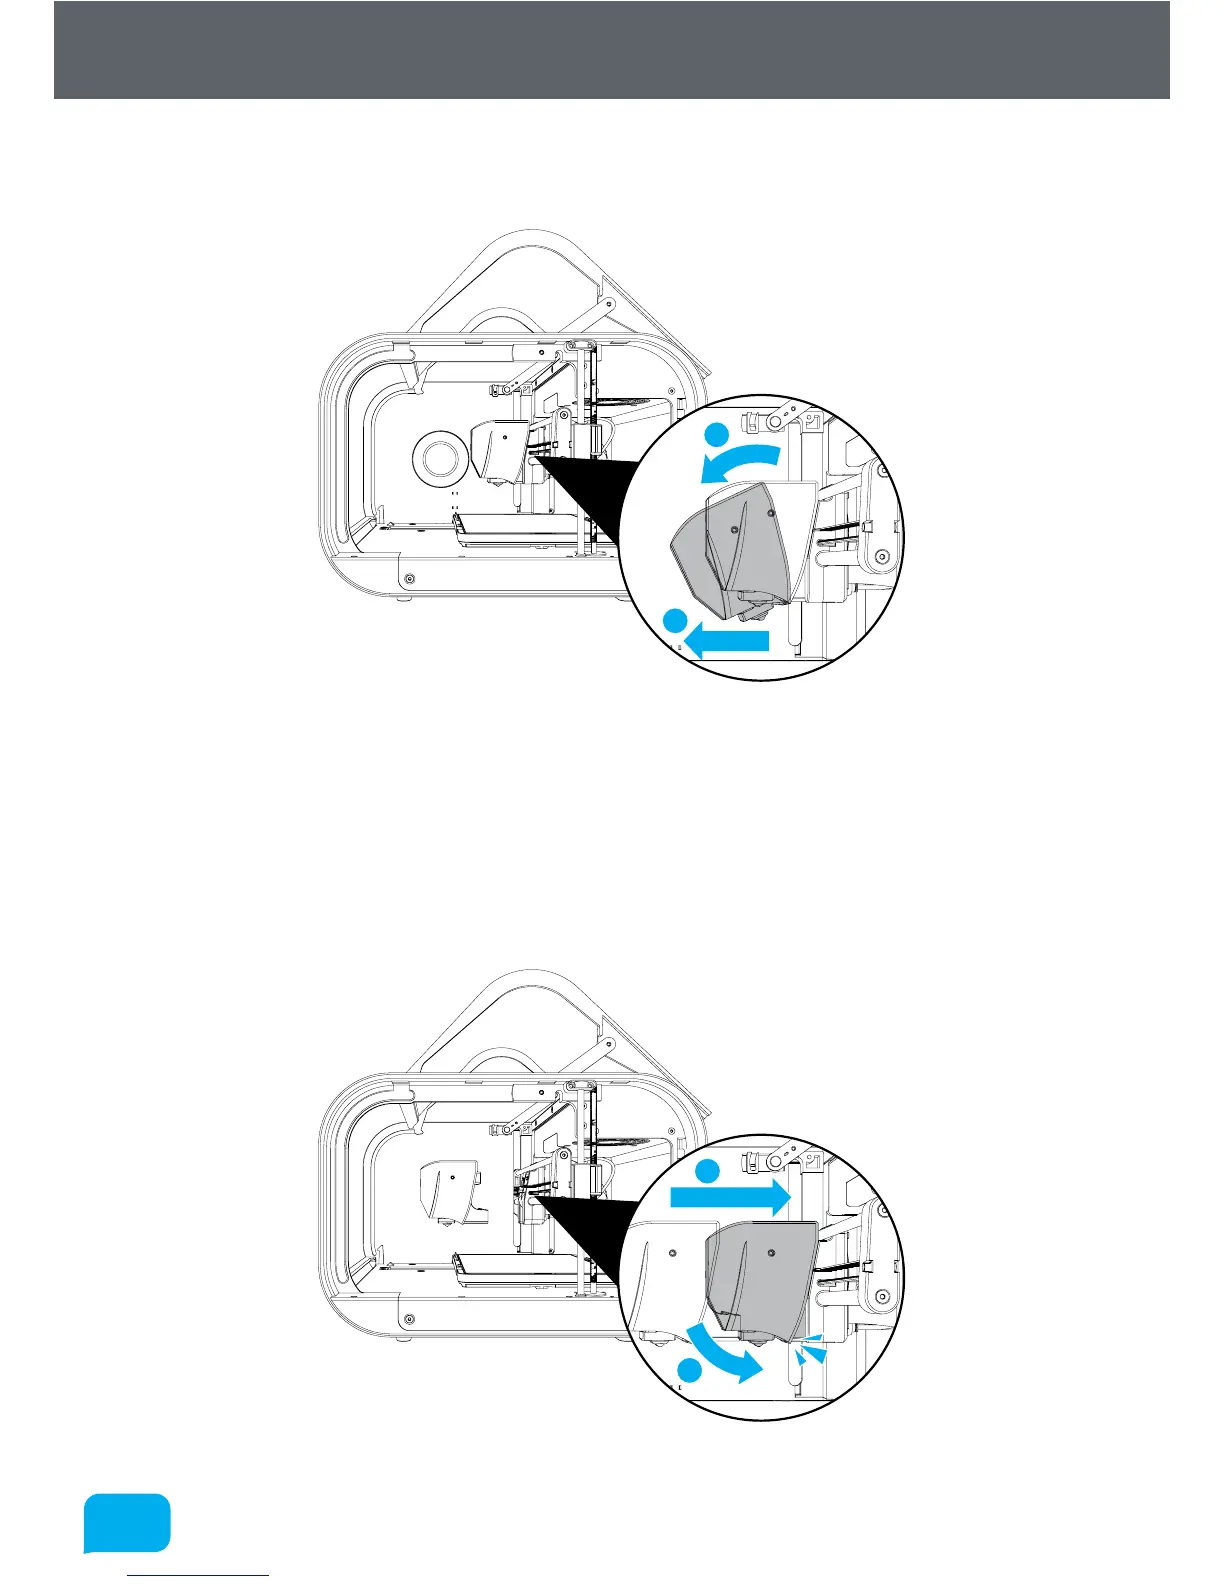
4.4.2 Installing a Head
To install a new head into Robox®, the process is essentially the same in reverse.
First, push the bottom of the head into the carriage until you hear/feel a ‘snap’
- this signifies the head is correctly aligned and located, then simply tighten the
locking wheel until fully tight. You should see the head recognised in AutoMaker™
when you switch the power back on.
1
2