94
Menu Options
6. To execute restore, press the [ENTER/YES] button.
When restore is completed, the screen indicates “Complete.”
If you decide to cancel, press the [EXIT/NO] button.
Saving a Set or User Program to a USB Flash Drive (Export)
This function allows you to save the SET or User Program data to
the connected USB flash drive.
For details, “Export and Import Sets to/from the Optional USB
Flash Drive” (p. 35), “Export and Import User Programs to/from
the Optional USB Flash Drive” (p. 40).
Importing a Set or User Program from a USB Flash Drive
(Import)
This function allows you to import the settings of a SET and User
Program file. You can choose the Set and User Program memory
the settings should be loaded to.
For details, “Export and Import Sets to/from the Optional USB
Flash Drive” (p. 35), “Export and Import User Programs to/from
the Optional USB Flash Drive” (p. 40).
Adding Expansion Sounds (Exp. Snd)
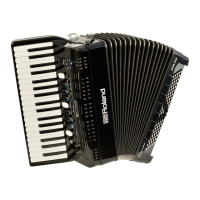
The FR-4x allows you to add new sounds to the internal sound
memory area. The new sounds (files with the “.bin” extension)
must be copied to a USB flash drive, after which you can load them
with the FR-4x.
“Loading” means that they will be copied to a permanent internal
memory area.
There are four such memory areas (“A ,” “ B ,” “C” and “D”).
1. Insert into the FR-4x USB port an optional USB flash
drive that contains the expansion to import.
NOTE
5 Carefully insert the USB flash drives all the way in—until it is
firmly in place.
5 Use a commercially available USB flash drive or a USB flash
drive sold by Roland. However, we cannot guarantee that all
commercially available USB flash drives will work with this
unit.
5 Never turn off the power or remove the USB flash drives or
the power cord while the USB flash drive’s access indicator is
blinking.
2. Press the [MENU] button.
3. Use the [
K
] [
J
] buttons to select “Utility,” and then
press the [ENTER/YES] button (p. 44).
4. Use the [
K
] [
J
] buttons to select “Exp. Snd,” and
then press the [ENTER/YES] button.
Each time you press the [
J
] button, the type names of the
expansion sounds currently loaded into memory areas A–D are
shown consecutively.
The example shown below is for when “VA-SE02: Dallapé Sound
Expansion” is loaded into memory area B.
If no expansion sounds are loaded into a memory area, the
indication “----” is shown.
5. In the Exp D screen, press the [
J
] button again.
6. Use the [–] [+] buttons to specify “Mem Area”
(Memory Area).
Select the memory (A–D) into which you want to load an expansion
sound, or which you want to erase.
7. Press the [
J
] button.
8. Use the [–] [+] buttons to select “Action.”
To add sounds, select “LOAD.”
To erase the data, select “ERAS” (Erase).
Load an Expansion Sound
a. Press the [
J
] button.
The screen shows the root folder of the USB flash drive.
For details on how to select a folder, refer to “How to select the
folder” (p. 36).
b. Use the [–] [+] buttons to select the Expansion
Sound you want to load.
If the file name does not fit in the screen, it scrolls.
c. Press the [
J
] button.
A confirmation message appears.
 Loading...
