11
Turning the Power on and Adjusting the
Volume
1. Turn the volume of the JUNO-X all the way down.
If you’ve connected external speakers or similar audio
equipment to this instrument, turn the volume of those
external devices all the way down as well.
2. Power-on the equipment in the order of JUNO-XÓ
connected devices.
* In order to protect its circuitry, the JUNO-X waits for a while after being
powered on before it begins operating.
3. Raise the volume of the connected equipment to an
appropriate level.
4. Adjust the volume of the JUNO-X with the [VOLUME]
knob.
Turning the Power o
1. Turn the volume of the JUNO-X all the way down.
If you’ve connected external speakers or similar audio
equipment to this instrument, turn the volume of those
external devices all the way down as well.
2. Turn o the equipment in this order: connected
devices Ó JUNO-X.
* If you need to turn o the power completely, rst turn o the unit, then
unplug the power cord from the power outlet. Refer to “To completely
turn o power to the unit, pull out the plug from the outlet” in the “Quick
Start.”
Setting the AUTO OFF function
The power to this unit will be turned o automatically after a
predetermined amount of time has passed since it was last used for
playing music, or its buttons or controls were operated (Auto O
function). If you do not want the power to be turned o automatically,
disengage the Auto O function.
* Unsaved settings are lost when you turn the power o. Before turning the
power o, save (WRITE) the data that you want to keep (p. 44).
* To restore power, turn the power on again.
1. Press the [MENU] (WRITE) button.
2. Use the [ÇSELECTÉ] knob to select “SYSTEM,” and
then press the [ENTER] (INIT) button.
3. Use the [ÇSELECTÉ] knob to select “Auto O” and
use the [- VALUE +] knob to change the setting.
If you don’t want the unit to turn o automatically, choose the
“OFF” setting.
Parameter
[
Ç
SELECT
É
] knob
Value
[- VALUE +] knob
Auto O OFF, 30 (min), 240 (min)
4. To save the edited settings, hold down the [SHIFT]
button and press the [MENU] (WRITE) button.
A conrmation message appears.
If you decide to cancel, press the [EXIT] button.
5. To execute, press the [ENTER] (INIT) button.
Getting Ready to Play
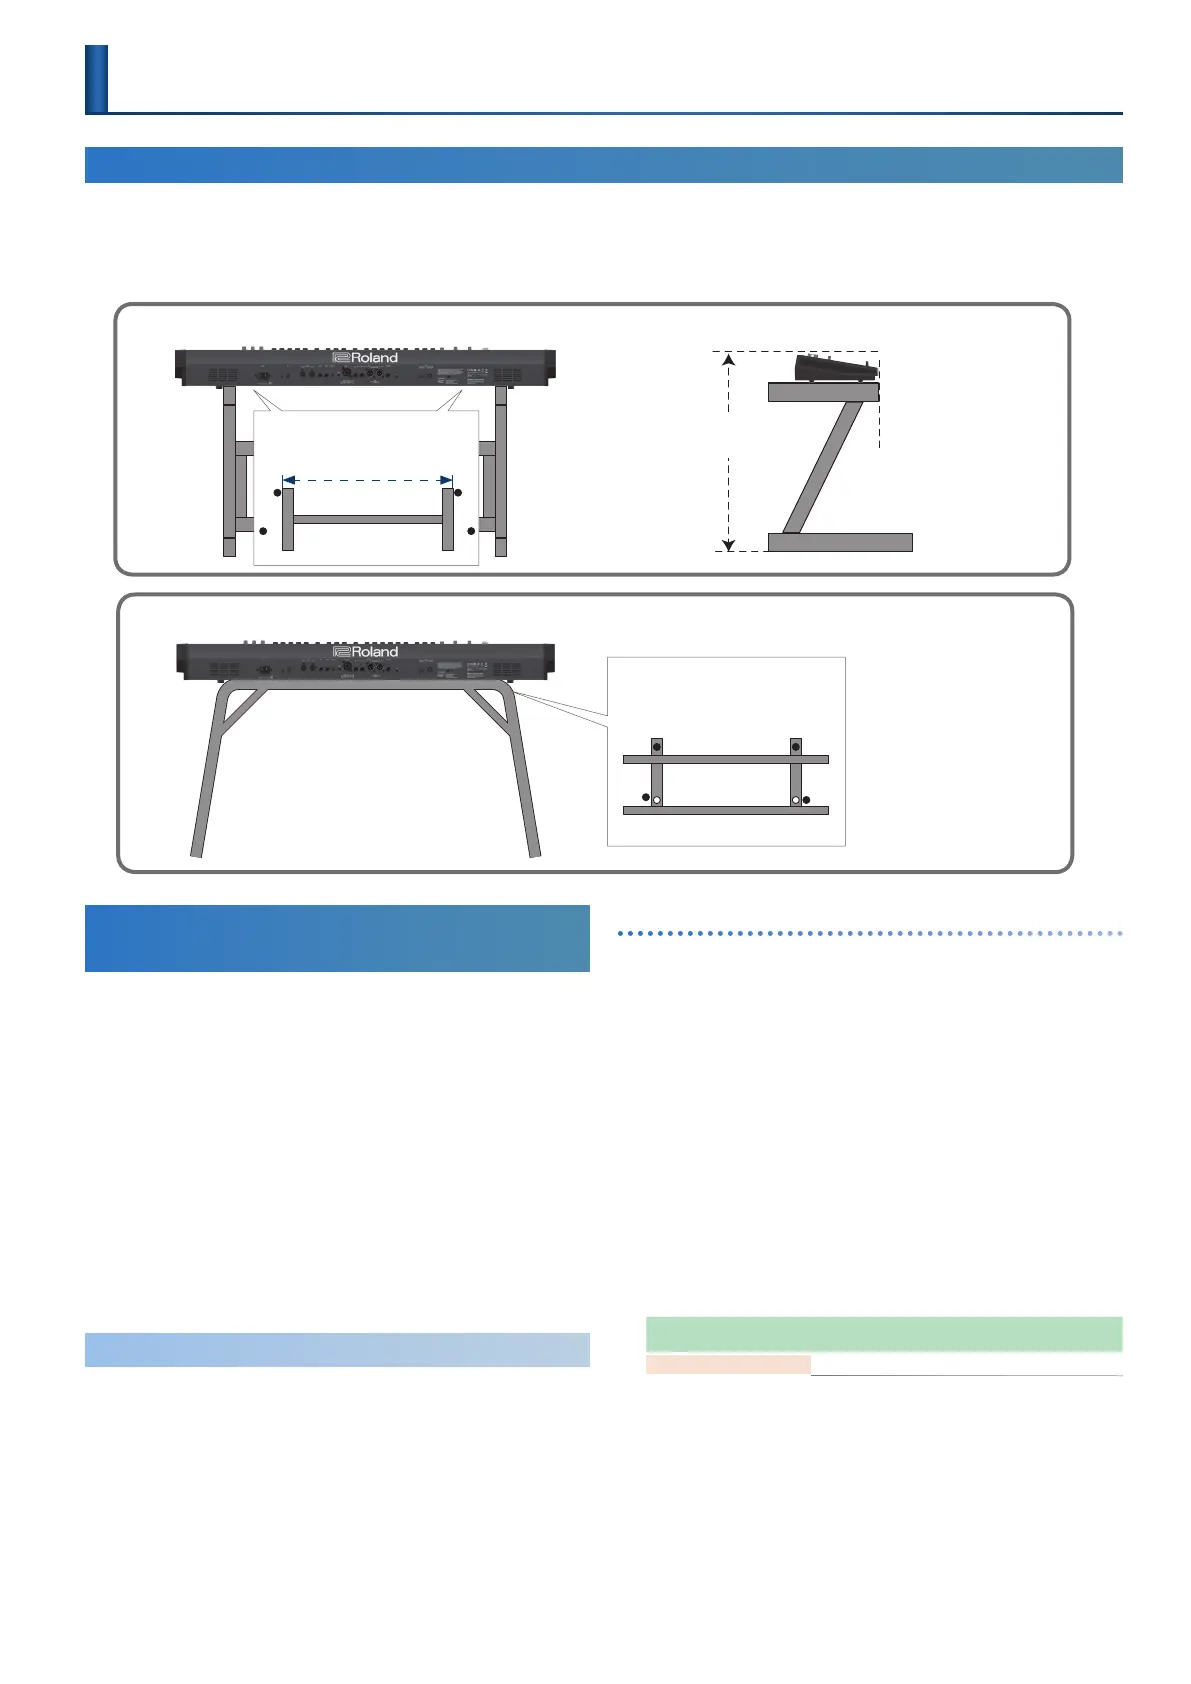
Placing the JUNO-X on a Stand
If you want to place the JUNO-X on a stand, use the Roland KS-10Z or KS-12. Place the JUNO-X on the stand as follows.
Be sure to follow the instructions in the Owner’s Manual carefully when placing this unit on a stand. If it is not set up properly, you risk creating an
unstable situation which could lead to the unit falling or the stand toppling, and may result in injury.
* Be careful not to pinch your ngers when setting up the stand.
KS-10Z
Adjust the horizontal width of the
stand as shown in the illustration.
Top view
Adjust so that the height
does not exceed 1 meter.
Align the side facing the player
of the JUNO-X with the front of
the stand
790 mm (2’ 7” inches)
KS-12
Adjust the width of the stand so
that the two rubber feet located on
the player’s side t into the holes
provided on the stand.
Top view
(Player’s side)

 Loading...


