16
Playing
When you play the keyboard, you hear the sound of the part(s) that you selected in “Selecting the Parts to Perform” (p. 15).
The JUNO-X lets you customize performance-related settings so that you can perform in the way that’s best for you.
Performing Arpeggios
To start arpeggio performance, make the I-ARPEGGIO [ON] button lit.
Ø “I-ARPEGGIO” (p. 18)
Layering Tones and Splitting the
Keyboard
SINGLE
Press the [SINGLE] button when you want to play this instrument using
only one tone without layering.
* Note that once you press the [SINGLE] button, the scene data you were
editing is lost. If you want to keep the data, save the scene before switching
to SINGLE mode.
* The SINGLE setting state is canceled when you switch scenes.
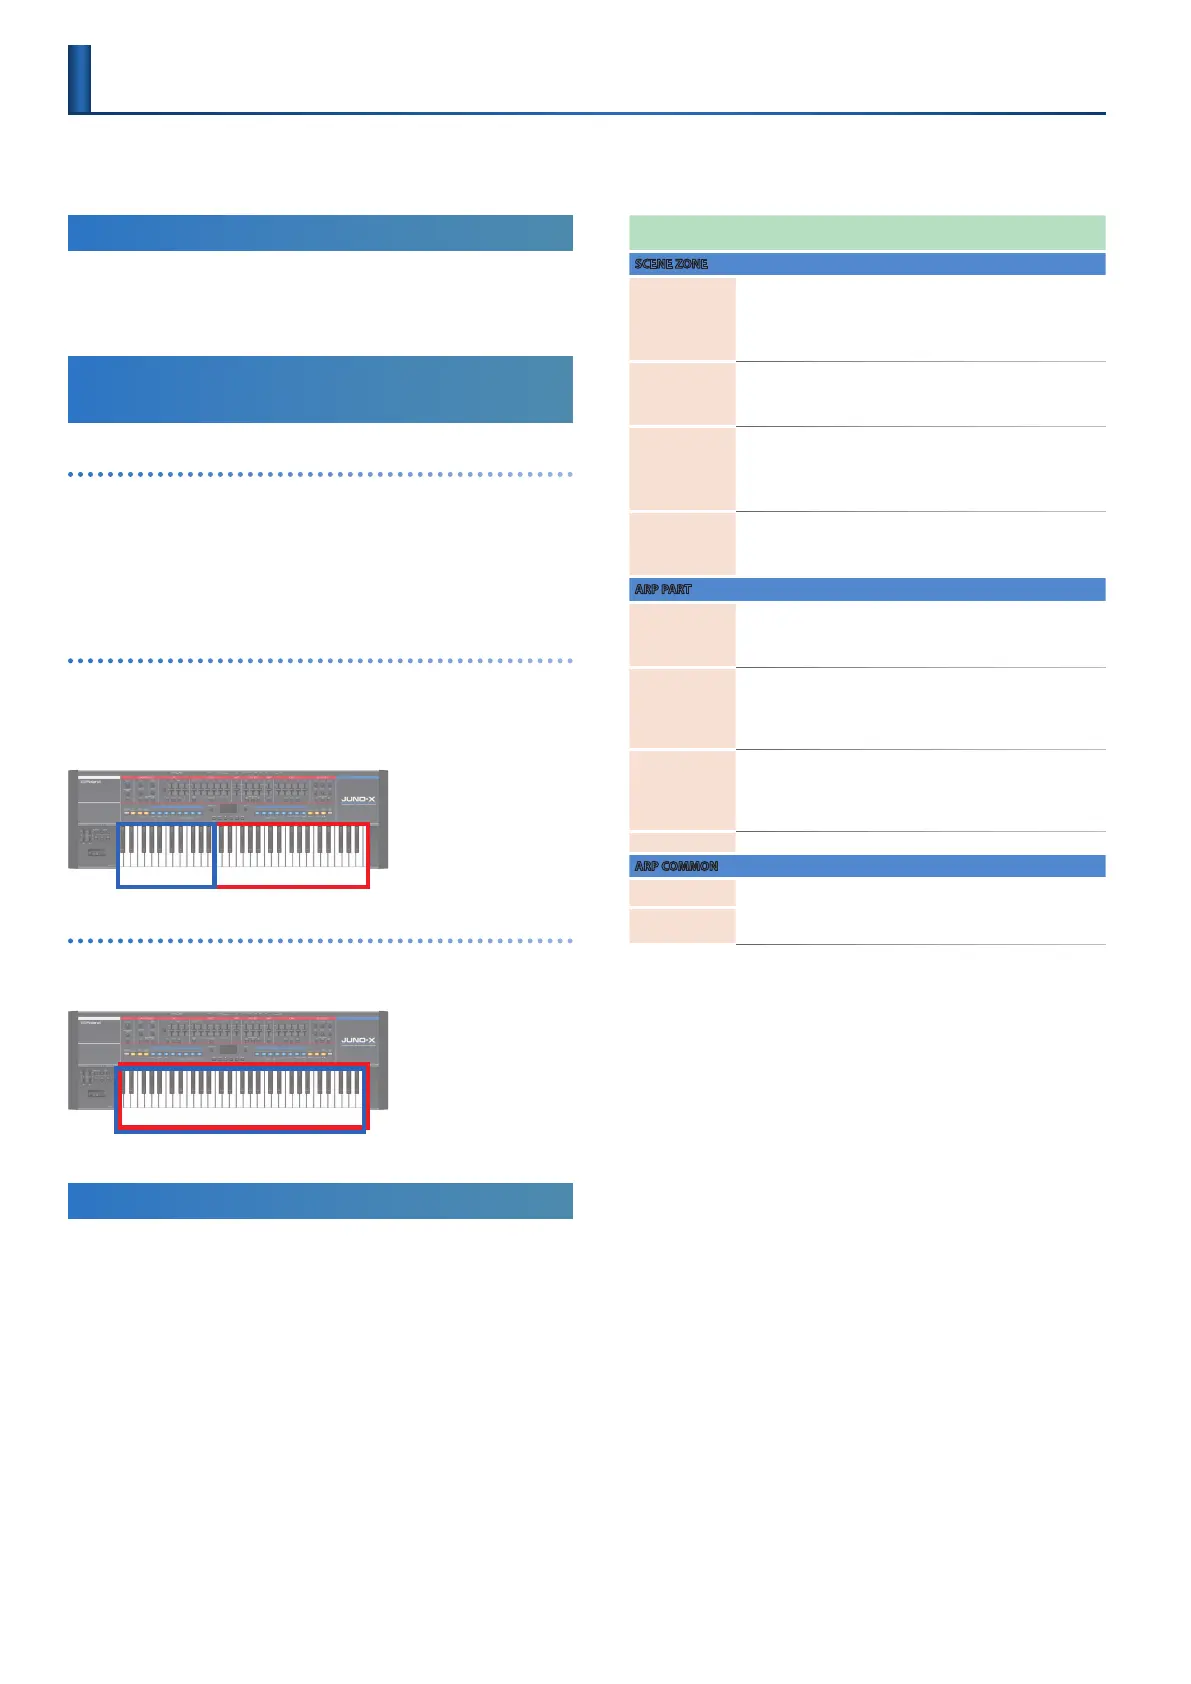
SPLIT
When the [SPLIT] button is on (lit), the keyboard is divided into two
regions that you can play separately. To set the split point (the place
on the keyboard where the regions are divided), hold down the [SPLIT]
button and press the desired key.
JU001
PX028
DUAL
When the [DUAL] button is on (lit), you can play two tones layered
together.
JU001
PX028
+
Specifying the Key Range
By specifying the key range, a sound that you play or an arpeggio
performance can be restricted to a specic region of keys.
For example, you could specify that the left-hand region of the
keyboard plays only the bass part, so that an arpeggiated bass
continues without being aected by what you play in the right-hand
region of the keyboard. Alternatively, you could specify fades between
multiple parts to create gradations between sounds.
1. Press the [MENU] (WRITE) button.
2. Use the [ÇSELECTÉ] knob to select “KEY RANGE
SETTINGS,” and then press the [ENTER] (INIT) button.
3. Use the [ÇSELECTÉ] knob to select the parameter
and use the [- VALUE +] knob to change the value.
Parameter
[ÉSELECTÇ] knob
Value
[- VALUE +] knob
Explanation
SCENE ZONE
Key Rng Low C- –G9
Set the keyboard range in which each part
will sound.
Make these settings when you want dierent
key ranges to play dierent tones.
Specify the lower limit of the key range.
Key Fade Low 0–127
Species the degree to which the part is
sounded by notes played below the Key Rng
Low. If you don’t want the tone to sound at all,
set this parameter to “0.”
Key Rng Upp C- –G9
Set the keyboard range in which each part
will sound.
Make these settings when you want dierent
key ranges to play dierent tones.
Specify the upper limit of the key range.
Key Fade Upp 0–127
Species the degree to which the part is
sounded by notes played above the Key Rng
Upp. If you don’t want the tone to sound at all,
set this parameter to “0.”
ARP PART
K-Range Lo C- –G9
Species the lower pitch limit that is sounded
by the arpeggio. If the arpeggiator attempts to
play a note that is lower than this, the octave
is raised.
K-Range Oct 0–12
Species the number of higher octaves in
which the arpeggio is sounded, relative to
K-Range Lo.
If the arpeggiator attempts to play a note that
is higher than this, the octave is lowered.
Oct Range -3–+3
Species the range of octaves over which the
arpeggio plays.
You can specify whether the arpeggio is
sounded in the octave(s) above (+) or below (-)
the notes you play.
Transpose -36–+36 Shifts the arpeggio notes in semitone steps.
ARP COMMON
In Range Low
C- –G9
Species the range that is detected for
arpeggio performance. Pressing a key outside
the specied range does not aect the
arpeggio function.
In Range Upp
4. To save the settings, press the [SCENE] button and
then press the [MENU] (WRITE) button while holding
down the [SHIFT] button.
The WRITE MENU screen appears.
5. Use the [ÇSELECTÉ] knob to select “SCENE,” and
then press the [ENTER] (INIT) button.
6. Use the [- VALUE +] knob to select the save-
destination, and then press the [ENTER] (INIT) button.
To rename the scene that’s being saved, use the [Í] [Ë]
buttons to move the cursor and use the [- VALUE +] knob to
select the characters.
7. Press the [ENTER] (INIT) button.
A conrmation message appears.
If you decide to cancel, press the [EXIT] button.
8. To execute, press the [ENTER] (INIT) button.

 Loading...


