7
Panel Descriptions
4
OSC (oscillator) section
[PWM/MOD] slider
Changes the waveform modulation, such as the duty cycle of
the square wave.
[ ] slider
Adjusts the level of the square wave or asymmetrical square
wave.
[ ] slider
Adjusts the level of the sawtooth wave.
[SUB] slider
Adjusts the level of the sub oscillator.
[NOISE] slider
Adjusts the level of the noise.
[PITCH] (DETUNE) slider
Adjusts the pitch of the oscillator.
Also, you can press the [PART/FUNC] button to make it light up
blue and then use the [PITCH] (DETUNE) slider to detune the
pitches of the two oscillators.
[SUPER SAW] button
* This button is enabled only when “JUNO-X” is selected for the model.
When this button is on (lit), use the [PWM/MOD] slider to adjust
how much the sawtooth wave is overlapped, and use the [
]
slider to adjust the level.
[PART LEVEL] button
When this button is on (lit), you can use the corresponding
sliders to adjust the volume of parts 1–R.
5
HPF (high-pass lter) section
[FREQ] slider
Species the cuto frequency of the high-pass lter. The
frequency components below the cuto frequency are cut o.
6
FILTER section
[FREQ] slider
Adjusts the cuto frequency of the lter.
[RES] slider
Emphasizes the frequencies around the lter’s cuto frequency.
Larger values produce greater emphasis, creating a unique
synthesizer-like sound.
[KYBD] slider
Varies the lter’s cuto frequency according to the position of
the key.
Raising the slider increases the value, and the cuto increases
with higher notes. Lowering the slider decreases the value, and
the cuto decreases with lower notes.
VINTAGE FILTER [R] [M] [S] buttons
If a vintage type model is selected, these buttons change the
type of lter.
[R] models a Roland lter, and [M] and [S] model the lters of
vintage synthesizers made by other manufacturers.
7
AMP section
[LEVEL] knob
Adjusts the volume.
[GATE] button
When this button is on (lit), the notes play at a specic volume
only while you press the keys.
8
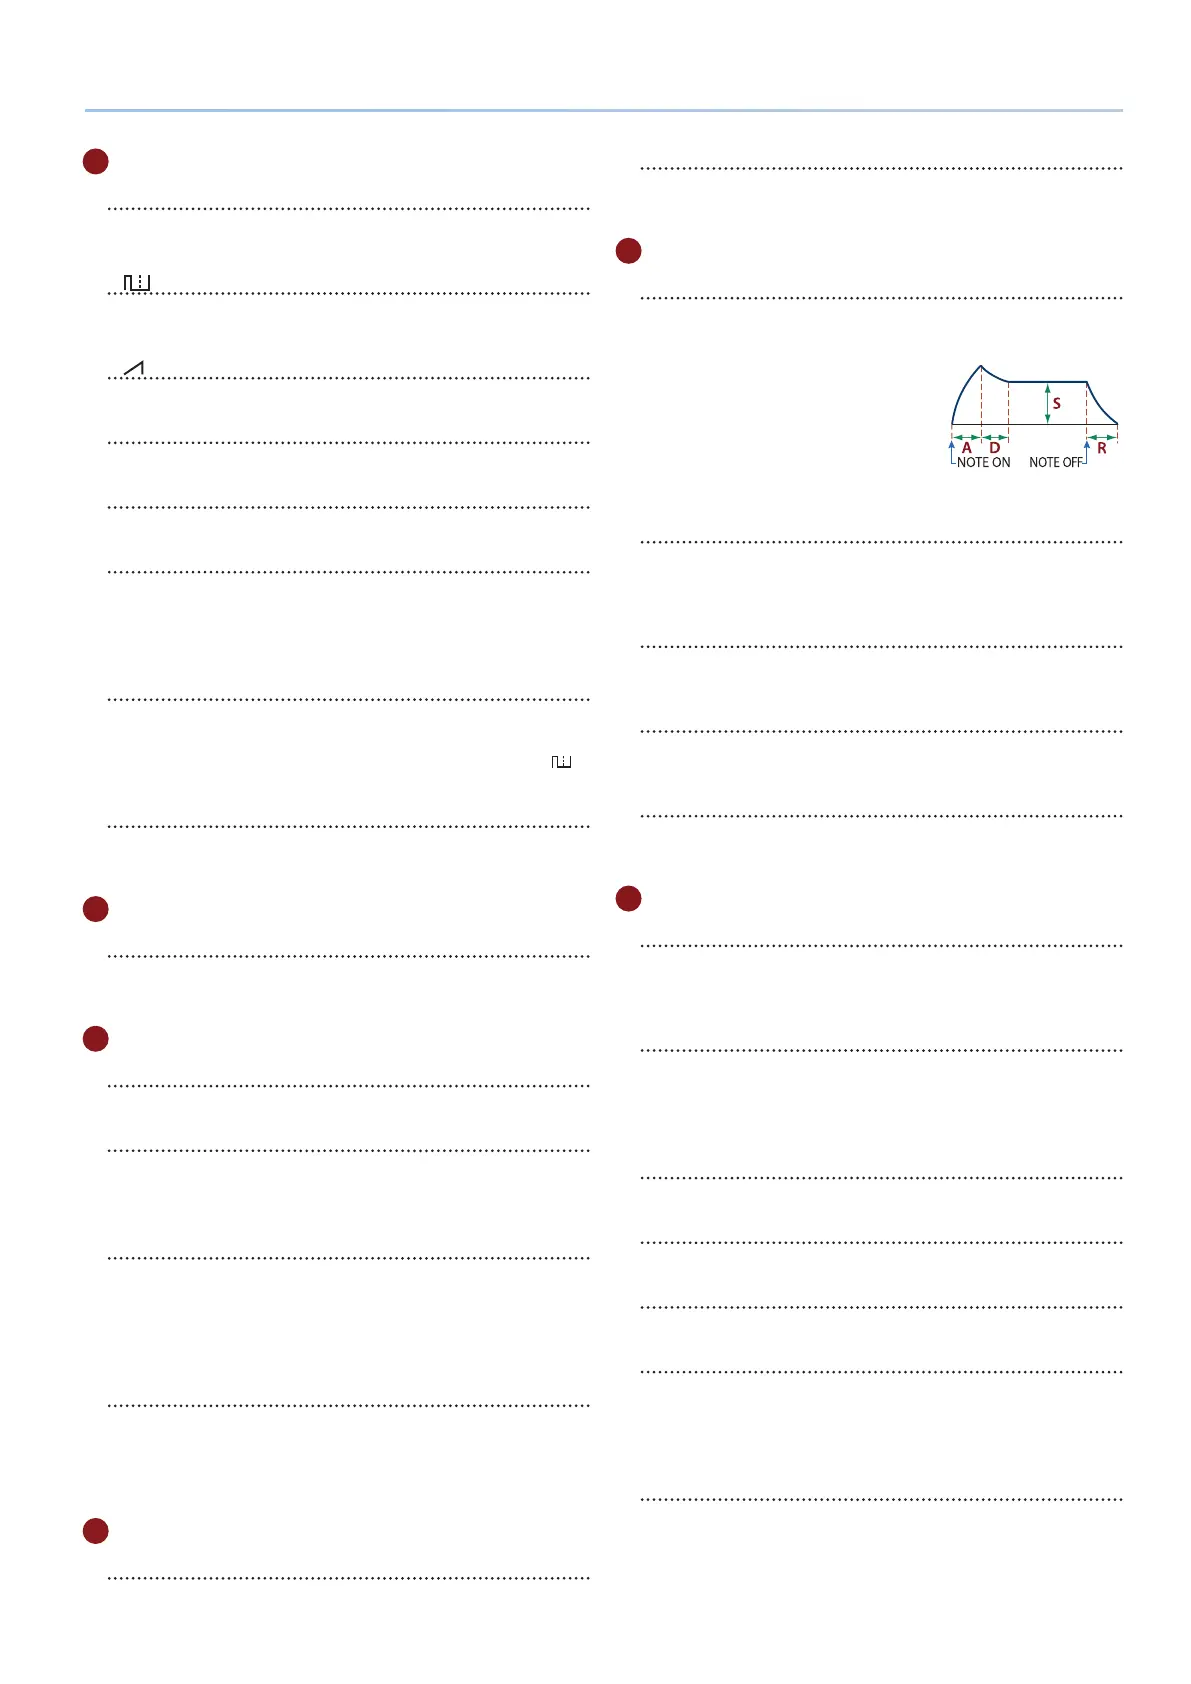
ENV (envelope) section
[A] [D] [S] [R] sliders
These sliders control the envelope, which creates time-based
changes to the sound.
A: Attack time (the time it takes for the
sound to rise)
D: Decay time (the time it takes for the
sound to attenuate)
S: Sustain level (the level at which the
sound sustains)
R: Release time (the length of time that the sound lingers)
[DEPTH] slider
Used in conjunction with the [PITCH] button and [FILTER]
button, this slider species the depth of each envelope. No
eect is applied when the value shown onscreen is zero.
[PITCH] button
If this button is on (lit), use the [DEPTH] slider and [A] [D] [S] [R]
sliders to edit the pitch envelope.
[FILTER] button
If this button is on (lit), use the [DEPTH] slider and [A] [D] [S] [R]
sliders to edit the FILTER envelope.
[AMP] button
If this button is on (lit), use the [A] [D] [S] [R] sliders to edit the
AMP envelope.
9
EFFECTS section
[DRIVE] knob
Adjusts how much distortion is applied to the sound (applies to
all parts, but enabled only for parts whose Part:Output is set to
“DRIVE”).
[REVERB] (TIME) knob
Adjusts the depth of reverb (individually for each part).
Also, you can press the [PART/FUNC] button to make it light
up blue and then operate the [REVERB] (TIME) knob to set the
reverb length.
[CHORUS] knob
Adjusts the amount of chorus (individually for each part).
[MFX] knob
Adjusts the MFX depth (individually for each part).
[DELAY] knob
Adjusts the amount of delay (individually for each part).
[TIME] (FEEDBACK) knob
Adjusts the delay time (for all parts together).
Also, you can press the [PART/FUNC] button to make it light up
blue and then operate the [TIME] (FEEDBACK) knob to adjust
the amount of delay feedback.
JUNO CHORUS [I] [II] [III] buttons
Selects the chorus type.
* More than one button can be selected at the same time.

 Loading...


