EN
31
3.2 Installing and adjusting the handlebar
DANGER
Risk of accident due to incorrectly installed stem!
Improper assembly may cause the stem or handlebar to twist or come loose while riding!
• For mounting a stem you need to stick to the specific instructions! Observe the following assembly instructions!
• Stick to the torques of the bolt connections!
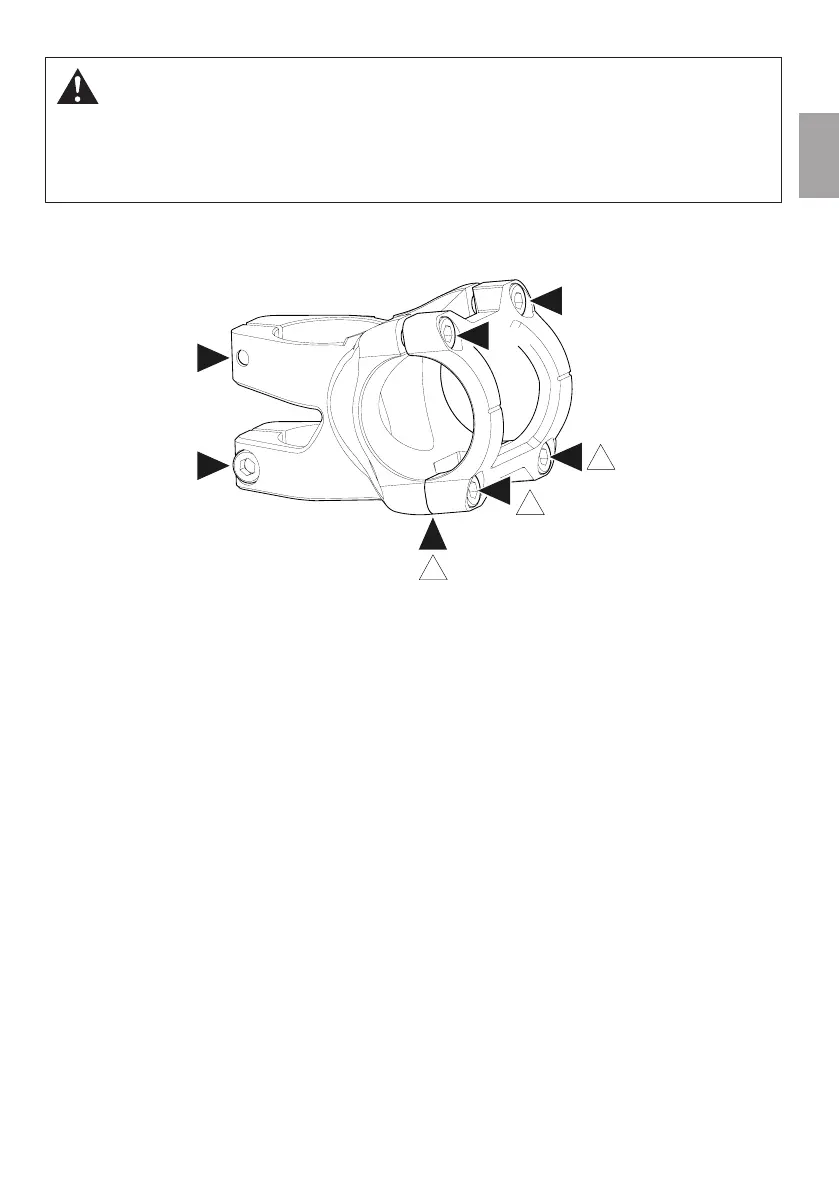
3.2.1 Reverse Black One D-2
1. Completely loosen the upper and lower handlebar clamp bolts (B, C) and remove the handlebar clamp.
2. Install handlebar and handlebar clamp and tighten the lower bolts of the handlebar clamp (C) slightly (max. 1Nm).
→ The lower gap between handlebar clamp and stem (D) must be completely closed.
3. Align the handlebar.
4. Tighten the upper bolts of the handlebar clamp (B) alternately with a torque wrench until you have reached a
tightening torque of 6 Nm.
Tightening the upper bolts (B) preloads the lower bolts (C) to the intended value. The lower bolts of the handlebar clamp (C)
must not be tightened any further!
5. Check the steering bearing for play by pulling the front brake and pushing the bike gently forwards and backwards.
Place one hand on the lower cup of the headset and the fork crown.
→ There must be no play.
6. If you feel any movement inside the headset, tighten the adjusting bolt for the steering play a quarter turn.
7. Check the headset once again for play and repeat the previous steps, if need be, until there is no more play inside the
bearing. Turn the adjusting bolt clockwise another half turn.
If in doubt, seek professional advice from a qualified bicycle mechanic.
8. Tighten the stem clamp bolts (A) alternately to a torque of 5 to 6Nm.
6 Nm
max. 1 Nm
max. 1 Nm
5 - 6 Nm
5 - 6 Nm
6 Nm
6 Nm
D
A
A
!
B
B
C
C
!
!