3–28 • Installation NK Series User Guide (1.0)
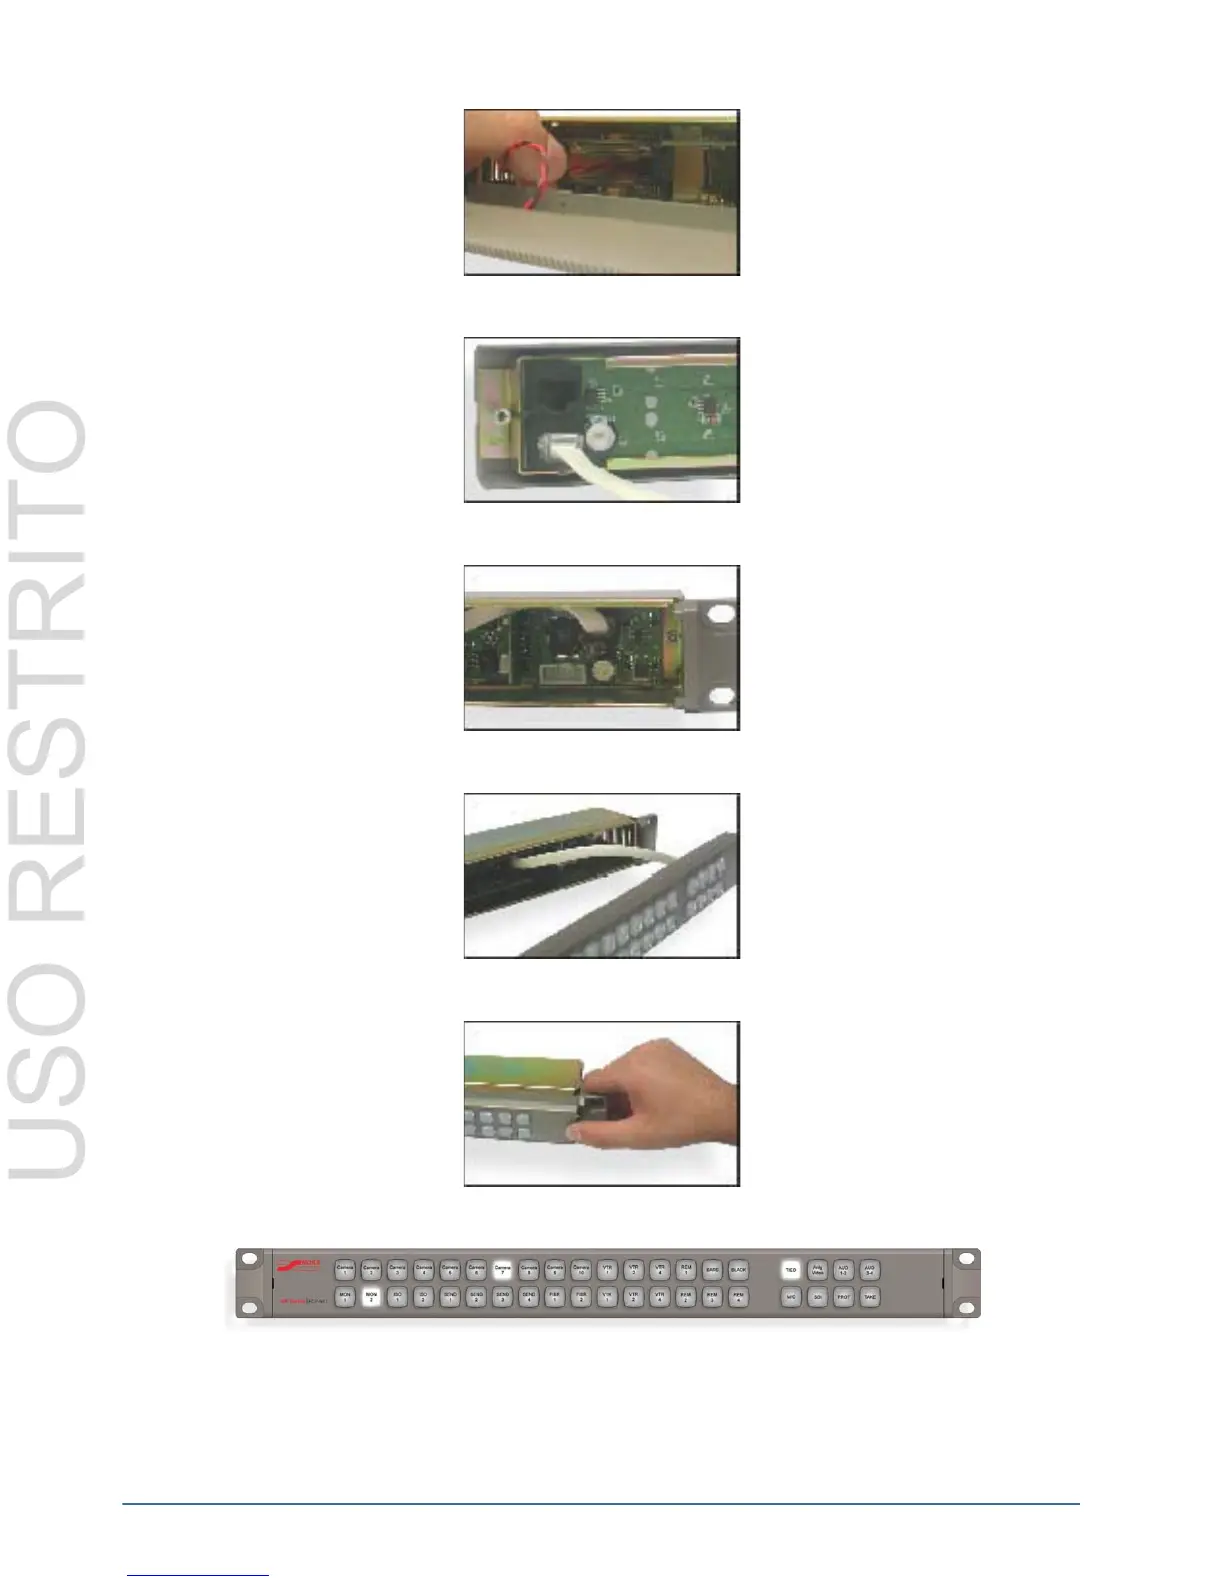
4. Connect one end of the CAT5 cable to either of the control panel’s RJ-45 ports.
5. Connect the other end of the CAT5 cable to the internal RJ-45 of the router.
6. Ensure the excess cable is packed in the empty space of the casing before attaching the panel face.
7. Slowly clip the button panel into the router casing, on both the left and the right sides.
8. When the face is firmly in place on the router casing, it can be installed as any normal router, saving rack space.
Customizing RCP-NK1 Button Labels
The button labels of the RCP-NK1 may be customized to suit the needs of any application. Button labels may be
customized in any word processing, spreadsheet or design software providing that the label size is set to exactly 9.5
x 9.5 mm (3/8” x 3/8”).