User Manual - 10/32
3. ZONES MENU
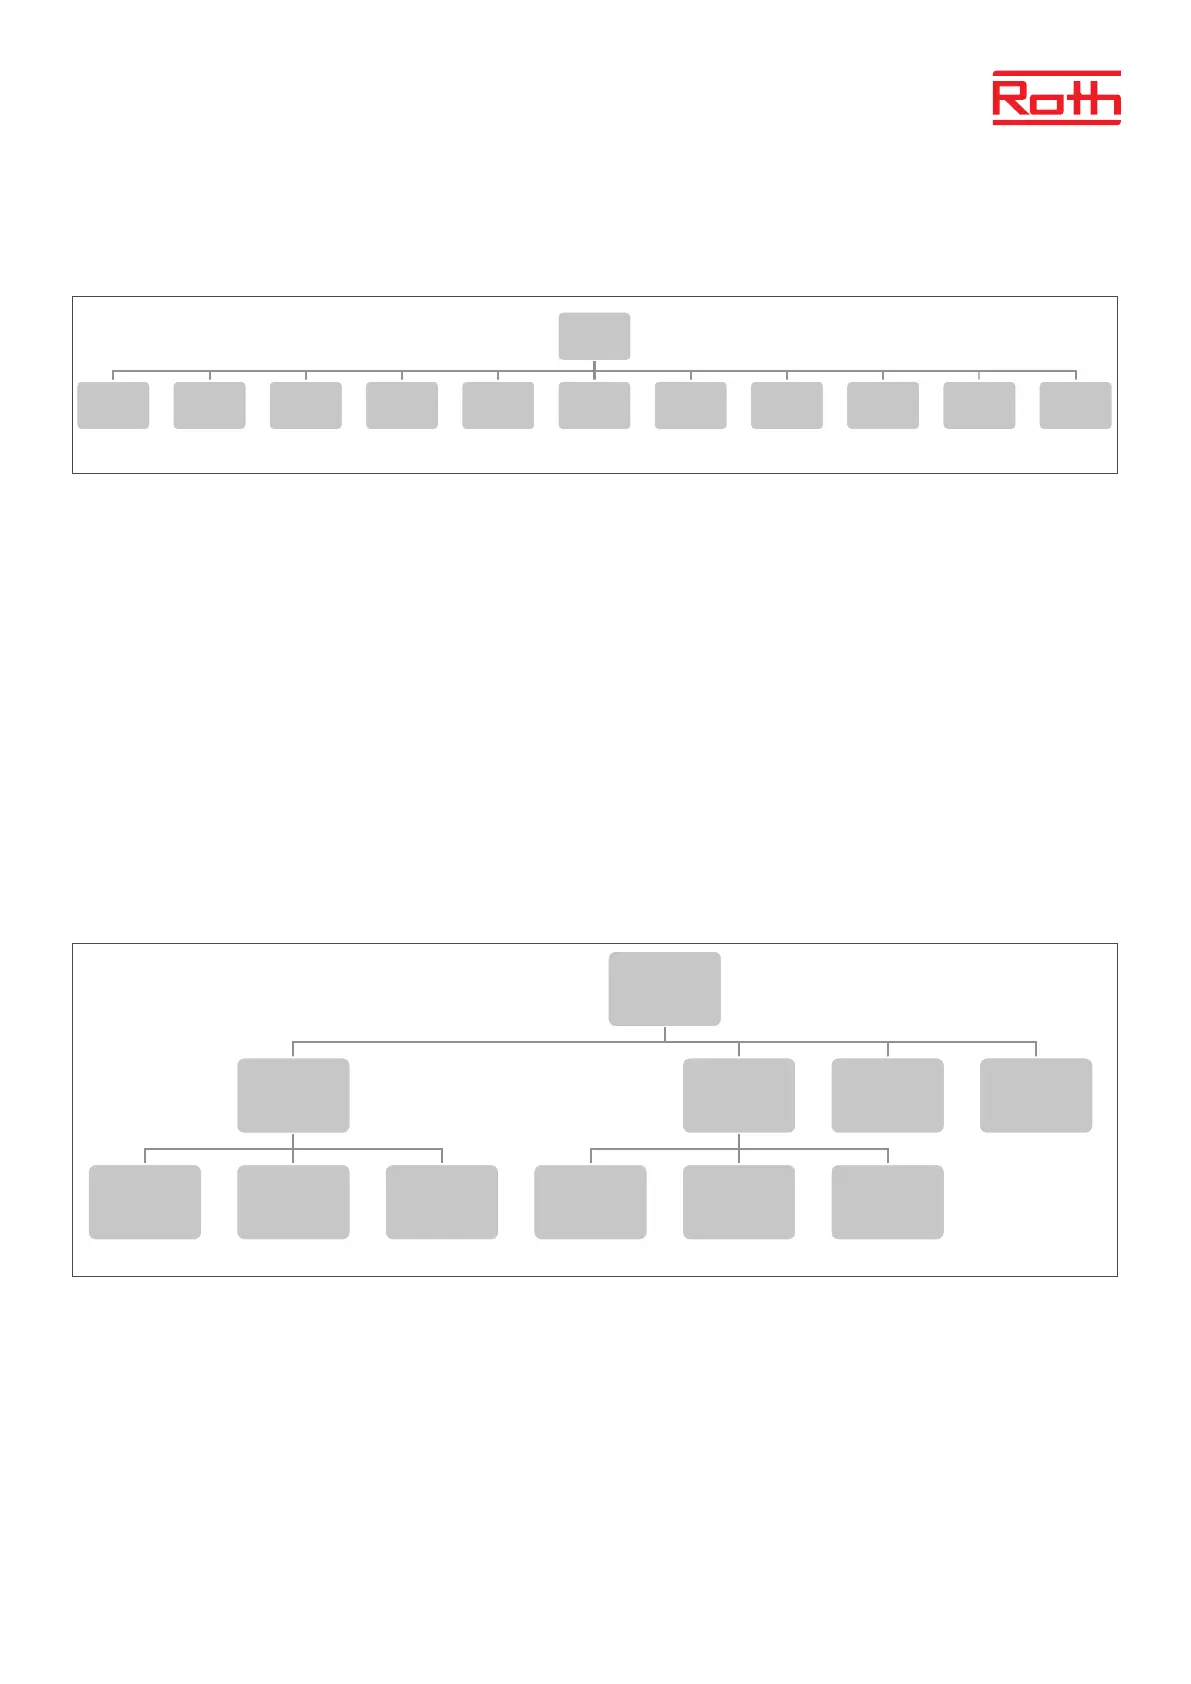
Diagram - Zones menu
This submenu enables the user to congure operation parameters for the particular zones. When the pre-set temperature value in a zone is
reached, the controller labels the zone as suciently heated and the status remains unchanged until the temperature drops below the pre-set
temperature by hysteresis value. When the temperature in all the zones is sucient, the controller disables both the pump and the heatsource
(potential-free contact).
3.1 ON
Aer the room thermostat has been activated and registered in a given zone, it can be regulated by the controller. The function “ON” is inactive
by default, but it may be activated when the room thermostat has been registered.
Press MENU button to cancel “ON”.
3.2 SENSOR TYPE
Here you can choose between wired (NTC) or wireless room sensor. Wired sensors are connected at the terminals marked “Sensor 1 – 8” in the
top of the controller.
3.3 PRE-SET TEMPERATURE
Temperature will normally be set on the room thermostat, but can also be set on the Controller display.
Press MENU button - , set temperature with ▼ or ▲ – press MENU. Press MENU to “CONFIRM” or choose “CANCEL” with ▲ – press MENU.
3.4 OPERATION MODE
Here you can choose between dierent modes, pres MENU button and scroll with ▼ or ▲, select with MENU button.
Local schedule Here you can select a schedule which you can customize only for this zone. You can choose “Select” immediately,
“Preview” if you want to see the schedule rst or “Edit” if you want to edit the schedule. Editing of the schedule is
described in chapter VII Time settings menu.
Global schedule Here you can choose to let the zone follow one of the 5 (G1 – G5) predened global schedules. You can choose
“Select” immediately, “Preview” if you want to see the schedule rst or “Edit” if you want to edit the schedule.
Editing of the schedule is described in chapter VII Time settings menu.
Constant temperature Here you choose to run the zone with a constant temperature. Press MENU button - , set temperature with
▼ or ▲ – press MENU. Press MENU to “CONFIRM” or choose “CANCEL” with ▲ – press MENU.
With time limitation Here you choose to overwrite the current setting for a certain time. Press MENU button - , set temperature with ▼
or ▲ – press MENU. Set time “Hours” with▼ – press MENU, then set “Minutes” with ▲ – press MENU.
Press MENU to “CONFIRM” or choose “CANCEL” with ▲ – press MENU.
2
Blockdiagram – styrenhetens huvudmeny
Diagram – meny för globalt driftläge
Diagram – zonmeny
Menu
Operation
mode
Zones 1 - 8
Additonal
modules
1 - 4
External
sensor
Manual
mode
Control
panel
Time
settings
Screen
settings
Language
version
Fitter's
menu
Service
menu
Software
version
Zones
1-8
ON
Sensor
type
Set temp.
Operation
mode
User
settings
Floor
heating
Optimum
start
Hysteresis Calibration Actuators
Window
sensors
Menu
Operation
mode
Normal
mode
Holiday
mode
ECO
mode
Comfort
mode
Operation
mode
Local
schedule
Select Preview Edit
Global
schedule
G1 - G5
Select Preview Edit
Constant
temperature
With time
limitation
User
settings
Floor pump
On Off
Heating
On
Schedule
settings
Constant
temperature
Temperature
settings
Temp.
comfortable
Economical Holidays
Zones
1-8
Floor
heating
Registration Information
Operation
mode
Off
Floor
protection
Comfort
Max
temperature
Hysteresis Calibration