11-1
EB|LTR|43_EN
May 2023 edition
Subject to technical changes
Removal
11 Removal
The work described in this chapter may only be performed by
specialist personnel qualifi ed to perform the corresponding task.
The After Sales Service of SAMSON is glad to provide on-site
consultation and support. Contact the nearest SAMSON offi ce.
Danger of burning due to hot or cold components and pipe!
The actuator and pipe can become very hot or very cold during
operation and cause burns upon contact.
Ö Let the components and pipes cool down or warm up.
Ö Wear protective garments and protective gloves.
Danger of crushing due to moving parts
Ö Before working on the actuator, interrupt and lock the
pneumatic energy and the control signal and release the
spring tension in the actuator if necessary.
Ö Do not allow the jamming of objects in the bracket to hinder
the rotation of the shaft.
Ö If the shaft is blocked, contact SAMSON LEUSCH through the
nearest SAMSON offi ce.
Danger of injury due to residual medium in the butterfl y valve!
When working on the butterfl y valve, residual medium can
escape and, depending on the medium properties, cause injuries
(e.g. scalding, chemical burns).
Ö Empty the medium from the concerned plant parts and
butterfl y valve.
Ö Wear protective garments, protective gloves and eye
protection.
Danger of injury due to preloaded springs!
Actuators that are equipped with preloaded actuator springs are
under mechanical tension. The marking on the actuator type
plate indicates whether a spring return is available and the fail-
safe position. The marking on the type plates is described in the
instruction manuals for the actuators.
Ö Release the compression from the preloaded springs before
working on the actuator, see the corresponding actuator doc-
umentation.
If the actuator is delivered separately from the butterfl y valve or if
it must be disassembled, the corresponding assembly instructions
must be observed.
Prior to disassembly, make sure that the following conditions are
met:
Ö The actuator is decommissioned, see chapter 10.
Ö When using manual auxiliary actuations, observe the corre-
sponding documentation to bring the actuator into the closed
position.
Ö Check the closed position.
WARNING
NOTE
Ö To ensure collision-free removal, suitable measures must be
taken, see Chapter 5.3.2. In the case of noise-reducing ver-
sions of the wedge-lock-washer that also protrude past the
overall length, the order-related dimension sheet must be ob-
served.
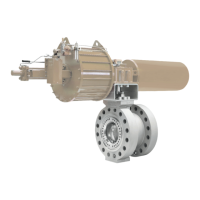
11.1 Removing the butterfl y valve with an
assembled actuator from the pipe
Ö Fasten the actuator with suitable lifting equipment and pay
attention to the centre of gravity of the actuator, see chapter
“4.3 Transporting and lifting the actuator”.
Swivel and/or tipping danger
Ö If necessary, release and remove the supports or mountings.
Ö Remove the actuator, depending on the version, from the pipe
as follows:
Version with fl ange
Ö Loosen the fl ange connection properly.
Ö Disassemble the screws and seals and store them appropri-
ately.
Versions with welded ends
Danger of explosion due to residual medium!
There may be explosive residual medium in the pipe or butterfl y
valve.
Ö Use suitable measures to prevent the risk of explosion.
Ö Separate the pipe in the middle of both welding seams of the
actuator.
Cutting hazard on sharp-edged cut surfaces!
Ö Avoid touching the cut surfaces.
Ö Wear safety gloves and corresponding protective clothing.
Ö Lift the actuator carefully out of the installation site using
suitable lifting equipment, see Chapter “4.3.2 Lifting the
actuator”.
Ö Check the closed position.
Ö Place the actuator in a safe position on suitable ground and
secure it to prevent it from tipping.
NOTE
DANGER
NOTE