Advanced Recording
[ENGLISH]
• CLOCK SET
+ The CLOCK can only be set in the CAMERA mode
4, The DATE/TIME is automatically recorded on a tape.
Before recording, set the DATE/TIME.
1. Press the MENU ON/OFF button.
• The menu list will appear.
2. Turn the MENU DIAL to highlight CLOCK SET.
3. Press the ENTER button to enter the SETTING mode.
• BLINKING indicates the setting to be changed,
The year will be the first to blink.
4. Using the MENU DIAL, change the year setting.
5. Press the ENTER button.
• The month will blink.
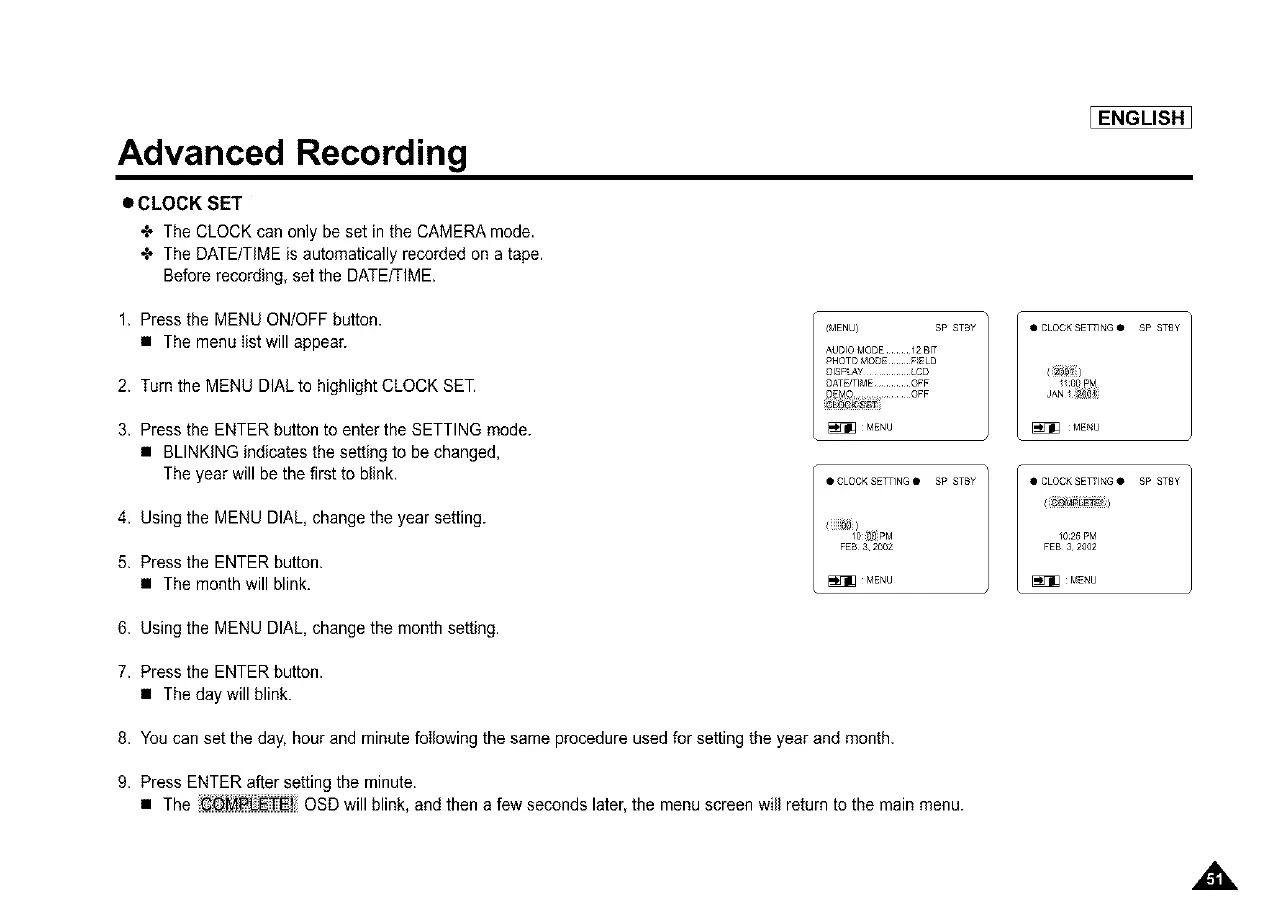
/MENU} SP STBY /
AUDIO MODE_ __ __ 12 BIT
PHOTO MODE __ __F_ELD
DISPLAY ......... LCD
DATE/TIME ........ OFF
DEMO ............ OFF
MENU
• CLOCK SETTING • SP STBY
MENU
• CLOCK SE_ING • SP STBY /
FEB 32002
_MENU
• CLOCK SETTING • SP STBy
( OMPL_E )
1025 PM
FEB 3 2002
MENU
6. Using the MENU DIAL, change the month setting.
7. Press the ENTER button.
• The day will blink.
8. You can set the day, hour and minute foilowing the same procedure used for setting the year and month.
9. Press ENTER after setting the minute.
• The OSD will blink, and then a few seconds later, the menu screen will return to the main menu.