Do you have a question about the Sanyo DSR-3000 and is the answer not in the manual?
Covers risks of electric shock, fire, unauthorized modifications, and general warnings.
Details FCC and Canadian compliance statements for digital devices.
Warning regarding battery replacement, emphasizing using the correct type.
Provides model number, trade name, responsible party, address, and telephone number.
States compliance with FCC Part 15, outlining conditions for operation.
Guidelines for selecting an installation location, considering sunlight, heat, dust, humidity, and ventilation.
Instructions on handling power cords, dealing with liquid spills, and avoiding obstructions.
Advises against self-repair and recommends referring servicing to qualified personnel.
Highlights capabilities like large capacity HDD, digital connections, alarm recording, and search functions.
Lists essential accessories like power cord and fixer power cord tie.
Guidance on protecting the hard disk from shocks, vibration, temperature changes, and magnetic fields.
Advises on general replacement times for hard disk and cooling fan.
Emphasizes checking recordings and making backups for important data.
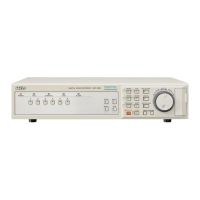
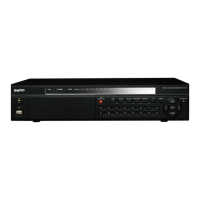
Explains the function of indicators like POWER, FULL, ALARM FULL, and LOCK.
Details the function of buttons such as MENU, REC/STOP, PLAY/STOP, and jog/shuttle dials.
Identifies the CompactFlash card slot.
Details various input/output terminals including PC card slot, audio, video, digital, RS-232C, and RS-485.
Specifies pins and signals for alarm input, output, and warnings.
Describes the AC power socket and power cord holder.
Details pins and signals for RS-485, REMOTE control, and switching outputs.
Shows connections for video cameras, microphones, and monitors.
Diagram for connecting a system controller via RS-485.
Illustrates the wiring for remote control operation using a remote control circuit.
Shows how to connect to a multiplexer for digital connections.
Illustrates connecting up to three digital video recorders in series.
Shows connecting multiple digital video recorders with multiplexer function in series.
Explains the default partitioning: Normal, Alarm, and Archive areas.
Details the function and usage of Normal, Alarm, and Archive recording areas.
Configures picture quality, recording method, audio, and recording speed for normal recording.
Configures picture quality, recording method, audio, and recording speed for normal recording.
Configures settings for alarm recording, including picture quality, speed, and pre-alarm.
Detailed tables showing recording speed, cycle, and time for various quality and frame/field settings.
Detailed tables showing recording speed, cycle, and time for various quality and frame/field settings.
Table showing available recording times for pre-alarm recording based on recording rate.
Explains the display of camera number and date/time settings.
Details operating symbols for recording/playback and remaining recording area.
Explains alarm status display and hard disk error indications.
Procedure to set the date and time, a prerequisite for recording.
How to start recording by pressing the REC/STOP button.
Procedure to stop recording by holding the REC/STOP button.
Setting the date and time is required before configuring timer recording.
Procedure to set start and end times for automatic timer recording.
How to activate timer recording standby mode using the TIMER button.
Details when timer recording automatically starts based on set times.
Explains how timer recording stops automatically at the set end time.
Setting the date and time is required before configuring alarm recording.
Procedure to set alarm recording modes, trigger, and buzzer settings.
Describes how 'ALARM' appears and recording starts upon detecting an event.
Explains how alarm recording stops after the set duration.
Setting the date and time is necessary before configuring pre-alarm recording.
Procedure to enable and set pre-alarm recording parameters.
Describes how pre-alarm stops and alarm recording begins upon event detection.
Illustrates and describes controls for playback, pausing, skipping, and speed adjustment.
Explains playback start points for first and subsequent playback sessions.
How to start and stop playback using the PLAY/STOP button.
Instructions for using the shuttle dial for fast forward and rewind.
How to change playback speed using the jog dial for slow or fast playback.
How to activate the zoom function using the ZOOM button.
Using jog and shuttle dials to move the zoom frame for desired enlargement.
Enlarging the selected area by turning the shuttle dial.
How to cancel zooming and return to normal playback.
Freezing the current image using the STILL button.
How to resume playback by pressing the STILL button again.
Advancing or rewinding playback one frame at a time using the jog dial.
How to activate channel selection mode after pausing playback.
Using the jog dial to select the desired camera channel.
Initiating playback of the selected channel's images.
How to switch between frame and field playback modes.
Methods for searching recorded images by alarm events or thumbnails.
Searching recorded images by date/time or within the archive area.
Searching for recorded images based on motion sensor detection.
How to access the main search menu.
Procedure to select 'ALARM SEARCH' from the menu.
Navigating and selecting alarm images for playback.
Starting playback of selected alarm images.
Using skip buttons to move between previous and next alarm recordings.
How to access the search menu to initiate thumbnail search.
Procedure to select 'ALARM THUMBNAIL SEARCH'.
Navigating and selecting specific alarm thumbnails.
Initiating playback of selected thumbnail images.
How to access the search menu for date and time searches.
Procedure to select 'TIME DATE SEARCH'.
Step-by-step guide to searching for specific recorded images by date and time.
Starting the search process by turning the shuttle dial.
Displaying and playing back the selected search results.
How to access the search menu for archive area searches.
Procedure to select 'ARCHIVE AREA SEARCH'.
Navigating and selecting specific images from the archive.
Initiating playback of selected archive images.
How to access the search menu for motion detection.
Procedure to select 'MOTION DETECTION SEARCH'.
Choosing the recording area (ALARM or NORMAL) for motion search.
Selecting the recording area (NORMAL, ALARM, or BOTH).
How to view search results, including start/end times and motion sensor status.
Setting the start date and time for the motion detection search.
Setting the end date and time for the motion detection search.
Previewing motion sensor settings.
Viewing motion detection results in a single-screen display.
Method for copying important images to the hard disk's archive area.
Method for copying images from archive to a CompactFlash card.
Method for copying images to external DDS (DAT) or CD-R drives.
Pausing playback at the desired image and pressing the COPY button.
Using jog dial to select 'COPY TO' and 'ARCHIVE AREA'.
Setting the number of images or seconds to be copied.
Starting the copying process to the archive area.
Instructions for inserting a CompactFlash card correctly.
Using jog dial to select 'COMPACIT FLASH' for copying.
Setting the number of images or seconds to copy to the card.
Starting the copying process to the CompactFlash card.
Procedure for formatting CompactFlash cards using the 'FORMAT COMPACTFLASH' option.
Explains the directory structure and file naming conventions on the CF card.
Covers copying camera images via multiplexers to archive or CF card.
Instructions for connecting DDS (DAT) or CD-R drives via SCSI.
Procedure to back up archive data to a DDS (DAT) drive.
Guide for inserting the recommended SCSI card.
How to access the archive set menu to initiate data restore.
Procedure to select 'RESTORE' for loading data from DDS.
Selecting and loading data from DDS (DAT) into the archive area.
How to access the archive set menu to delete data.
Procedure to select 'ERASE' for deleting data from DDS.
Confirming the deletion of data from the DDS (DAT) drive.
Pausing playback at the desired image and pressing COPY.
Using jog dial to select 'COPY TO' and 'CD-R'.
Setting number of images, seconds, or events to copy to CD-R.
Starting the copying process to the CD-R drive.
Categorizes settings related to recording operations.
Categorizes settings related to the device's operating environment.
Illustrates the hierarchy of menus and sub-menus.
Procedure to display Main Menu 1 and Main Menu 2.
Using the jog dial to move the cursor and highlight menu items.
Using the shuttle dial to open selected sub-menus.
Returning to the normal screen from menu operations.
How to view settings within sub-menu screens without making changes.
Procedure to select the display language from English, French, or Spanish.
Configuring the device's date and time for accurate recording and playback.
Configuring daylight saving time adjustments.
Synchronizing time settings across multiple connected devices.
Setting the start and end times for daylight saving.
Connecting devices for time synchronization via clock terminals.
Adjusting the time difference for synchronized devices.
Displays the total recording capacity of the hard disk.
Procedure to set Normal and Alarm recording area sizes.
Displays a warning before disk reinitialization.
Confirming the disk reinitialization process.
Configures how the device handles full recording areas (overwrite or stop).
Enabling or disabling overwrite for the normal recording area.
Enabling automatic overwriting by setting 'OVERWRITE' to 'ON'.
Setting the display for remaining disk space and related indicators.
Configuring settings for connecting multiple digital video recorders in series.
Instructions for connecting units using digital input/output terminals.
Setting overwrite behavior for the normal recording area.
Setting the percentage of free space to trigger disk warnings.
Configuring overwrite behavior for the alarm recording area.
How to access the settings for normal recording mode.
Selecting image quality from Basic to Super Fine.
Adjusting image quality settings.
Choosing between frame or field recording.
Enabling or disabling audio recording.
Adjusting the recording speed (cycle) for normal recording.
Choosing the day of the week for timer recording.
Entering the start time for scheduled timer recording.
Entering the stop time for scheduled timer recording.
Configuring the recording speed for timer recordings.
Activating the timer recording function.
Using specific lines for timer reservations exceeding 24 hours.
Example of setting a daily timer recording from morning to evening.
Example of setting timer recordings across multiple days.
Using SAT and DLY lines for timer reservations spanning over 24 hours.
Setting specific dates as holidays for timer recording adjustments.
Step-by-step guide to setting a specific date as a holiday.
Selecting image quality for alarm recordings.
Choosing between frame or field recording for alarms.
Enabling or disabling audio recording for alarms.
Selecting alarm recording modes (MODE1-MODE4).
Configuring recording speed and duration for alarm events.
Enabling and configuring pre-alarm recording.
Selecting the alarm trigger (external alarm or motion sensor).
Adjusting sensitivity and activation for motion sensors.
Choosing between frame or field recording for alarms.
Enabling or disabling audio recording for alarms.
Selecting alarm recording modes (MODE1-MODE4).
Adjusting the recording speed for alarm events.
Setting the duration of alarm recording.
Setting the overall alarm recording status.
Choosing the specific alarm recording mode (MODE1-MODE4).
Turning pre-alarm recording ON or OFF.
Configuring the recording speed for pre-alarm events.
Adjusting the recording speed for pre-alarm events.
Choosing between external alarm, motion sensor, or both.
Adjusting sensitivity and activation for motion sensors.
Navigating to the motion sensor configuration screen.
Turning the motion sensor ON or OFF.
Setting the sensitivity level for motion detection.
Enabling or disabling the date display on the monitor.
Enabling or disabling the time display on the monitor.
Enabling or disabling the image quality display.
Enabling or disabling the recording speed display.
Enabling or disabling the display of alarm types.
Enabling or disabling the display of alarm counts.
Enabling video loss detection to display 'VIDEO LOSS!' when signal is lost.
Selecting between RS-232C and RS-485 control.
Configuring the data transmission speed for RS-232C.
Enabling status/alarm transmission and setting addresses for RS-485.
Switching the control mode to RS-485.
Configuring the data transmission speed for RS-485.
Enabling or disabling status information transmission.
Enabling or disabling alarm information transmission.
Assigning a unique address for RS-485 devices.
Enabling or disabling buzzer sounds for alarms.
Enabling or disabling buzzer for disk full warnings.
Enabling or disabling buzzer for hard disk errors.
Enabling or disabling buzzer when the security lock is engaged.
Enabling or disabling buzzer sounds for button presses.
Enabling or disabling buzzer when recording stops.
Setting security levels for Administrator and User access.
Procedure to set a password for administrator access.
Navigating to the administrator password setting screen.
Inputting characters for the administrator password.
Activating administrator password protection.
Navigating to the user password setting screen.
Inputting characters for the user password.
Activating user password protection.
Explains how operations vary based on ON/OFF and ADMIN/USER settings.
Configuring operating privileges for Administrator and User.
Activating the security lock feature using SHUTTLE HOLD button.
Testing the security lock by pressing an operating button.
Procedure to unlock the device by entering the correct password.
Choosing the appropriate LAN card (LAN1 or LAN2).
Enabling or disabling network control and display options.
Configuring the device's IP address for network connection.
Configuring the subnet mask for network connectivity.
Configuring the gateway address for network access.
Specifying the network port number.
Setting passwords for different network access levels (ID1, ID2, ID3).
Navigating to the Network Settings menu.
Choosing the Network Set option from the main menu.
Choosing between LAN1 or LAN2 based on the card used.
Confirming the selected LAN card type.
Setting Network Control ON/OFF and display options.
Entering the IP address for network connectivity.
Entering the subnet mask for network connectivity.
Entering the gateway address for network connectivity.
Specifying the network port number.
Setting the password for access level ID1.
Setting passwords for access levels ID2 and ID3.
Procedure to initialize the hard disk (Disk 1 or Disk 2).
Setting up disk mirroring for data redundancy.
Selecting which hard disk to use for playback.
Recommendation to consult a dealer for adding hard disks.
Details on MIRRORING and PLAYBACK DRIVE settings.
Shows date/time of power failures and occurrence count.
Shows date/time when power was restored.
Displays the total usage time for Disk 1.
Displays the total usage time for Disk 2.
Shows the total usage time for the entire unit.
Displays the current firmware version of the unit.
Steps to save menu settings onto a CompactFlash card.
Steps to load menu settings from a CompactFlash card.
Option to copy recording area settings during menu load.
Confirming the loading of saved menu settings.
Details pin assignments, signals, and direction for RS-232C connector.
Specifies mode, character length, speed, parity, and stop bit for RS-232C.
Describes byte-unit communication and command protocols.
Specifies mode, character length, speed, parity, and stop bit for RS-485.
Describes the proprietary Sanyo protocol (SSP) for RS-485.
Setting termination switches for series connections.
Table listing commands for controlling the digital video recorder via interface.
Details hard disk capacity, resolution, compression, and storage areas.
Lists all input/output terminals and their specifications.
Details power consumption, operating environment, dimensions, and weight.
Details requirements for obtaining warranty service, including delivery and contact information.
Lists conditions and actions that void the warranty.