21
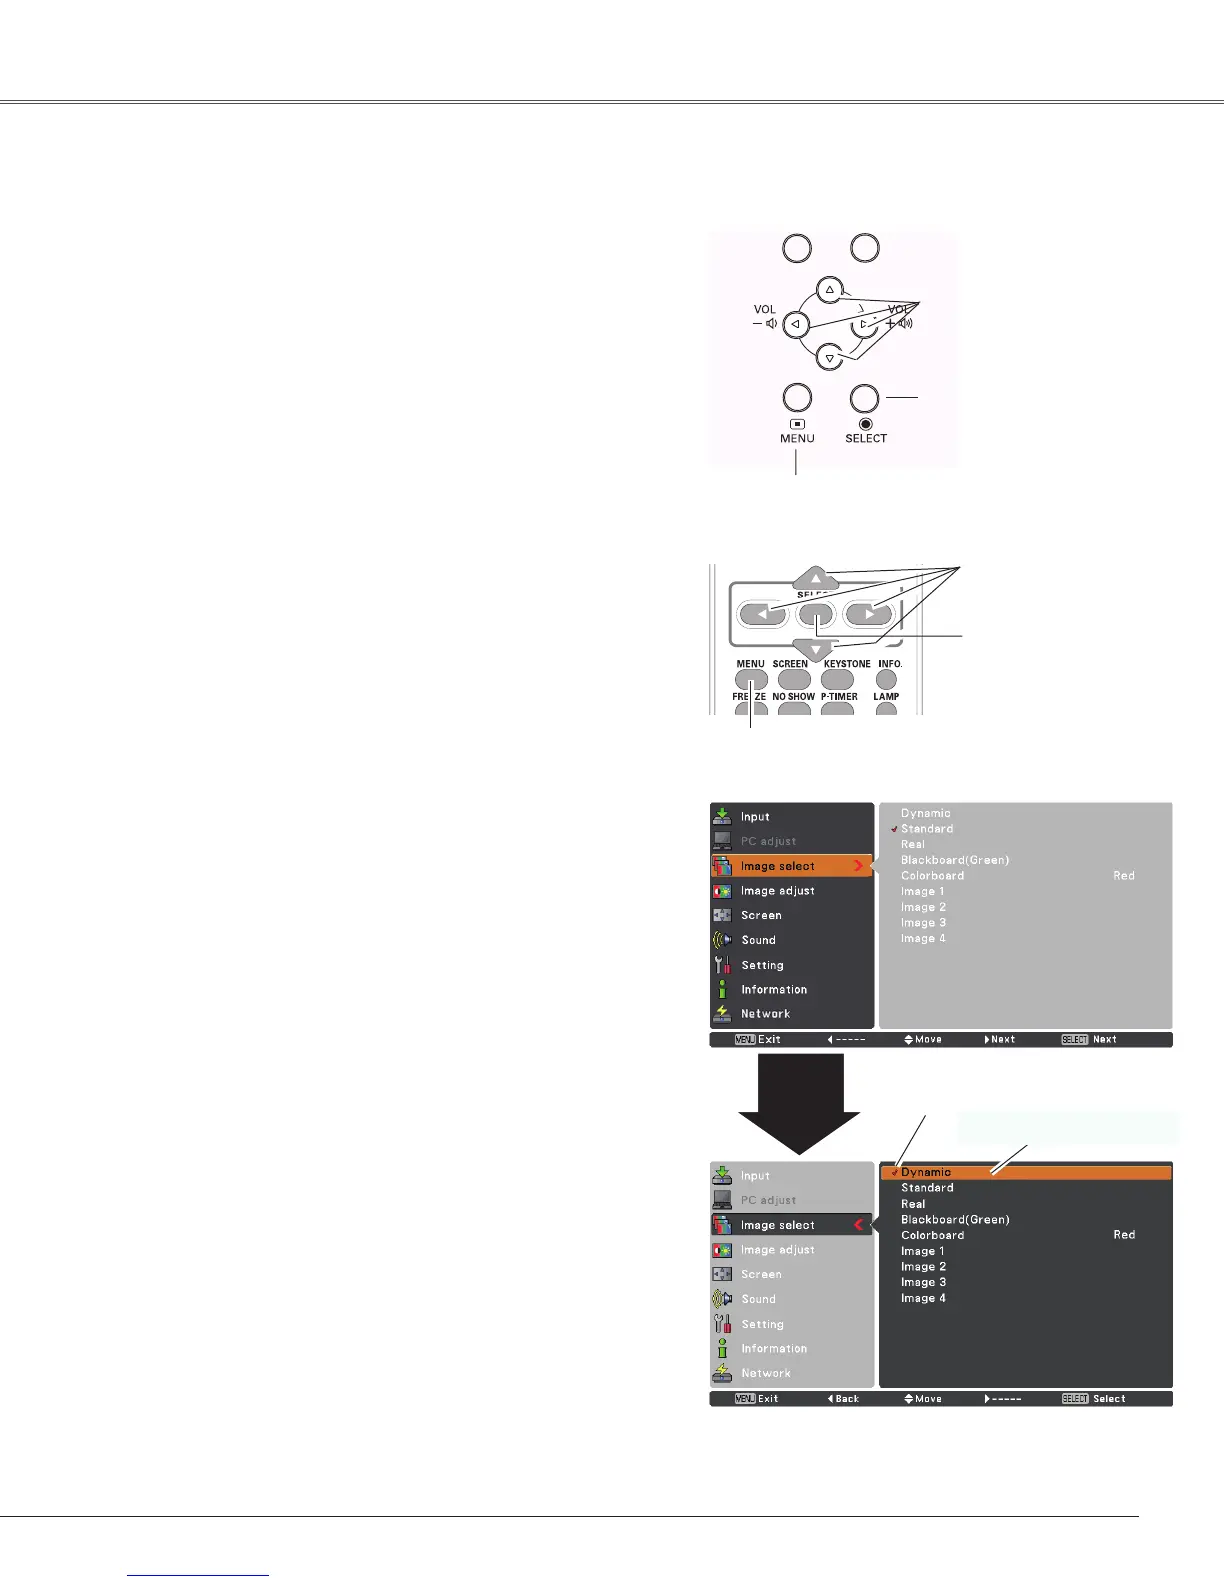
How to Operate the On-Screen Menu
The projector can be adjusted or set via the On-Screen
Menu. The menus have a hierarchical structure, with
a main menu that is divided into submenus, which are
further divided into other submenus. For each adjustment
and setting procedure, refer to respective sections in this
manual.
Use the Point
ed buttons to highlight or select a main
menu item. Press the Point 8 or the SELECT button
to access the submenu items. (The selected item is
highlighted in ORANGE.)
Use the Point
ed buttons to select the desired
submenu item and press the SELECT button to set or
access the selected item.
Press the MENU button on the top control or the
remote control to display the On-Screen Menu.
1
2
3
On-Screen Menu
Top Control
MENU button
POINT buttons
(arrowhead)
Remote Control
SELECT button
MENU button
SELECT button
POINT buttons
(arrowhead)
Point
8
or SELECT
button
Use the Point ed7 8 buttons to adjust the setting or
switch between each option and press the SELECT
button to activate it and return to the submenu.
4
Press the Point 7 button to return to the main menu.
Press the MENU button to exit the On-Screen Menu.
5
The currently set item is
check marked.
The selected item is
highlighted in ORANGE.
Basic Operation

 Loading...