EasyManuals Logo

Sanyo PLV-Z3000 Service Manual

Sanyo PLV-Z3000
134 pages
To Next Page IconTo Next Page
To Previous Page IconTo Previous Page
Page #17 background imageLoading...
Page #17 background image
- 17 -
Mechanical disassemblies
1
Cabinet top ass'y removal.
Disassemble should be made following procedures in numerical order.
Following steps show the basic procedures, therefore unnecessary step may be
ignored.
Caution:
The parts and screws should be placed exactly the same position as the original other-
wise it may cause lose of performance and product safety.
The wiring method of the leads and ferrite cores should be returned exactly the same
state as the original, otherwise it may cause lose of performance and product safety.
Screws Expression
(Type Diameter x Length ) mm
T type M Type
Tapping screw Machine screw
1. Remove the 3 screws-A(M3x10) from the bottom side.
2. Remove the 3 screws-B(M3x8) and remove the Cabinet top ass'y.
3. Remove the 3 screws-C(T2.6x6), remove the Button and DEC. LED.
A
A
A
B
B
B
Cabinet top assy
Cabinet top assy
Cabinet top
DEC. LED
Button
C
C
C
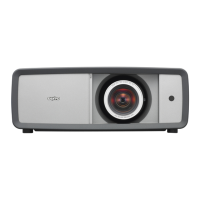
Table of Contents

Other manuals for Sanyo PLV-Z3000

Questions and Answers:

Question and Answer IconNeed help?

Do you have a question about the Sanyo PLV-Z3000 and is the answer not in the manual?

Sanyo PLV-Z3000 Specifications

General IconGeneral
Matrix size0.7 \
Vertical scan range50 - 100 Hz
Horizontal scan range15 - 80 kHz
Projection technologyLCD
Contrast ratio (typical)-
Screen size compatibility40 - 300 \
Aspect ratio16:9
RS-232 ports1
Dimensions (WxDxH)400 x 146 x 346 mm
Lamp typeUHP
Lamp power165 W
Light source typeLamp
Service life of light source2000 h
Service life of light source (economic mode)3000 h
FocusManual
Focal length range22.3 - 45.3 mm
Noise level19 dB
Dot clock scanning frequency100 MHz
Serial interface typeRS-232
Component video (YPbPr/YCbCr) in3
Weight and Dimensions IconWeight and Dimensions
Weight7500 g

Related product manuals