FILE NO.
SERVICE MANUAL
REFERENCE NO. SM5111017-00
PRODUCT CODE :
PLV-Z3000 ME4A 1 122 447 00 U.S.A., Canada
PLV-Z3000 PE4A 1 122 448 00 Europe, Asia, Africa
PLV-Z3000 PE4C 1 122 448 02 U.K.
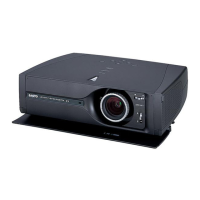
Multimedia Projector
Chassis No. ME4-Z300000
NOTE: Match the Chassis No. on the rating
sheet on the cabinet with the Chassis
No. in the Service Manual.
If the Original Version Service
Manual Chassis No. does no t
match the unites, additional Service
Literature is required. You must refer
to “Notices” to the Original Service
Manual prior to servicing the unit.
MODEL NO. PLV-Z3000
U.S.A., Canada, Europe,
U.K. Asia, Africa
Original Version