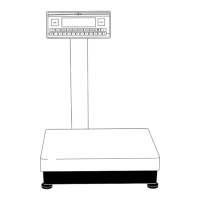
Calibration/Adjustment “isoTEST”*
Purpose
Calibration is the determination of the
difference between the weight readout
and the true weight (mass) of a sample.
Calibration does not entail making any
changes within the scale.
Adjustment is the correction of this
difference between the measured value
displayed and the true weight (mass)
of the sample, or the reduction of the
difference to an allowable level within
maximum permissible error limits.
Using Verified Scales as Legal Measuring
Instruments in the EU**:
Before using your scale as a legal
measuring instrument, you must perform
“internal calibration” at the place of
installation after the warmup period.
* isoTEST = TEST in the U.S. and Canada
** including the Signatories of the
Agreement on the European Economic
Area
Available Features
You can start the isoTEST function
at the press of a key to check a scale
used as measuring, inspection and
test equipment at any time. The scale
is calibrated and any deviation is
displayed. Press the
Start soft key
to start adjustment. If you do not wish
to have the scale adjusted, press the
End soft key to cancel the isoTEST.
Your scale can be calibrated externally
(Scale menu: CAL/isoTST key function;
menu item
Ext. cal./adj.;
factory-def. wt. or
Ext. cal./adj.;
user-defined wt.) or
internally (
Internal
cal./adjustment).
External calibration can be performed
– using a pre-set weight value
Ext. cal./adj.;
factory-def. wt., or
– with a user-defined weight
Ext. cal./adj.;
user-defined wt.
The adjustment can be performed
– automatically following calibration:
Cal., then auto
adjust. or
– if desired, the adjustment operation can
be started manually after calibration:
Cal., then manual
adjust
You can also configure whether the
calibration mode
– will be activated according to the
specific setting (external/internal) or
– can be selected by the user after
pressing the
isoTST soft key:
Selection mode.
You can have the scale automatically
display an adjustment prompt after a
certain time interval has elapsed since
the last calibration/adjustment or when
the ambient temperature changes by
a defined amount.
You can configure the scale to perform
calibration and adjustment automati-
cally (isoCAL) when the pre-set time(s)
and/or temperature limit is reached:
On and reset applica-
tion and On without
resetting application.
You can have the calibration/
adjustment results documented on
an ISO/GMP-compliant printout or
on a block printout with up to 50
adjustment sequences; see page 100.
Factory Settings
Calibration/adjustment mode:
Selection mode
Calibration/adjustment sequence:
Calibrate, then auto
adjust
Automatic calibration/adjustment
function:
On without
resetting app.
Start automatic adjustment: isoCAL
Generate GLP/GMP-compliant record:
Automatic if GLP is
selected
External Calibration in Verified Scales
of Accuracy Class K
– External calibration is blocked when
the scale is used in legal metrology
> External calibration can only be
released after removing the verification
control seal, in which case the validity
of the verification becomes void and
the scale must be re-verified
– External calibration can now be
performed
36
