must be placed in the lowest position and close to the
table.
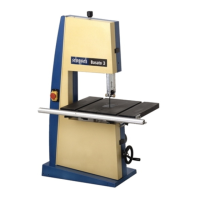
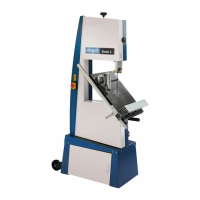
Machine description
Due to its perfected design, the machine offers a versatile
application for processing wood and plastics in the work-
shop.
The upper and lower bandwheel is protected by a fixed
guard and an articulated cover. The non-cutting part of the
sawbelt above the table top is covered by a guard fixed to
the sawbelt guide, the latter being protected against in-
advertant opening by the fixed guard of the upper band
wheel. The non-cutting part of the sawbelt under the table
top is protected by a fixed cover.
Theswivellingrangeofthetablefrom-17°to+45°allows
versatilecuttingpossibilities(e.g.)
•Longitudinalcuts
•Crosscuts
•Diagonalcuts
•Curvedandirregularcuts
•Cutsfordovetailsandtenons
•On-edgecutsofsquaredbeams
Please consult also the working hints in the operating in-
structions.
Assembly
Assembly tools
1 engineerís wrench SW 10
1 hexagonal head spanner SW 3
1 hexagonal head spanner SW 6
Tabletop and the mounting angles are not mounted for rea-
sons of packaging technology.
Installation of the tabletop, Fig. 1
• Openthecasecover,andsettheslewingsegmentsto
30°.
• Looselyscrewthetabletop.
4 hexagon head cap screws M 8 x 16
4 serrated lock washers A 8,4
Fig. 2
Swingthetablesurfaceintothe0°positionandtightenthe
locking lever.
Fig. 3
Adjust the table surface as follows:
•Placeastraight,circa50cmlong,woodenslatonthe
table and adjust it to the upward as well as downward part
of the saw blade.
•Placethebracketonthewoodenslatandonthegroove
side of the table. Adjust the table and tighten both of the
front hex bolts on the table.
•Releasethelockingleverontheswingingpartbyaquar-
ter of a turn, and pull the rear segment outward, Tighten
both of the back hex bolts on the table. In this way, ease of
pivoting is achieved.
Fig. 4
•Usingtheadjustmentscrew,A,ontherearofthema-
chine, adjust the table to a right-angle. Use a set square.
•Counter the adjustmentscrew and pullonthelocking
lever.
Assembly of the Length End Stop, Fig. 5
•Turnthefourwing-bolts,eachwithaatwasher,roughly
5 mm into the table surface (Fig. 5.1)
•Placetheguidancetubesothatittouchesthetableand
lightly tighten the wing-bolts.
•Attachthepivotingpartoftheguidancetubewithtwo
screws M6X12 and the snap ring on to the table (Fig. 5.2)
•Tightenthewingnuts.
•Now,putthelengthendstopontheguidancepipe,to
the left of the saw blade, and clamp it tightly. The end stop
pipe should now be parallel to the table groove; corrections
can be made by loosening the two Allen screws (Fig. 5.3).
Fitting the transport handles, Fig. 6
• Slidethetransporthandle(A) intotheopeningonthe
front of the frame cover until you cannot slide it any
further. Turn slightly to secure it in place.
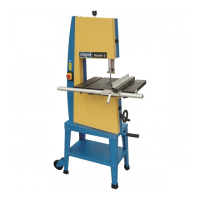
Assembly of the base
Delivery scope:
1 base plate
1 side cover
1 front leg piece
1 rear leg piece fitted with rollers
1 door cpl
1 accessories bag
1 set of operating instructions
Place a block of wood behind the band saw and then
carefully tip it over, so that the base plate ends up on the
block.
Fig. 1/UG
Screwthebaseplate(1),sidecover(2)andbothlegpieces
(3)tothebaseplateofthebandsaw(A)byhand,butnot
very tightly.
Fig. 2/UG
Place the band saw upright again, level it and tighten the
screws.
Nowscrewthedoors(5)tothebase.
Transport, Fig. 3/UG
When transporting the band saw, tip it over to the front
slightly, and use your foot to push the pedal in the bottom
position,andthenpulloutthetransporthandle(A,Fig.6)
on the front side until the stop, after which you can move
the band saw by slightly lifting it by the handle.
To put the band saw down, you have to tip it over to the
front slightly, and use your foot to push the pedal in the
top position. Then push the transport handle back in, and
secureit(Fig.3.1/UG).
Attention: Before you start using the band saw, it all has to
be back on the ground.
m Commissioning
Before putting the machine into operation, carefully observe
the safety instructions.
When working with the machine, all protective devices and
guards must be fitted.
Changing the saw blade, Fig. 7
Attention: Disconnect the saw from the power outlet!
• Openthesawbladeprotectionandsecureitusingthe
pin.