www.scheppach.com
28
|
GB
To remove the fuel lter for replacement, pull it out
through the tank ller neck using a piece of wire bent at
one end to form a hook.
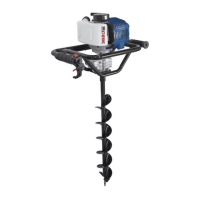
Lubricate transmission Fig. 2 (12)
Lubricate with lithium-based grease. Remove the
screw Fig. 2 (12) and put in the grease, turning the
shaft manually until grease emerges, then replace the
screw.
Attention! Fill only a small amount of grease. Do not
overll. (max. 5-10g)
Service information
Please note that the following parts of this product are
subject to normal or natural wear and that the following
parts are therefore also required for use as consum-
ables.
Wear parts*: spark plug, drill
* Not necessarily included in the scope of delivery!
Spare parts and accessories can be obtained from our
service centre. To do this, scan the QR code on the
cover page.
10. Storage/Transport
Transport
Leave the motor to cool down before transporting the
machine or storing it indoors in order to prevent burn-
ing and re hazards.
Turn o the motor even for short distances when
changing locations during work.
Carry the auger exclusively by the handle. Do not touch
the casing (risk of burning).
When transporting the auger in a vehicle, it must be
stored safely.
The fuel tank (2) must be emptied completely before
transport.
Storage
Never store an auger for longer than 30 days without
carrying out the following steps.
Follow the cleaning instructions and maintenance in-
structions before storing the device!
Storing the auger
If you store an auger for longer than 30 days, it must
be prepared ahead of time. Unless the storage instruc-
tions are followed, fuel remaining in the carburetor will
evaporate, leaving gum-like deposits.
• Carefully remove the air lter insert (F) and check it
for damage, replace if required.
• Clean the foam lter insert (F) in warm water and
with a mild soap solution. Thoroughly rinse it with
clear water and leave it to dry.
Warning!
Do not use petrol or cleanser.
Risk of explosion.
• Return the air lter insert (F) and reposition the air
lter casing.
Do not run the motor without an air lter insert or when
it is damaged. This can cause motor damage.
In this case: The manufacturer is not liable for dam-
age resulting from this; the risk lies exclusively with the
user.
Spark plug (g. 6 - 7)
The exhaust/casing becomes very hot during opera-
tion. Wait for the motor to cool down.
NEVER touch the hot motor.
• Remove the spark plug cap (8).
• Remove the spark plug (I) and check it.
• Check the insulator. In case of damage such as
cracks or chips: Replace the spark plug (I).
• Clean the spark plug electrodes with a wire brush.
• Check the electrodes‘ gap and adjust it. Gap 0.75
mm.
• Return the spark plug (I) and tighten it with the spark
plug spanner.
• Replace the spark plug cap (8) on the spark plug (I).
Ensure that no dirt gets into the cylinder head during
replacement.
Check the position of the spark plug (I).
• A loose spark plug (I) can damage the motor by
overheating.
• Tightening it too much can damage the thread in the
cylinder head.
The manufacturer is not liable for damage resulting
from this, the risk lies exclusively with the user.
Replacing the fuel lter (g. 8)
The felt lter (J) of the fuel lter can become clogged.
It is recommended to replace the fuel lter once every
three months in order to ensure unimpeded fuel ow to
the carburetor.
 Loading...