4 • Schlage • PIB300 / PIB301 user guide
Handheld device (HHD)
The Handheld Device (HHD) is used for programming and setup only.
The HHD is used to congure this device’s links and outputs. For information about the HHD,
see the SUS user guide.
PIB300/PIB301 installation
Location
• The PIB300/PIB301 should be located close to the access control panel (wiring distance
may be up to 500 feet (152 meters)).
Wiring to the lock
• Power wire for locks must be appropriately sized for the distance and voltage.
• Communication wire should be suitable for use on RS-485 type networks.
• The maximum length of the RS-485 wiring from the PIB300/PIB301 to lock 2 is 4000
feet (1219 meters).
• Wiring of locks requires one connector via the RS-485 connector (J5).
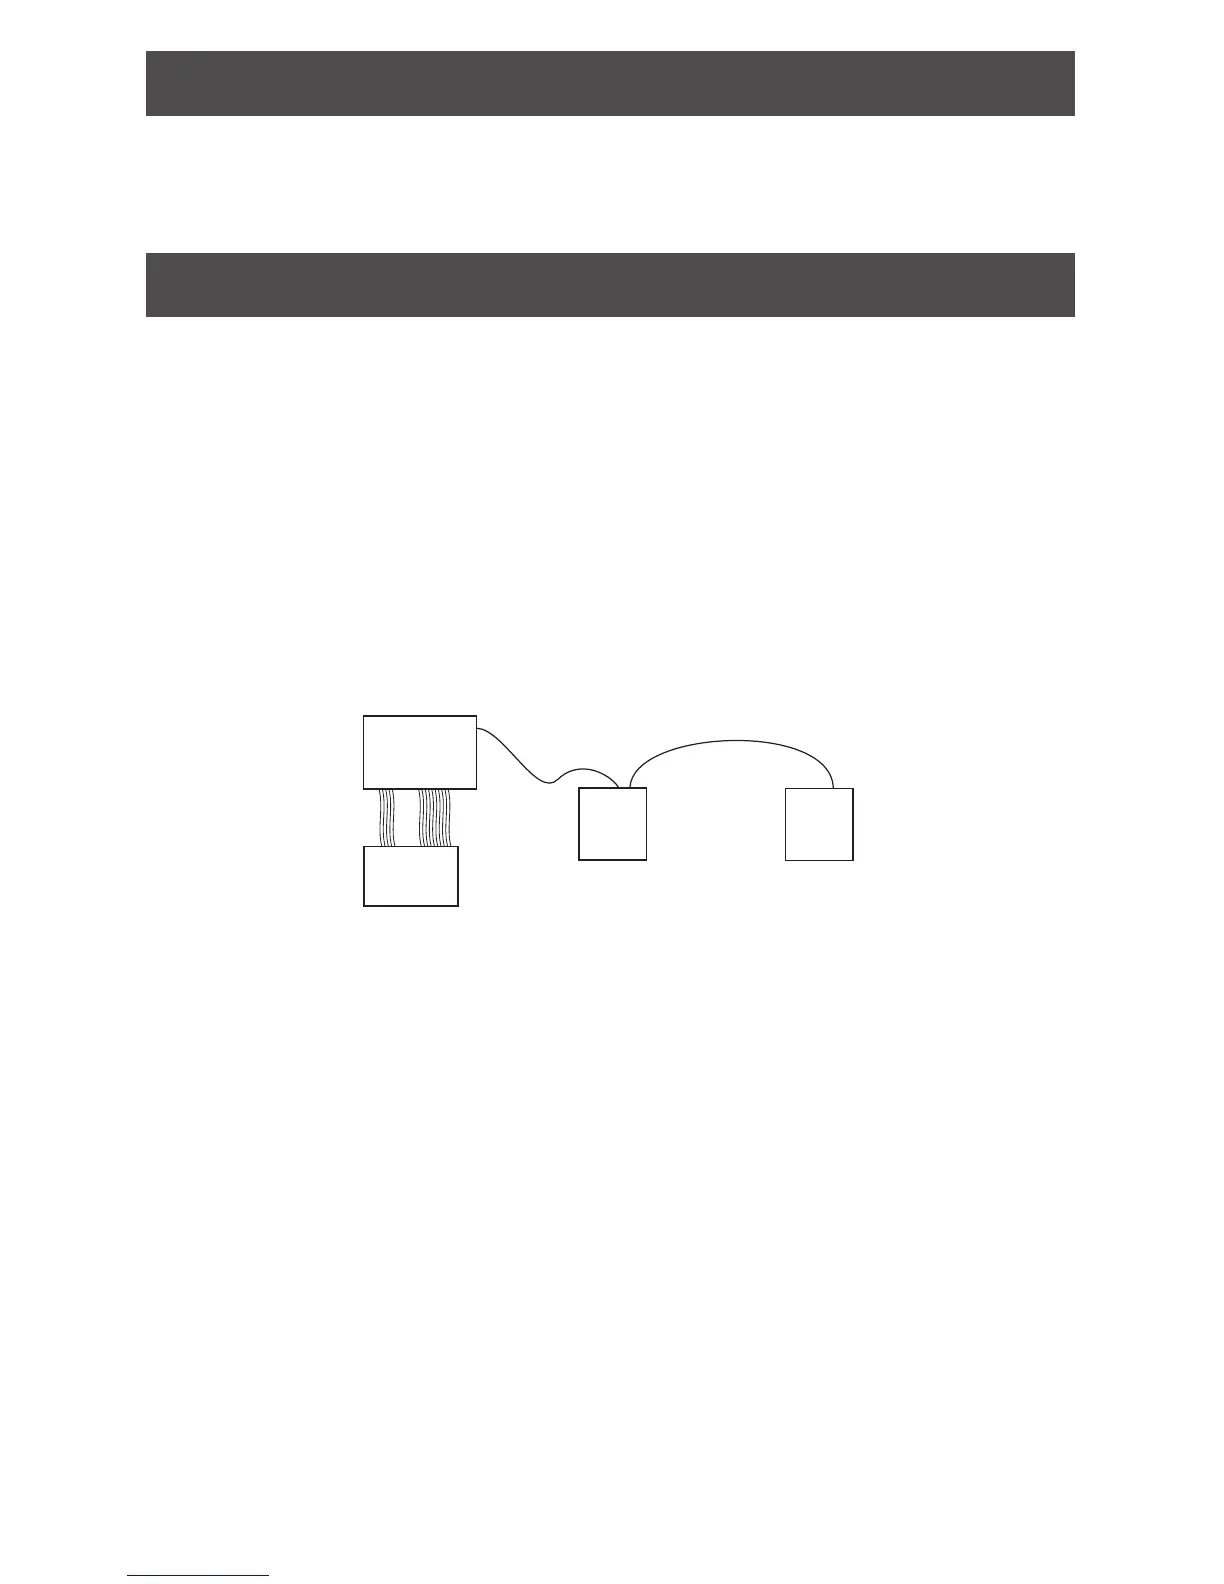
• Connections from lock to lock should be daisy-chained (see diagram below).
• The power supply is located at or near the PIB300/PIB301 for short wire runs, or local to
locks if located far from the panel.
ACP
PIB300
PIB301
RS485
Lock 2
Daisy Chain
Lock 1
Connect the PIB300/PIB301 to the access control panel (ACP)
CAUTION: Disconnect the ACP power and batteries while wiring the PIB300/PIB301 to
the panel.
WARNING: Because every access control panel is different, always check the panel’s
instruction manual for appropriate interface wiring.
• For compliance with UL 294, product must be used with a UL 294 Listed access control
panel or unit. For compliance with ULC S319, product must be used with a ULC S319
Listed access control panel or unit.
• Must be connected to external power using a UL294 listed power supply for UL
installations, and a power supply that complies with CAN/ULC-S318 or CAN/ULC-S319
for cUL installations. The power supply must be capable of sourcing 250mA @ 12 or 24
VDC (example: Schlage PS902, PS904, PS906). Refer to Typical wiring to the access
control panel on page 5 for how to connect DC power to the PIB300/PIB301.
• Use shielded cables for the signal wiring between the PIB300/PIB301 and the ACP. For
maximum wire lengths and cable specications, sSee Cable/wire specications on page
5 for more information..
 Loading...