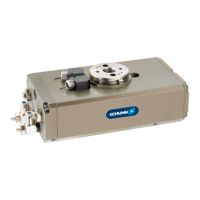
Assembly and settings
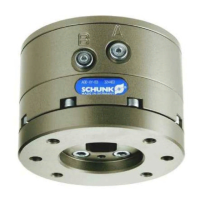
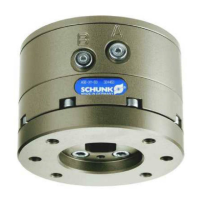
1 Connecting plate 8 O-ring
2 Tightening nut 9 Tightening nut
3 Cable exit 10 Cover
4 Cover 11 Cable cover
5 Cable cover 12 Cable exit OSE 45/57
6 Connecting piece 13 Cable exit OSE 34/40
7 Pinion
1. Draw the cable through the centre bore of the produkt unit until
the connecting plate (1) is located just in front of the pinion (7).
2. Place the O-rings (8) in the recess in the air feedthrough in the pinion (7).
3. Draw the cable through fully and align the connecting plate (1)
properly on the pinion. (7).
4. Screw in the two fitting screws for positioning the connecting plate (1).
5. Screw the connecting plate (1) to the pinion (7) with the two
retaining screws.
6. Remove the fitting screws.
7. Check that the air feed-throughs are sealed.
8. Rotate the prodeuct and place it on the connecting plate (1).
9. Swivel the product counter-clockwise until it reaches the stop.
10. Draw the connecting piece (with the loosely screwed-in
locknut (6)) over the cable, screw it fully into the pinion (7). Do
not tighten the tightening nuts (2) yet!
11. Align the cable spiral and return it to its original shape.
12. Turn the cable in the produkt until the cable end comes out of
the spiral as shown in figure cable spiral.
13. Now tighten the tightening nuts (2) fully into the connecting
piece (6).
14. Fit the cable cover (5) to the product and draw the cable ends
out through the tightening nut bore (2).
✓ Note the position of the cable end, see Figure cable exits
15. Grease the inside of the cable cover (11) and cable spiral.
NOTE
The outer Ø of the cable spiral must be approx. 27 mm! If
necessary, rotate the cable cover to achieve this (+ or - 360°).
16. Fasten the cable cover (11) to the product with two screws.
17. Tighten the tightening nut (9).
18. Check the assembly work by rotating the product.
✓ If the spiral does not open, it is mounted incorrectly.
19. Press down the cap (10) on the cable cover (11) and hold it down until
the air has escaped and the cable cover (11) is firmly closed by the cap
(10).
3103.00 | OSE | Assembly and Operating Manual | en | 1373804