Rostock MAX v2 User's Guide
Continue to manually feed the filament until it passes through the other push-fit connector on
the hot end.
Now you'll need to heat the hot end in order to prime it with filament. Once the hot end reaches
the target temperature, I want you to start using the manual Extrusion button to feed filament into the
hot end.
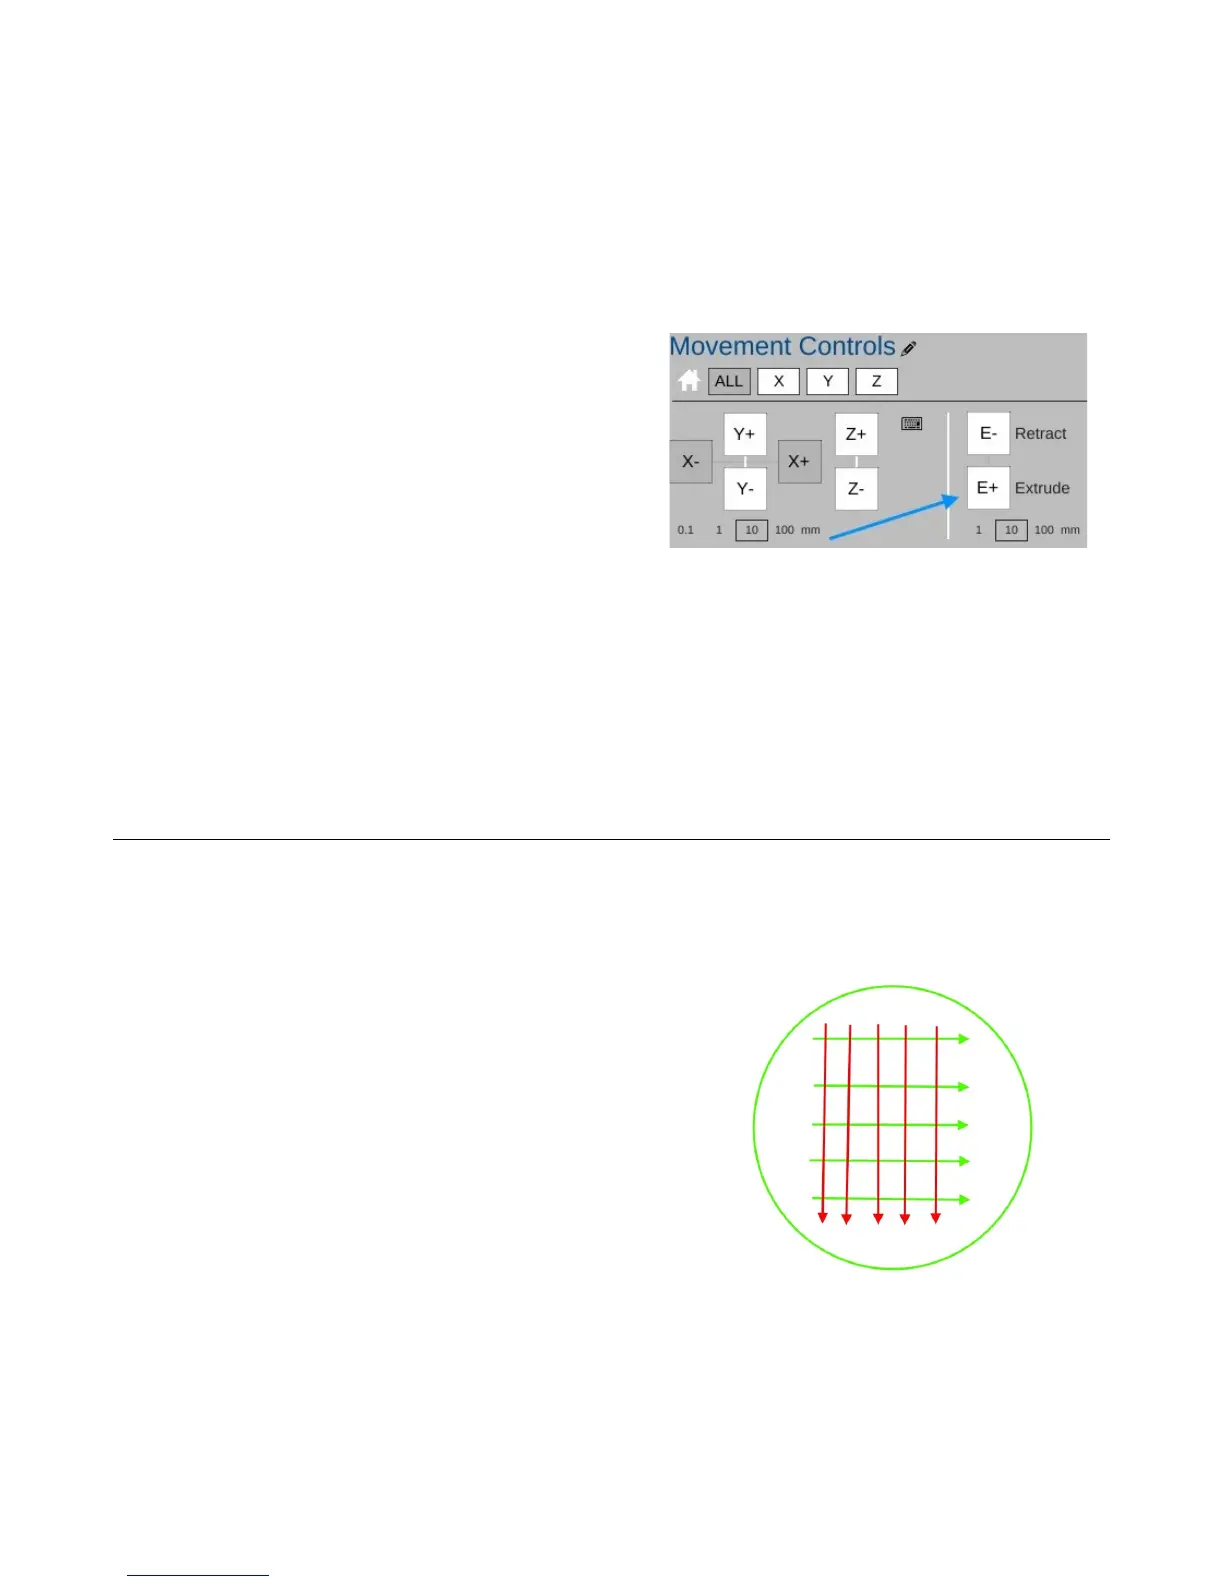
In the figure to the right, you'll see the control
panel for the extruder. In order to safely feed the hot end,
make sure that you've selected “10” in the settings below
the E+ button. Click the E+ button to begin feeding
filament through the hot end. You may have to click the
button a number of times to get filament coming out of
the hot end, but you'll want to wait for the extruder to
stop moving before you click it again.
Once it does begin to feed, go ahead and click the E+ button a few more times just to get the
extruder all nice and primed.
I recommend that you extrude 20-30mm of filament each time you start up the printer for the
day. This ensures that the hot end is primed and you have no jamming issues.
3.4 – Preparing the Heated Bed
ABS won't stick to bare glass. In order to get the ABS to stick, you're going to need to apply
two thin layers of glue to the bed. Remember back in the “need to have” list, I listed the Elmer's
“Disappearing Purple” glue stick? This is where you're going to use it.
You'll want to apply two perpendicular layers of
glue on to the heated bed. Follow the simple pattern
shown on the right. The green lines represent the first
layer and the red lines represent the second. The idea is to
lay down a thin, even layer with no spaces between each
“lane” of glue. Let the base layer completely dry before
applying the second layer. Let THAT layer dry before
starting a print.
3 – First Print: PEEK Fan Shroud - 38
Fig. 3.4-1: Glue application.
Fig. 3.3-2: Extruder control.