EasyManua.ls Logo

SeeMeCNC Rostock MAX v2 User Manual

SeeMeCNC Rostock MAX v2
128 pages
To Next Page IconTo Next Page
Page #1 background imageLoading...
Page #1 background image
Rostock MAX v2 User's Guide
Welcome to the User's Guide for the Rostock MAX v2.0 3D printer.
Version 1.52, September 28
th
, 2016
First Edition
Covers MatterControl v1.4
Copyright 2015 by Gene Buckle
Licensed as Creative Commons Attribution-ShareAlike 3.0
Questions or corrections should be emailed to geneb@deltasoft.com
- 1

Other manuals for SeeMeCNC Rostock MAX v2

Question and Answer IconNeed help?

Do you have a question about the SeeMeCNC Rostock MAX v2 and is the answer not in the manual?

SeeMeCNC Rostock MAX v2 Specifications

General IconGeneral
BrandSeeMeCNC
ModelRostock MAX v2
Category3D Printers
LanguageEnglish

Summary

1 – Driver and Software Installation

1.1 – Installing the RAMBo Driver

Install the driver for the RAMBo controller to communicate with your printer.

1.2 – Installing the Arduino IDE

Download and install the Arduino IDE for firmware compilation and uploading.

1.3 – Configuring the Arduino IDE

Configure the Arduino IDE for board type and serial port communication.

1.4 – Test Upload

Perform a test upload to validate Arduino IDE configuration and connection.

1.5 – Uploading Repetier-Firmware

Load and upload Repetier-Firmware to the RAMBo controller using Arduino IDE.

2 – Installing MatterControl and Calibrating the Printer

2.1 – Downloading, Installing, and Configuring MatterControl

Download, install, and configure MatterControl software for printer operation.

2.2 – Initial Function Tests

Perform initial tests on end-stop switches and basic printer functions.

2.3 – Setting the Z Height

Adjust the printer's Z height to ensure proper first layer and bed leveling.

2.4 – Motion Calibration

Calibrate the effector platform's end stops and movement for accuracy.

2.5 – Verifying Extruder Stepper Operation

Check that the extruder motor is operating correctly and extruding filament.

2.6 – Extruder Calibration

Set the steps per mm for the extruder for accurate filament feeding.

3 – First Print: PEEK Fan Shroud

3.1 – Configuring the Slicer

Configure material profiles and slicer settings for the first print.

3.2 – Printing The PEEK Fan Shroud

Download the STL file and load it into MatterControl for printing.

3.3 – Loading Filament

Learn the correct procedure for loading filament into the extruder.
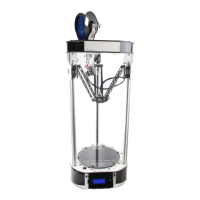
5 – Matter Control Basics: Slicing

6 – MatterControl Basics: Loading and Printing Objects

8 – Advanced MatterControl: Settings – General

9 – Advanced MatterControl: Settings – Filament

10 – Advanced MatterControl: Settings – Printer

Appendix A: Maintenance and Troubleshooting

Appendix B: Alternate Calibration Method

Appendix E: Optimizing The Temperature Control Algorithms