Rostock MAX v2 User's Guide
1.4 – Test Upload
Ok, now that you've got the Arduino IDE configured, we're going to do a quick task that'll do
two things. First, it will validate that you've got the Arduino IDE configured properly and that you're
able to connect and upload a program to the RAMBo controller. Remember – the RAMBo controller is
just an Arduino Mega 2560 with a bunch of goodies piled on top!
Second, the program I'm going to have you run will clear the EEPROM on the RAMBo
controller to make sure you start with a clean slate. The EEPROM is an Electrically Erasable
Programmable Read Only Memory and it's where Repetier-Firmware will store settings. When you can
store configuration information in the EEPROM, it means that you don't have to re-upload the
firmware every time you make a change.
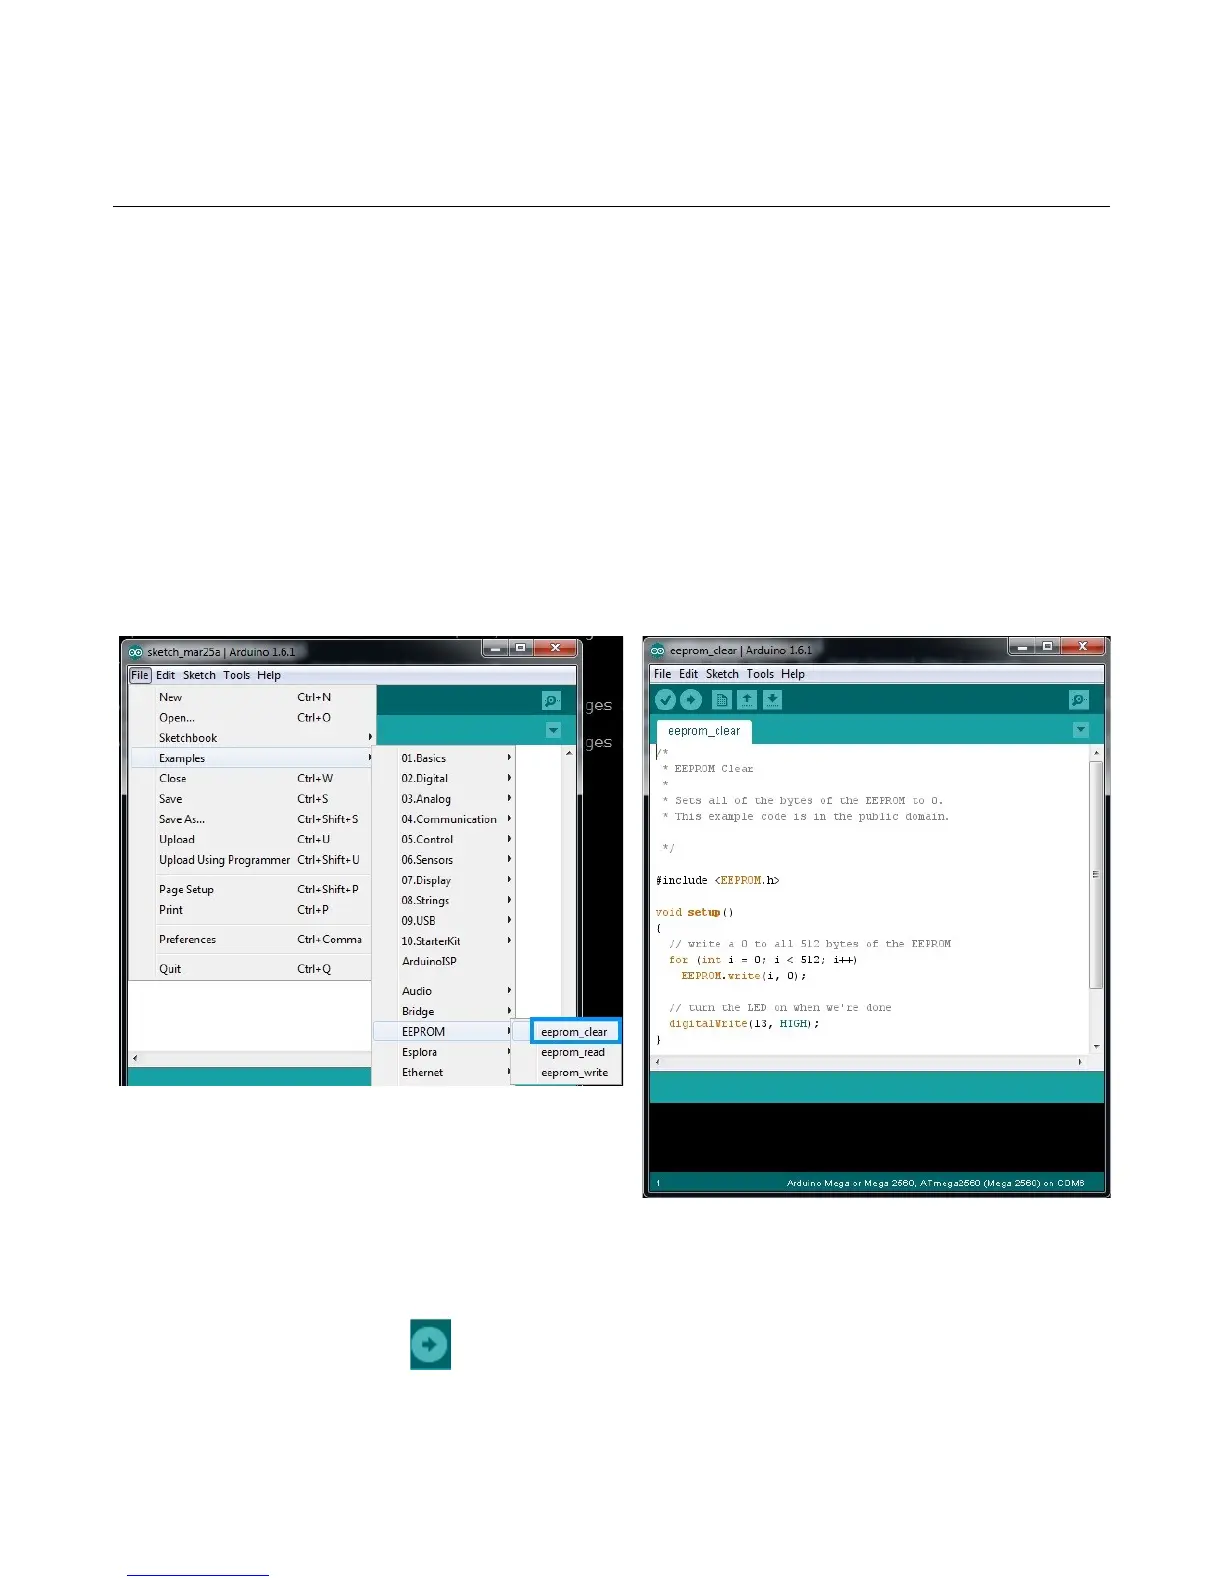
Click on “File”, “Examples”, “EEPROM”, and finally “eeprom_clear” as highlighted in blue in
the figure below.
The only thing you need to do now is click the “Upload” icon in the Arduino IDE. The upload icon is
represented by this symbol:
1 – Driver and Software Installation - 9
Fig. 1.4-1: Loading the eeprom_clear program.
Fig. 1.4-2: eeprom_clear loaded & ready to go.