Shake the ContactAgent spray can for at least 10 seconds and apply ContactAgent to the SensorBelt striped
fabric on the patient-facing side as shown in Figure 8-2. Repeat the spraying until the striped fabric is wetted
evenly and entirely. Where possible avoid spraying any ContactAgent outside the strip fabric area.
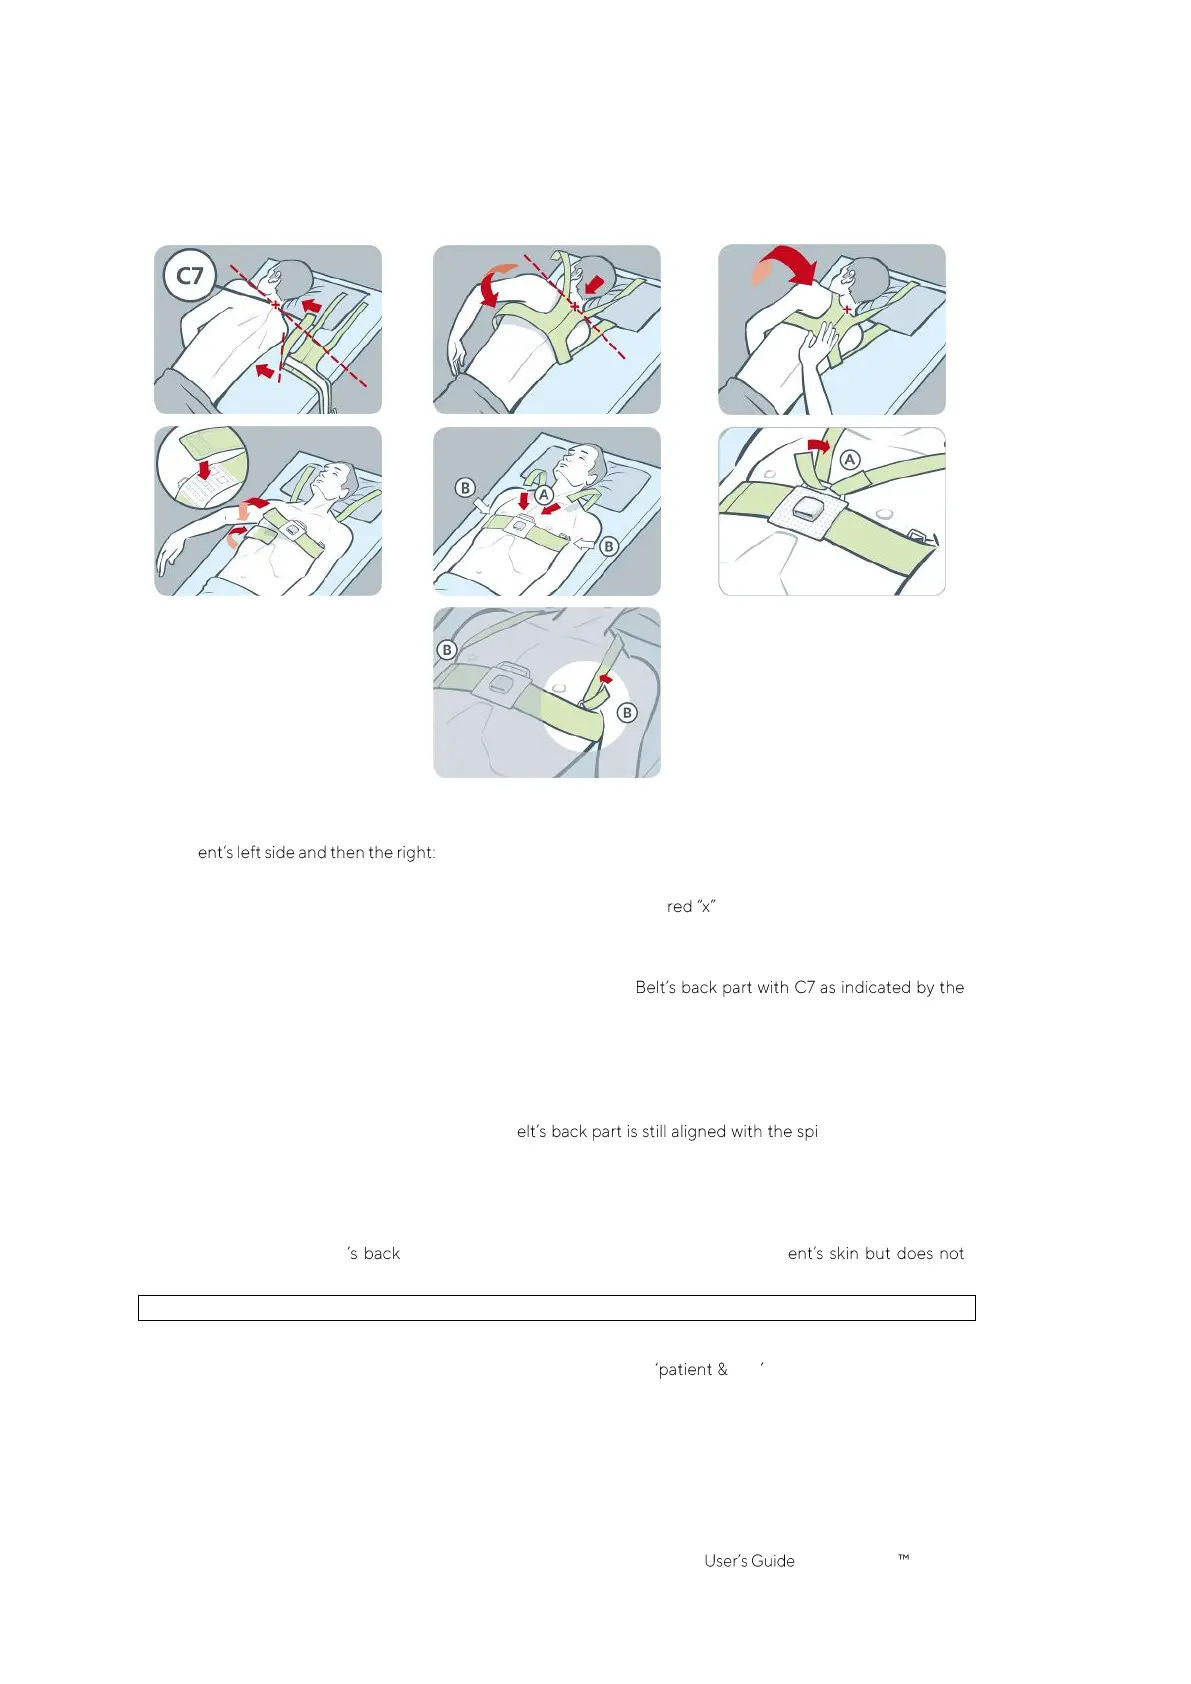
Figure 8-3: SensorBelt application
Apply the SensorBelt to the patient as shown in Figure 8-3, which shows the SensorBelt application first around
the pati
• Turn the patient to the right side.
• Identify the 7th cervical vertebra (C7) being highlighted by a . C7 has a large, easily identifiable
spinous process that protrudes posteriorly at the back of the neck.
• Place the belt aside the patient with the striped fabric of the left belt flap facing upwards and oriented
away from the patient and with the right belt flap folded up with the striped fabric facing downwards.
Hereby align the top-end of the mid-line on the Sensor
black solid and red broken lines.
• Flip the left belt flap over the left chest of the patient.
• Position the belt such that the mid-line on its back part is aligned with the spinal column, its top-end
remains close to C7 and the left belt flap follows the ribs along the 5th/6th intercostal space (ICS).
• Pay attention to maintain the SensorBelt in this position when turning the patient to the left side.
• Once the patient is on the left side, take the right belt flap and flip it over the right chest of the patient.
• Ensure that the mid-line on the SensorB nal column, its top-
end remains close to C7 and that the right belt flap is also following the ribs along the 5th/6th ICS.
• Pay attention to maintain the SensorBelt in this position when turning the patient back into supine
position.
• When closing and tightening the SensorBelt ensure that the striped fabric of both belt flap still follows
the ribs along the 5th/6th ICS (intercostal space) on an oblique plane with the top-end of the mid-line
of the SensorBelt part close to C7 and that it fits snugly on the pati
restrict breathing.
For applying the SensorBelt, first on the right side and then on the left proceed in corresponding manner.
Enter the measured half underbust girth and the patient data in the belt area of ScoutView (Figure
6-7) to select the thorax and lung model (9.1) best fitting the individual patient. Enter actual (not lean or ideal)
body weight.
Connect the SensorBeltConnector to the SensorBelt to initiate monitoring.
 Loading...