-
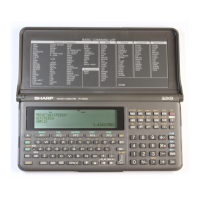
PC-I600
MODEL CE·.1600F
• 2.5" floppy disk drive
• Since individual parts replacement is not possible with
this model, when a failure is discovered after the test
mention in Section 7, Test program, the unit must be re-
placed with new one.
1. Specifications .. ,........................ 98
2. Cautions in installing and removing the CE-1600F ... 98
3. Block diagram .. , , , , . . . . . . . . . . .. 99
4. Circuit description , ,.,., 99
5. Brief description of floppy disk drive 100
6. Circuit diagram and parts positions ., , 100
7, Testmethods ,., ,.,., .102
8. Parts List and Parts Guide , , 103
1. Specifications
Model name: CE-1600F
Product name: Floppy disk drive
Drives: One drive (one side)/unit
Recording media: 2.5" two-sided floppy disk
Recording method: GeR (4/5)
Tracks: 16 tracks/side
Capacity: 64KB (one side)
(8 sectors/track)
Power supply: 6VDC: Supplied from the unit connected.
Power consumption: 2.5W
Operating temperature: 10°C - 35°C
(drive operating requirement)
Humidity: 20% - 80% (without moisture condensation)
Physical dimensions: 96mm(W) x 122mm(D) x 39mm(H)
Weight: 470 grams
Accessories: 2.5" two-sided floppy disk (x 1), instruction
book (x 1)
Option: CE-1650F
(contents of 102.5" two-sided floppy disks)
NOTE: '2.5" (63.5 mm)' indicates the diameter of the
floppy disk media.
2. Cautions in installing and removing the
CE-1600F
2-1. Cautions in installing the CE-1600F
Power must be shut off to the CE·1600P before connecting
the CE·1600F to the CE-1600P.
Pay special attention to hold the unit in a way as shown in
the figure below with care not to touch the disk holder, in
order to avoid a read/write failure because of center devia-
tion.
~
".,~'~.
~',
~,
SLIP ."
J /)~~~~
Bottom of
Uni! / ~ '\ \
'. I
I
2-2. Cautions in removing the CE-1600F
Before the removal of the CE-1600F, make sure that the
power is off and remove it without adding force to the disk
holder (see the figure below).
-QA-