8-2. Removing and installing the LSI and chip
components on the FPC PWB
(When a defective component is known without separating
the FPC PWB from the key PWB)
(1) Removing the LSI
a. Connect the LSI soldering tip to the soldering pencil
(see figure), set the surface temperature of the tool to
260
o
±5°C, and secure it on the vise installed on the
workbench.
~ '- Tip of the soldering pencil
Soldering pencil
If it is heated above the given temperature,
it
might
separate the circuit pattern or the FPC PWB itself.
The soldering pencil is held up to prevent solder, flux,
and gas from invading the back of the key PWB, where
the key contact pattern, the LCD rubber connector, is
mounted.
b. Evenly apply a proper amount of flux over the leads of
the LSI, and fill up the back side of the chip with solder.
-
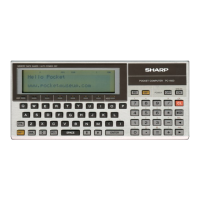
PC-1600
c. Lift the PWB with your hand and carefully mount it
over the leads of the LSr. When the solder on the leads
melts after five to six seconds, remove the LSI from the
PWB using a tweezers (or a small flat tip screwdriver).
d. Clean away solder fragments remaining on the pattern
side of the LSI using a solder wick. Then, evenly apply a
thin layer of solder over the surface.
e. Apply a small amount of solder to the leads of the new
LSI, and solder the leads with care. Press the mold of
the LSI with your finger tip while soldering the leads.
(2) How to remove and install the chip component
a. Melt both sides of the chip component using two
soldering pencils at the same time. Remove the corn-
ponent quicklv ,
b. After the removal of the chip component, clean the
pattern with a solder wick.
c. Solder one side of the new chip cornponent. Let it
cool for ten seconds; then solder the other side.