28
GENERAL INFORMATION
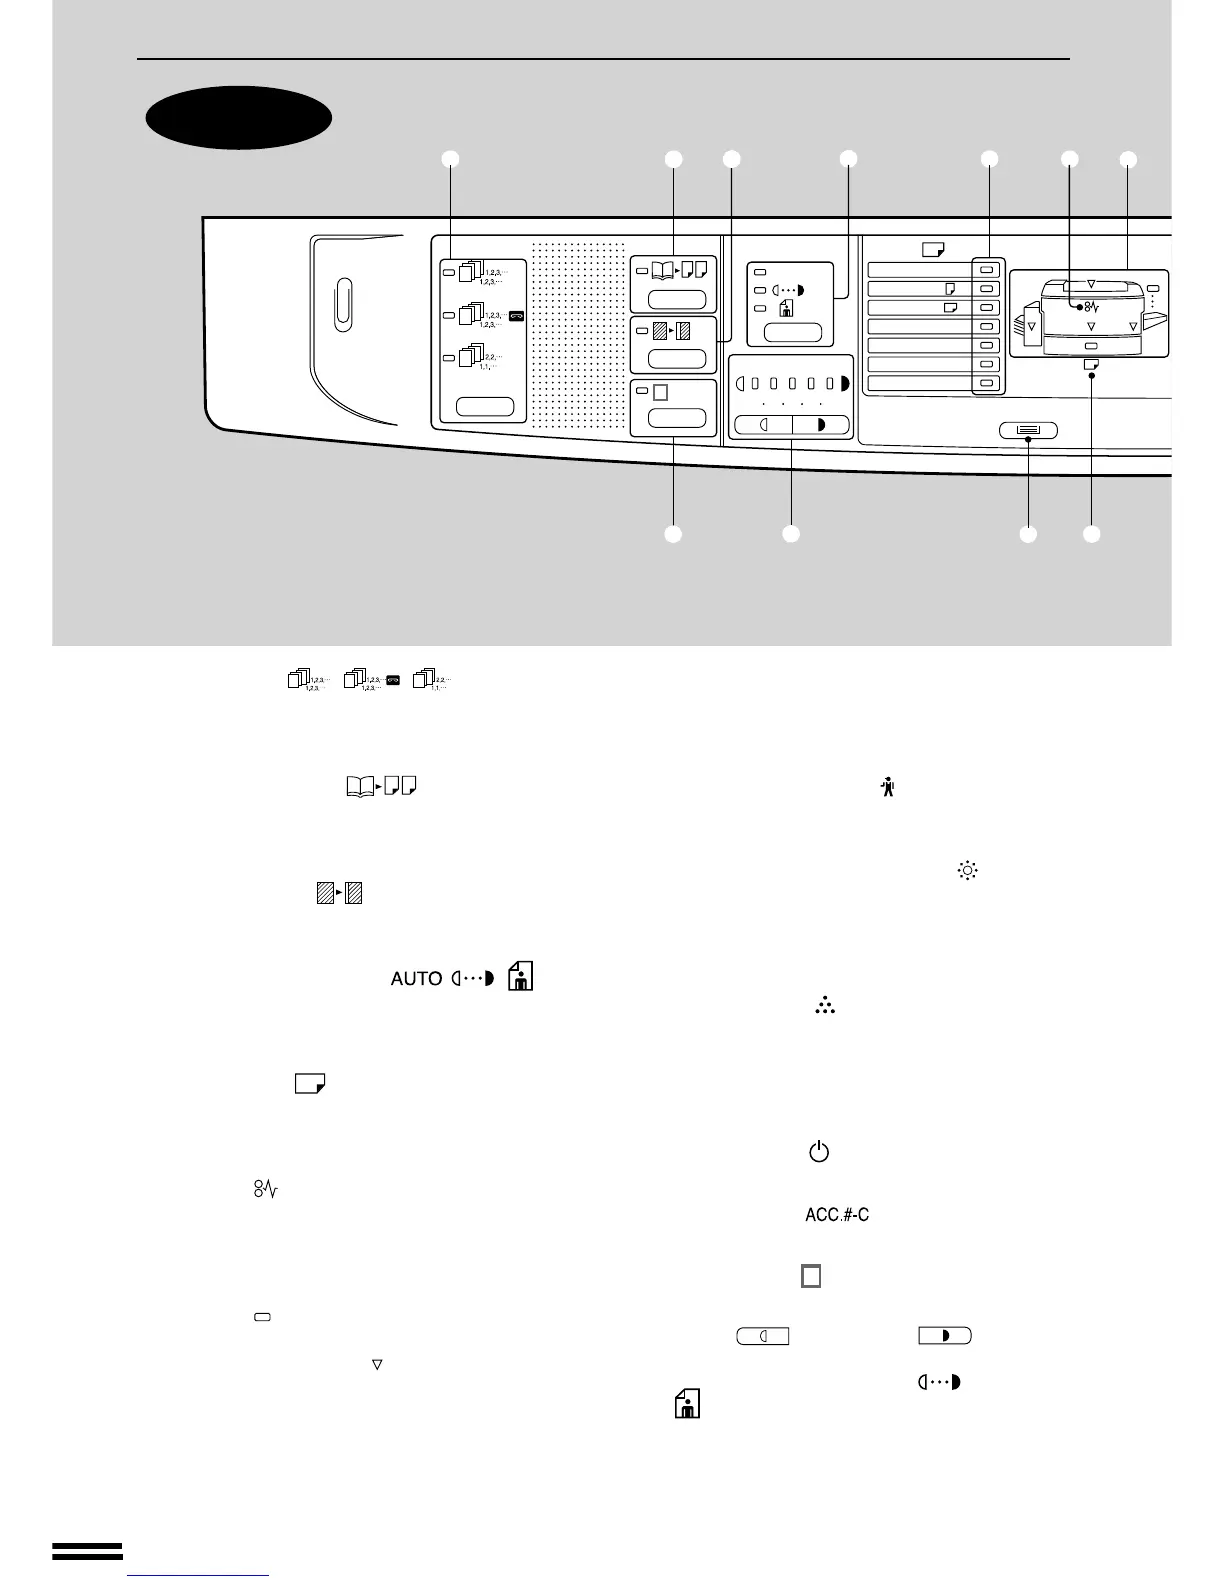
PART NAMES AND FUNCTIONS
q SORTER ( / / ) key and
indicators (p. 52)
Press to select a sorter mode when an optional
sorter or staple sorter is installed.
w DUAL PAGE COPY ( ) key and indicator
(p. 13)
Use to make individual copies of two originals
placed side by side on the document glass.
e MARGIN SHIFT ( ) key and indicator (p.14)
Shifts text or image on the copy to leave a binding
margin on the left side of the copy.
r AUTO/MANUAL/PHOTO ( / / ) key
and indicators (p. 9)
Use to sequentially select the exposure modes:
AUTO, MANUAL, or PHOTO.
t PAPER SIZE ( ) indicators
Light up to show the selected copy paper size.
The paper sizes vary depending on the country or
area.
y Misfeed ( ) indicator (p. 21)
Blinks when a paper misfeed occurs.
u Paper feed location/misfeed location indica-
tors (p. 21)
The selected paper feed location is shown by a lit
indicator ( ).
The general location of misfed paper is shown by
a blinking red indicator ( ).
i Preset ratio indicators (p. 11)
Displays the preset copy ratios for reductions or
enlargements.
o Copy quantity display
Displays the specified copy quantity during the
ready condition and displays the copy countdown
as copies are made. Also see items @2 and @5.
!0 Maintenance required ( ) indicator (p. 25)
Lights up or blinks when maintenance is required.
Call your authorised Sharp Service Centre.
!1 Developer replacement required ( ) indicator
(p. 25)
When lit, indicates that the developer needs to be
replaced. Call your authorised Sharp Service
Centre.
!2 Toner required ( ) indicator (p. 6)
Lights up or blinks when toner is required.
!3 10-key pad
Use to select the desired copy quantity or to make
user program entries.
!4 POWER SAVE ( ) indicator (p. 37)
Lights up when the copier is in a power save mode.
!5 AUDIT CLEAR ( ) key (p. 8)
Clears audit account information.
!6 EDGE ERASE ( ) key and indicator (p. 15)
Use to erase dark areas from copy edges.
!7 LIGHT ( ) and DARK ( ) keys and
indicators (p. 10)
Use to adjust the MANUAL ( ) or PHOTO
( ) exposure level.
Operation panel
Part names and functions
AUTO
123
4
5
A3
A4
A4
A5
B4
R
EXTRA
✕
1
2
/
8
13
!6
q
w
e
r
t
y
u
!7
!8
!9